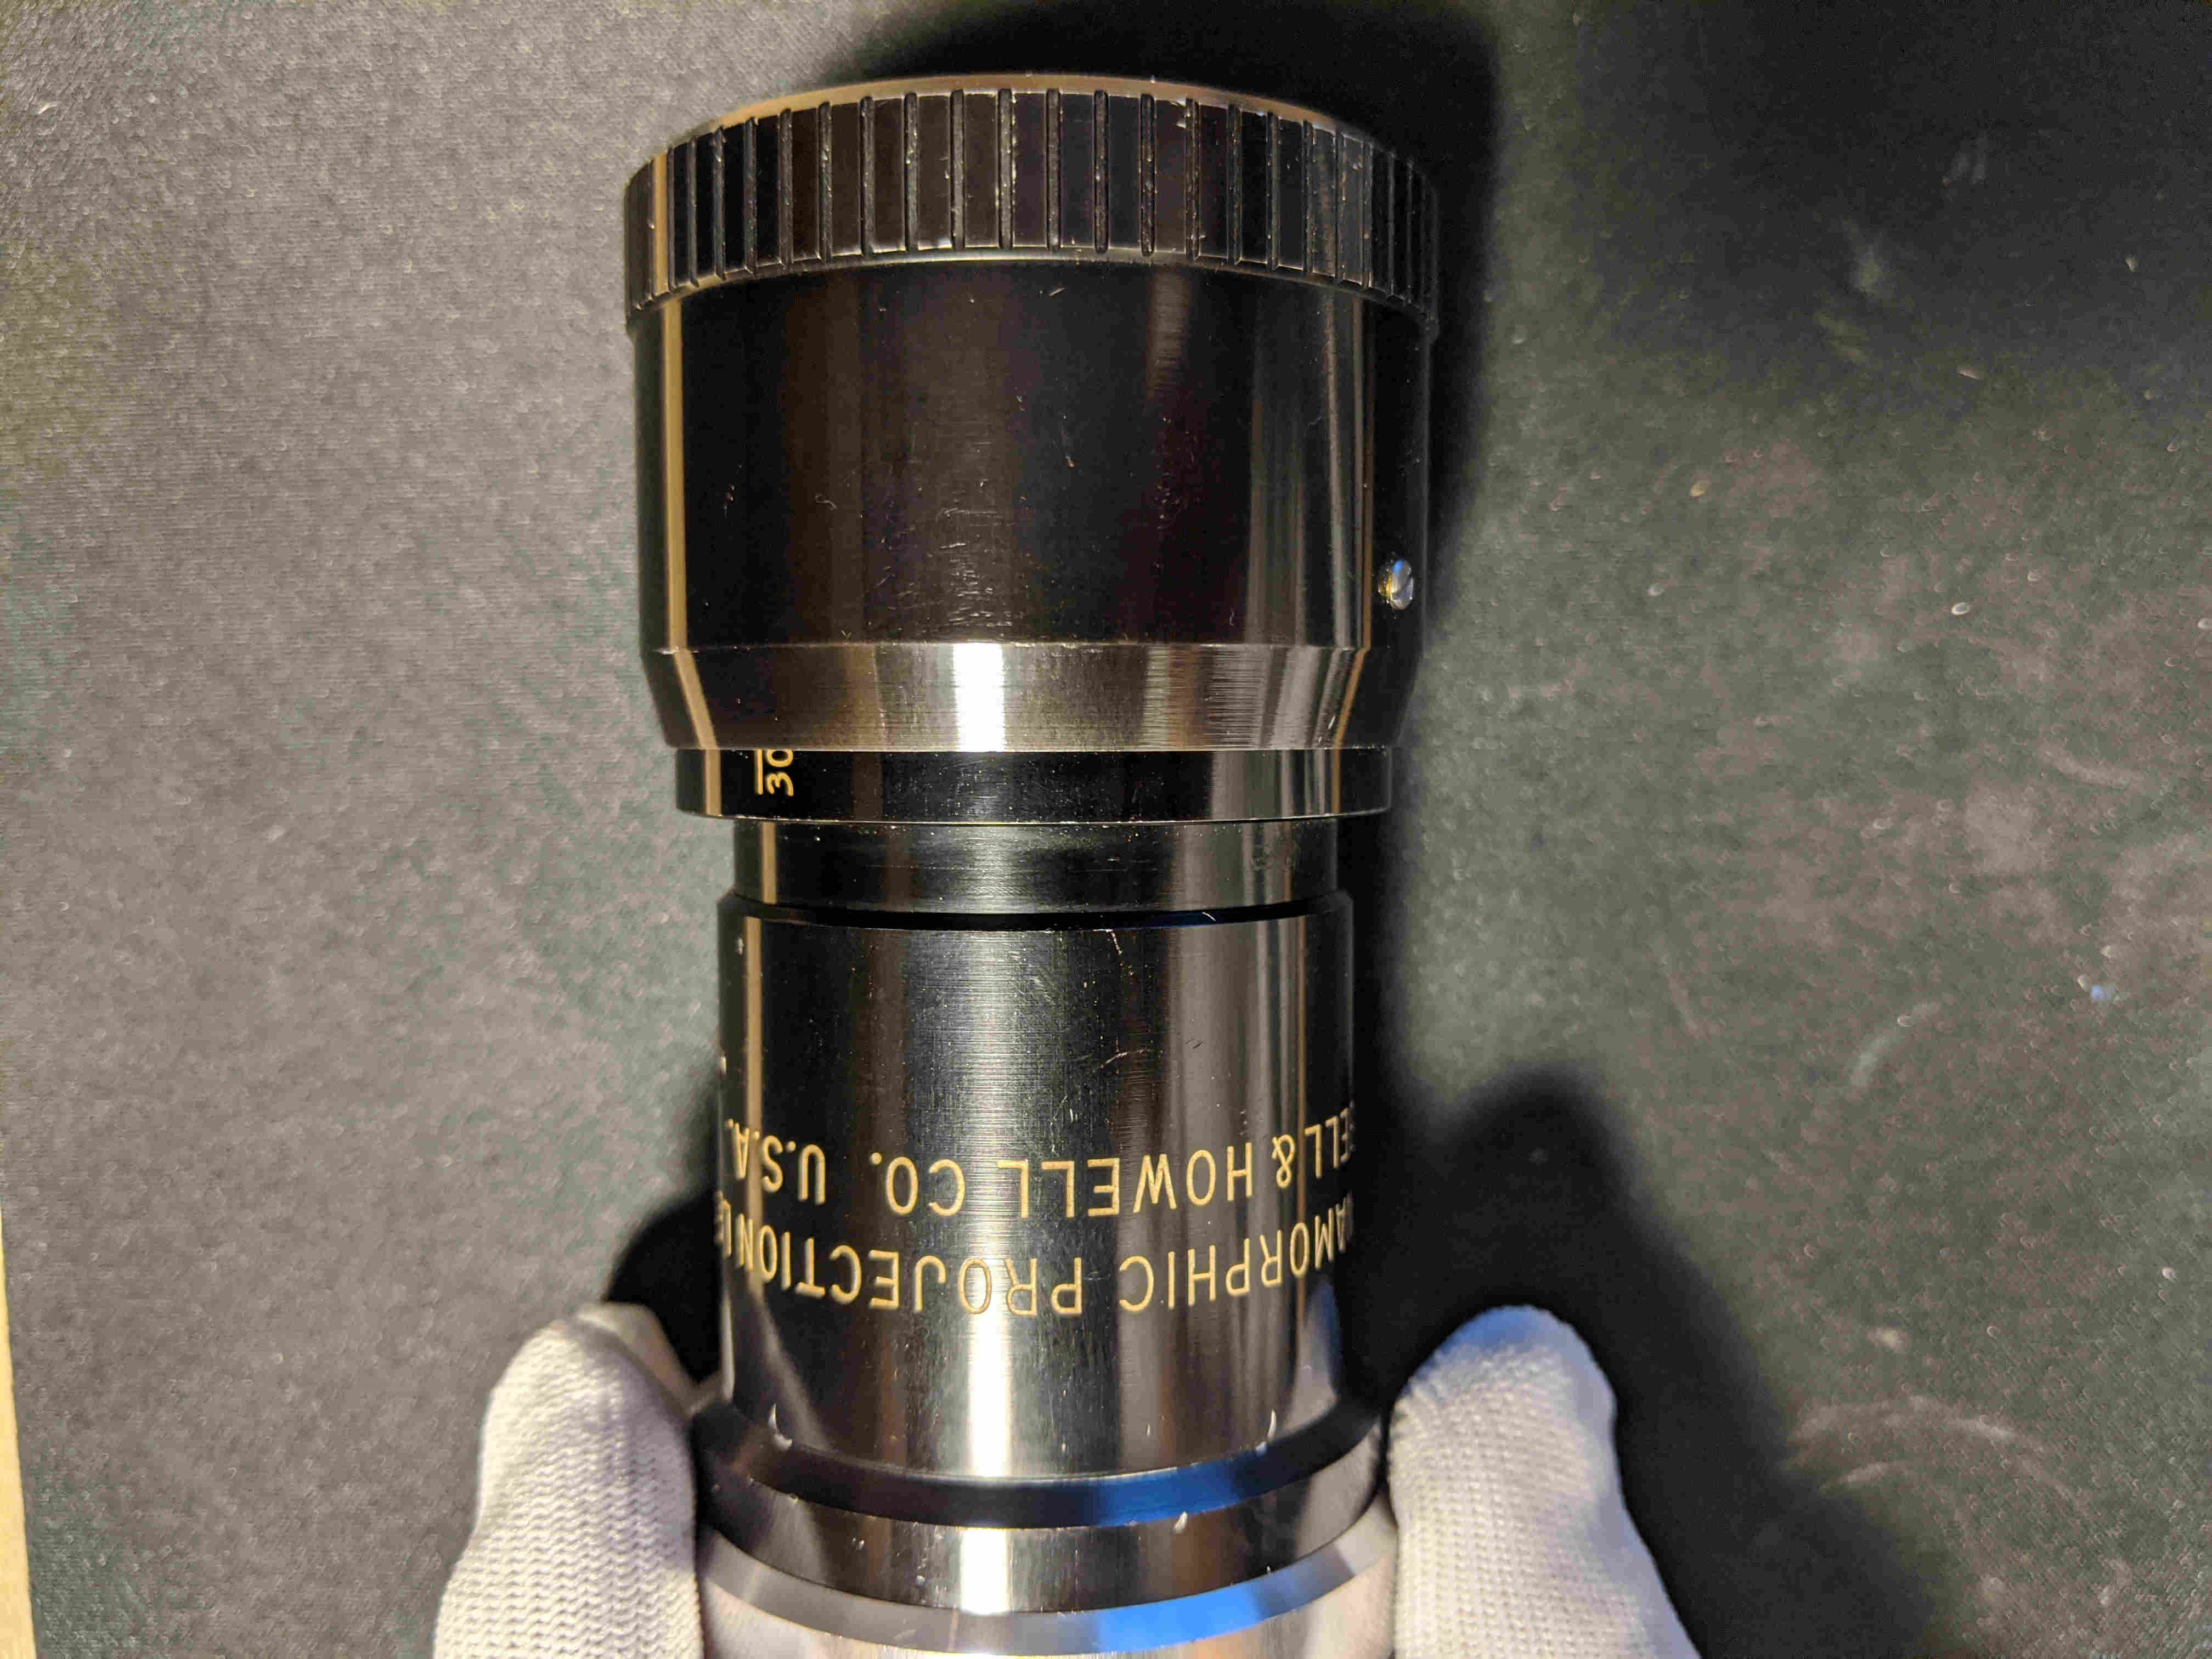
How to Modify the BH16-2
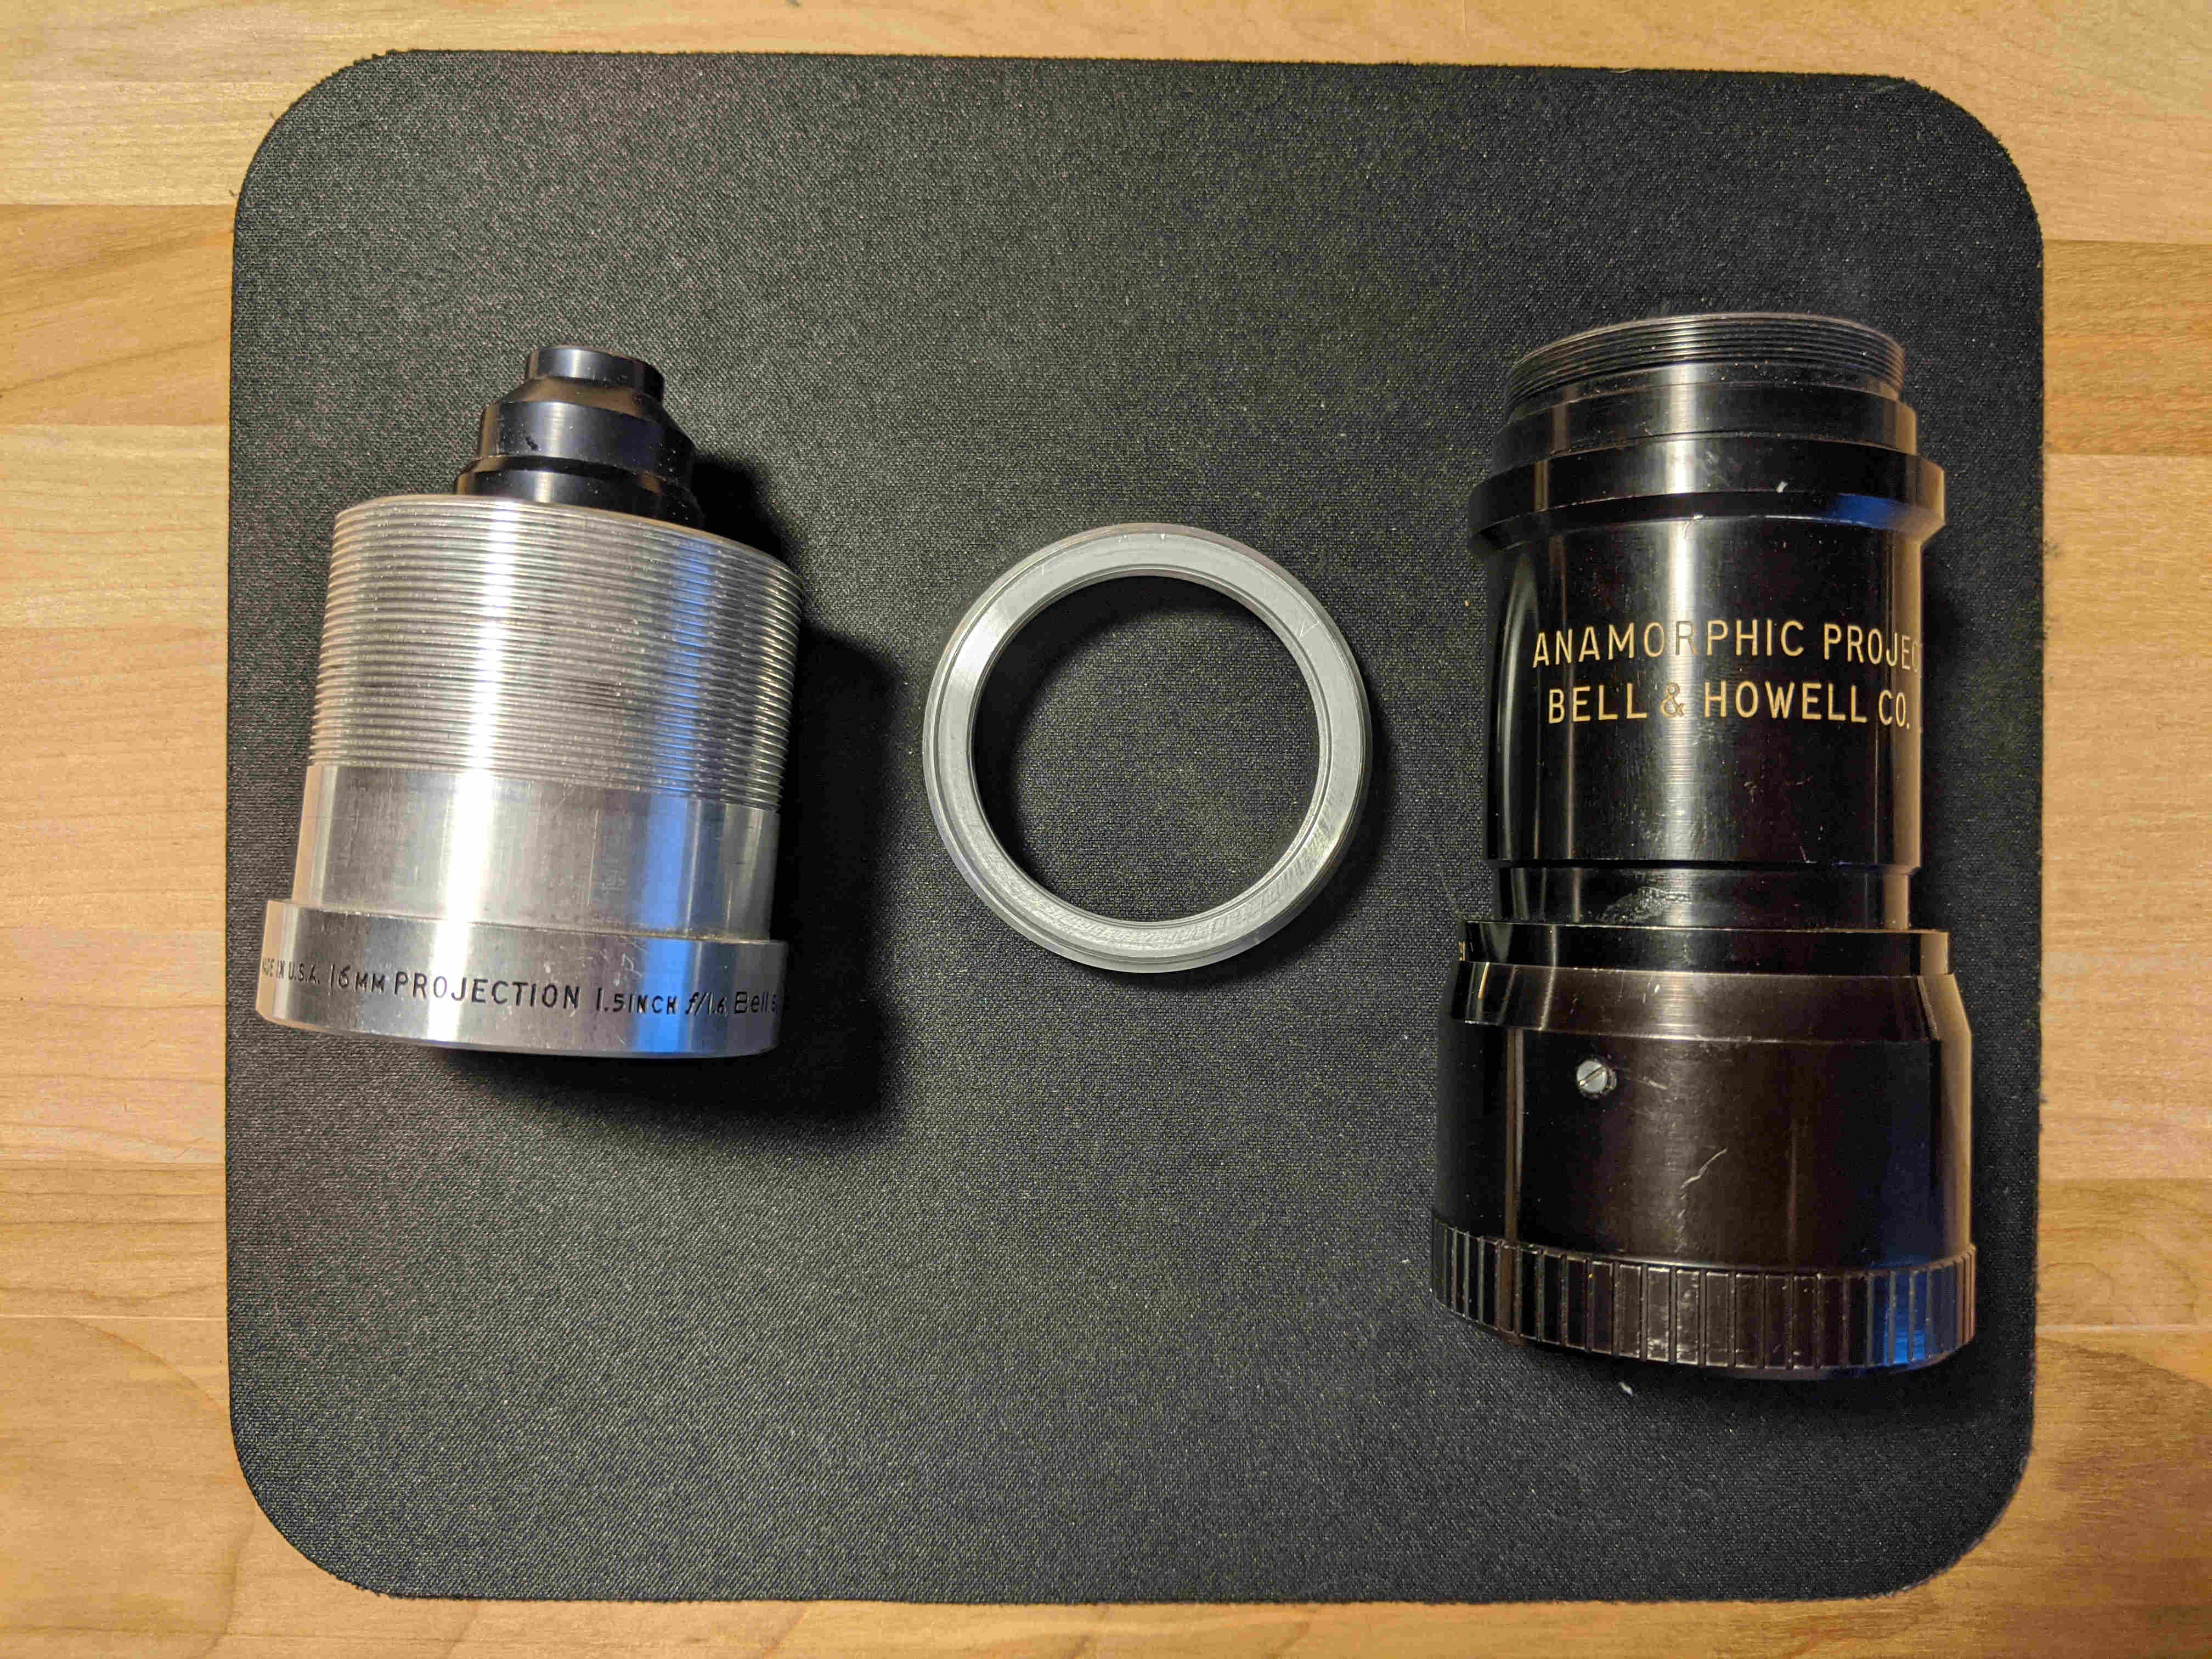
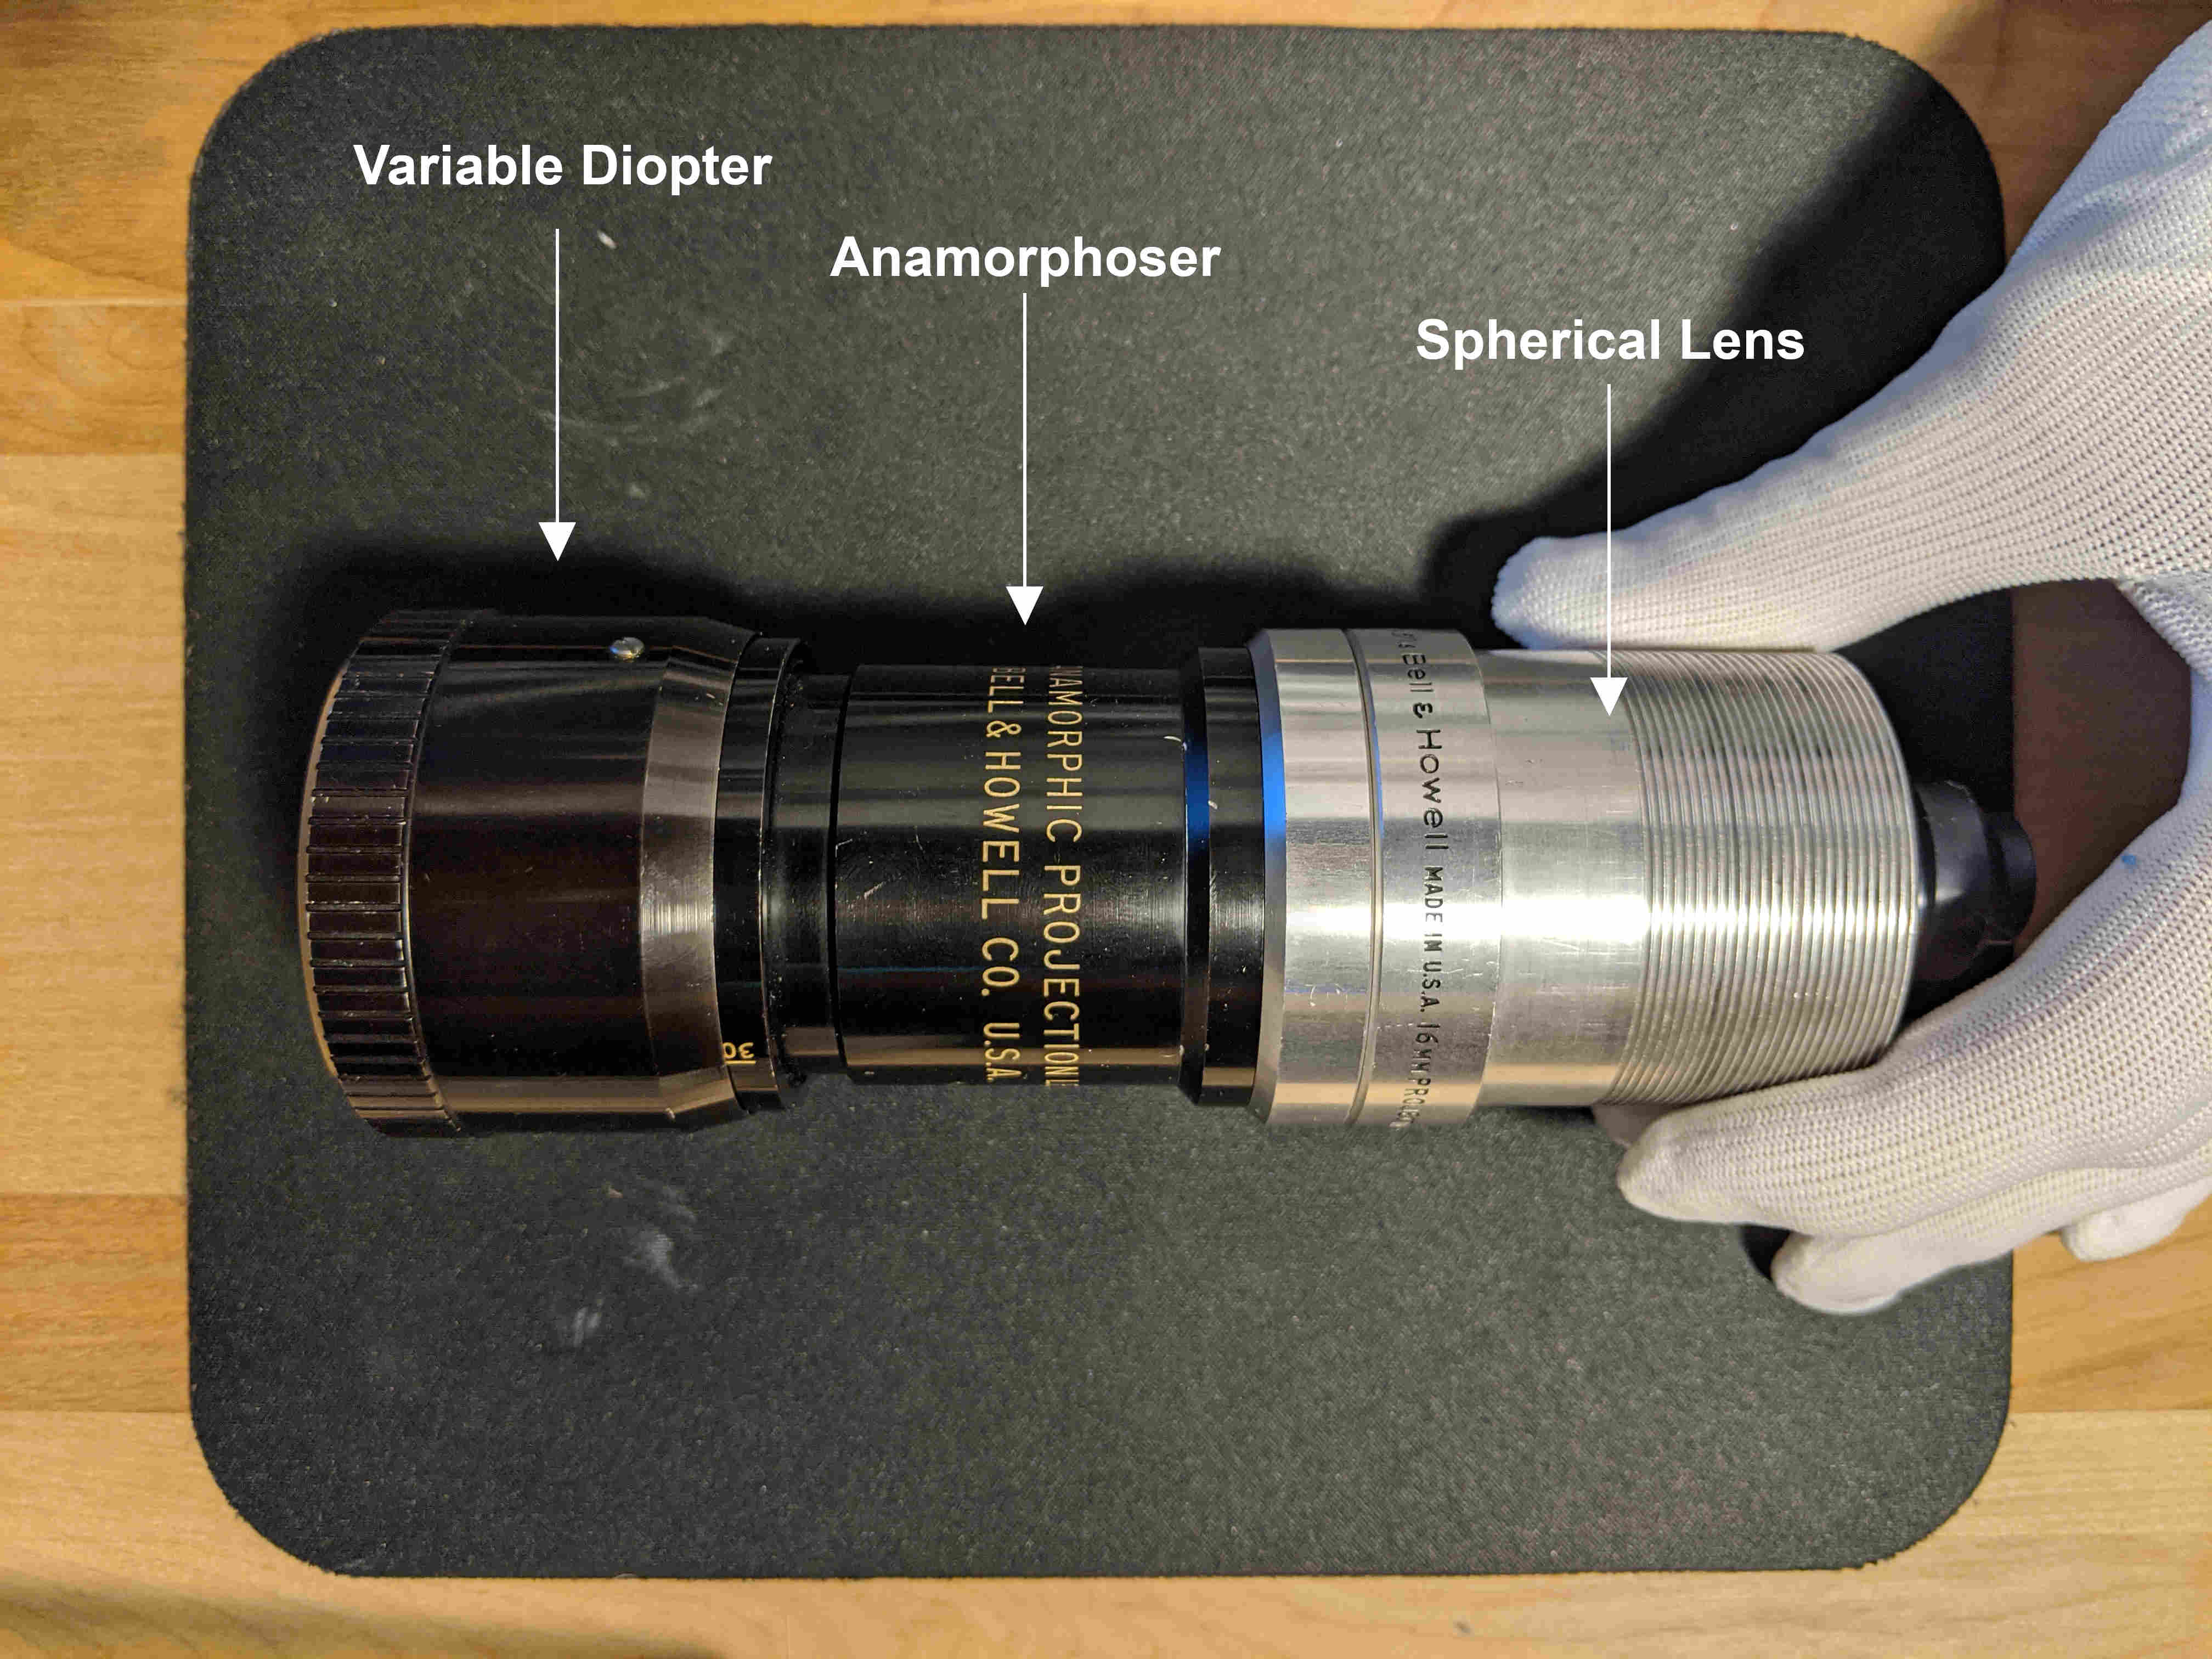
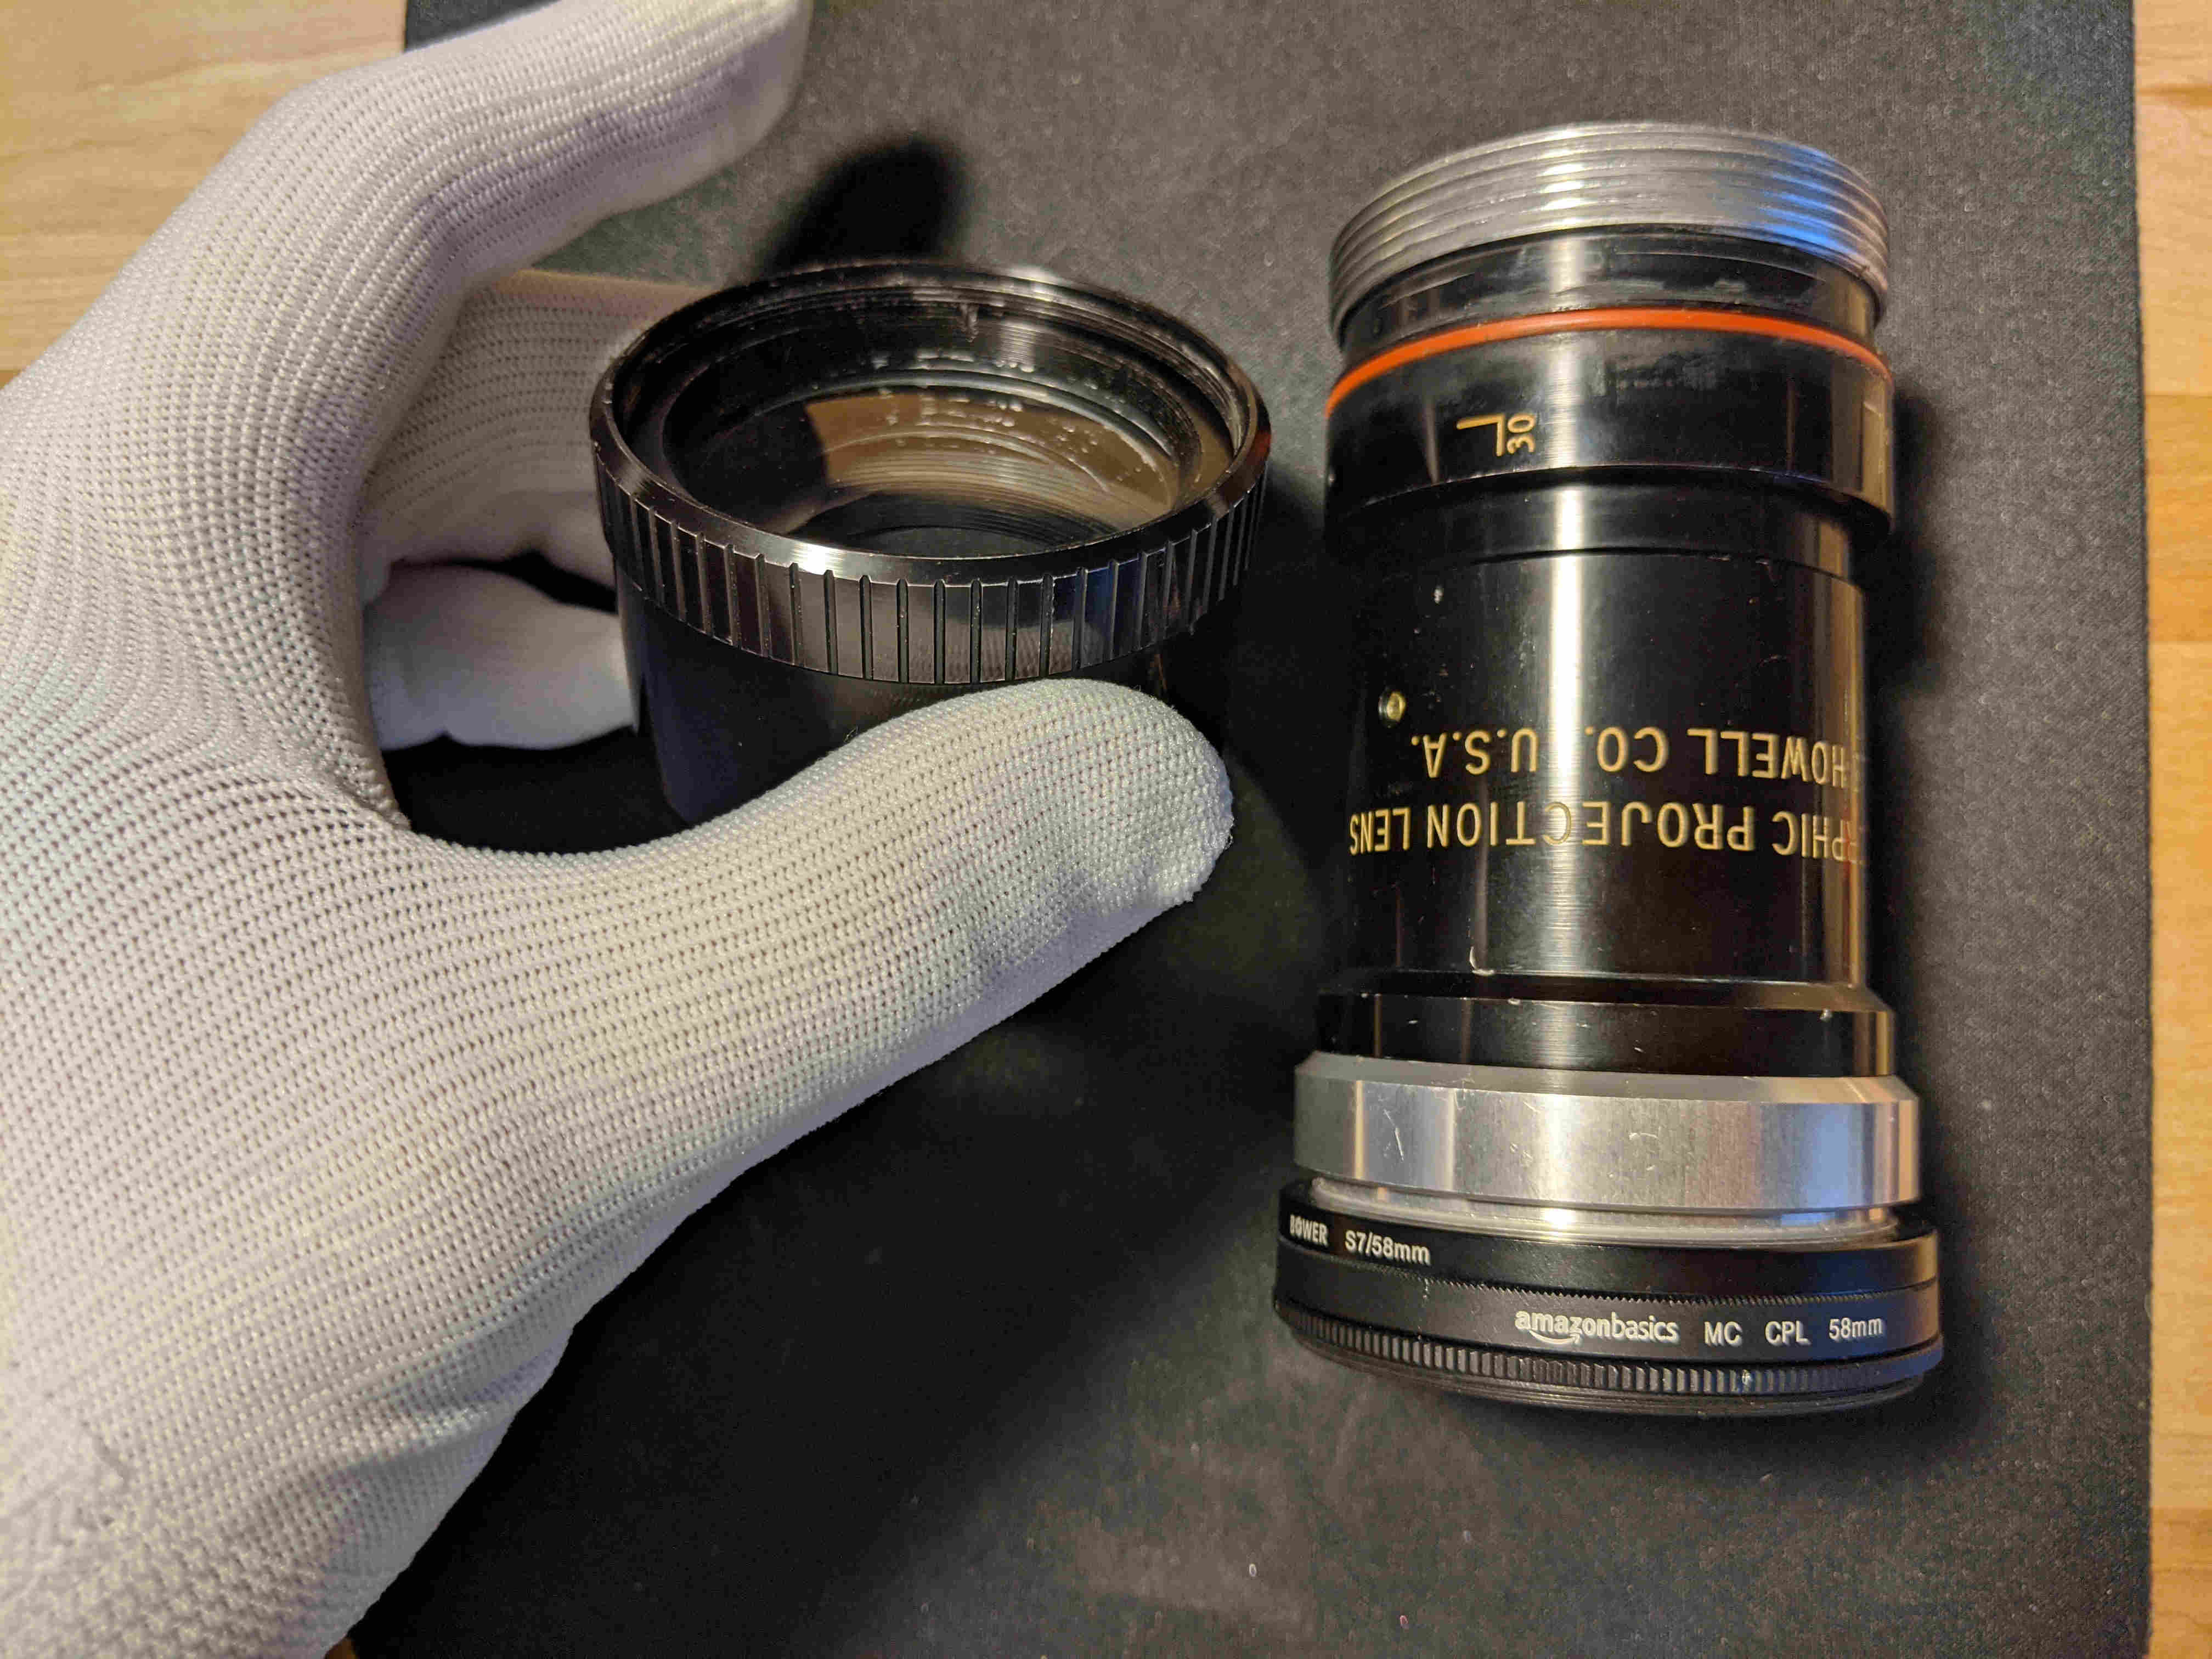
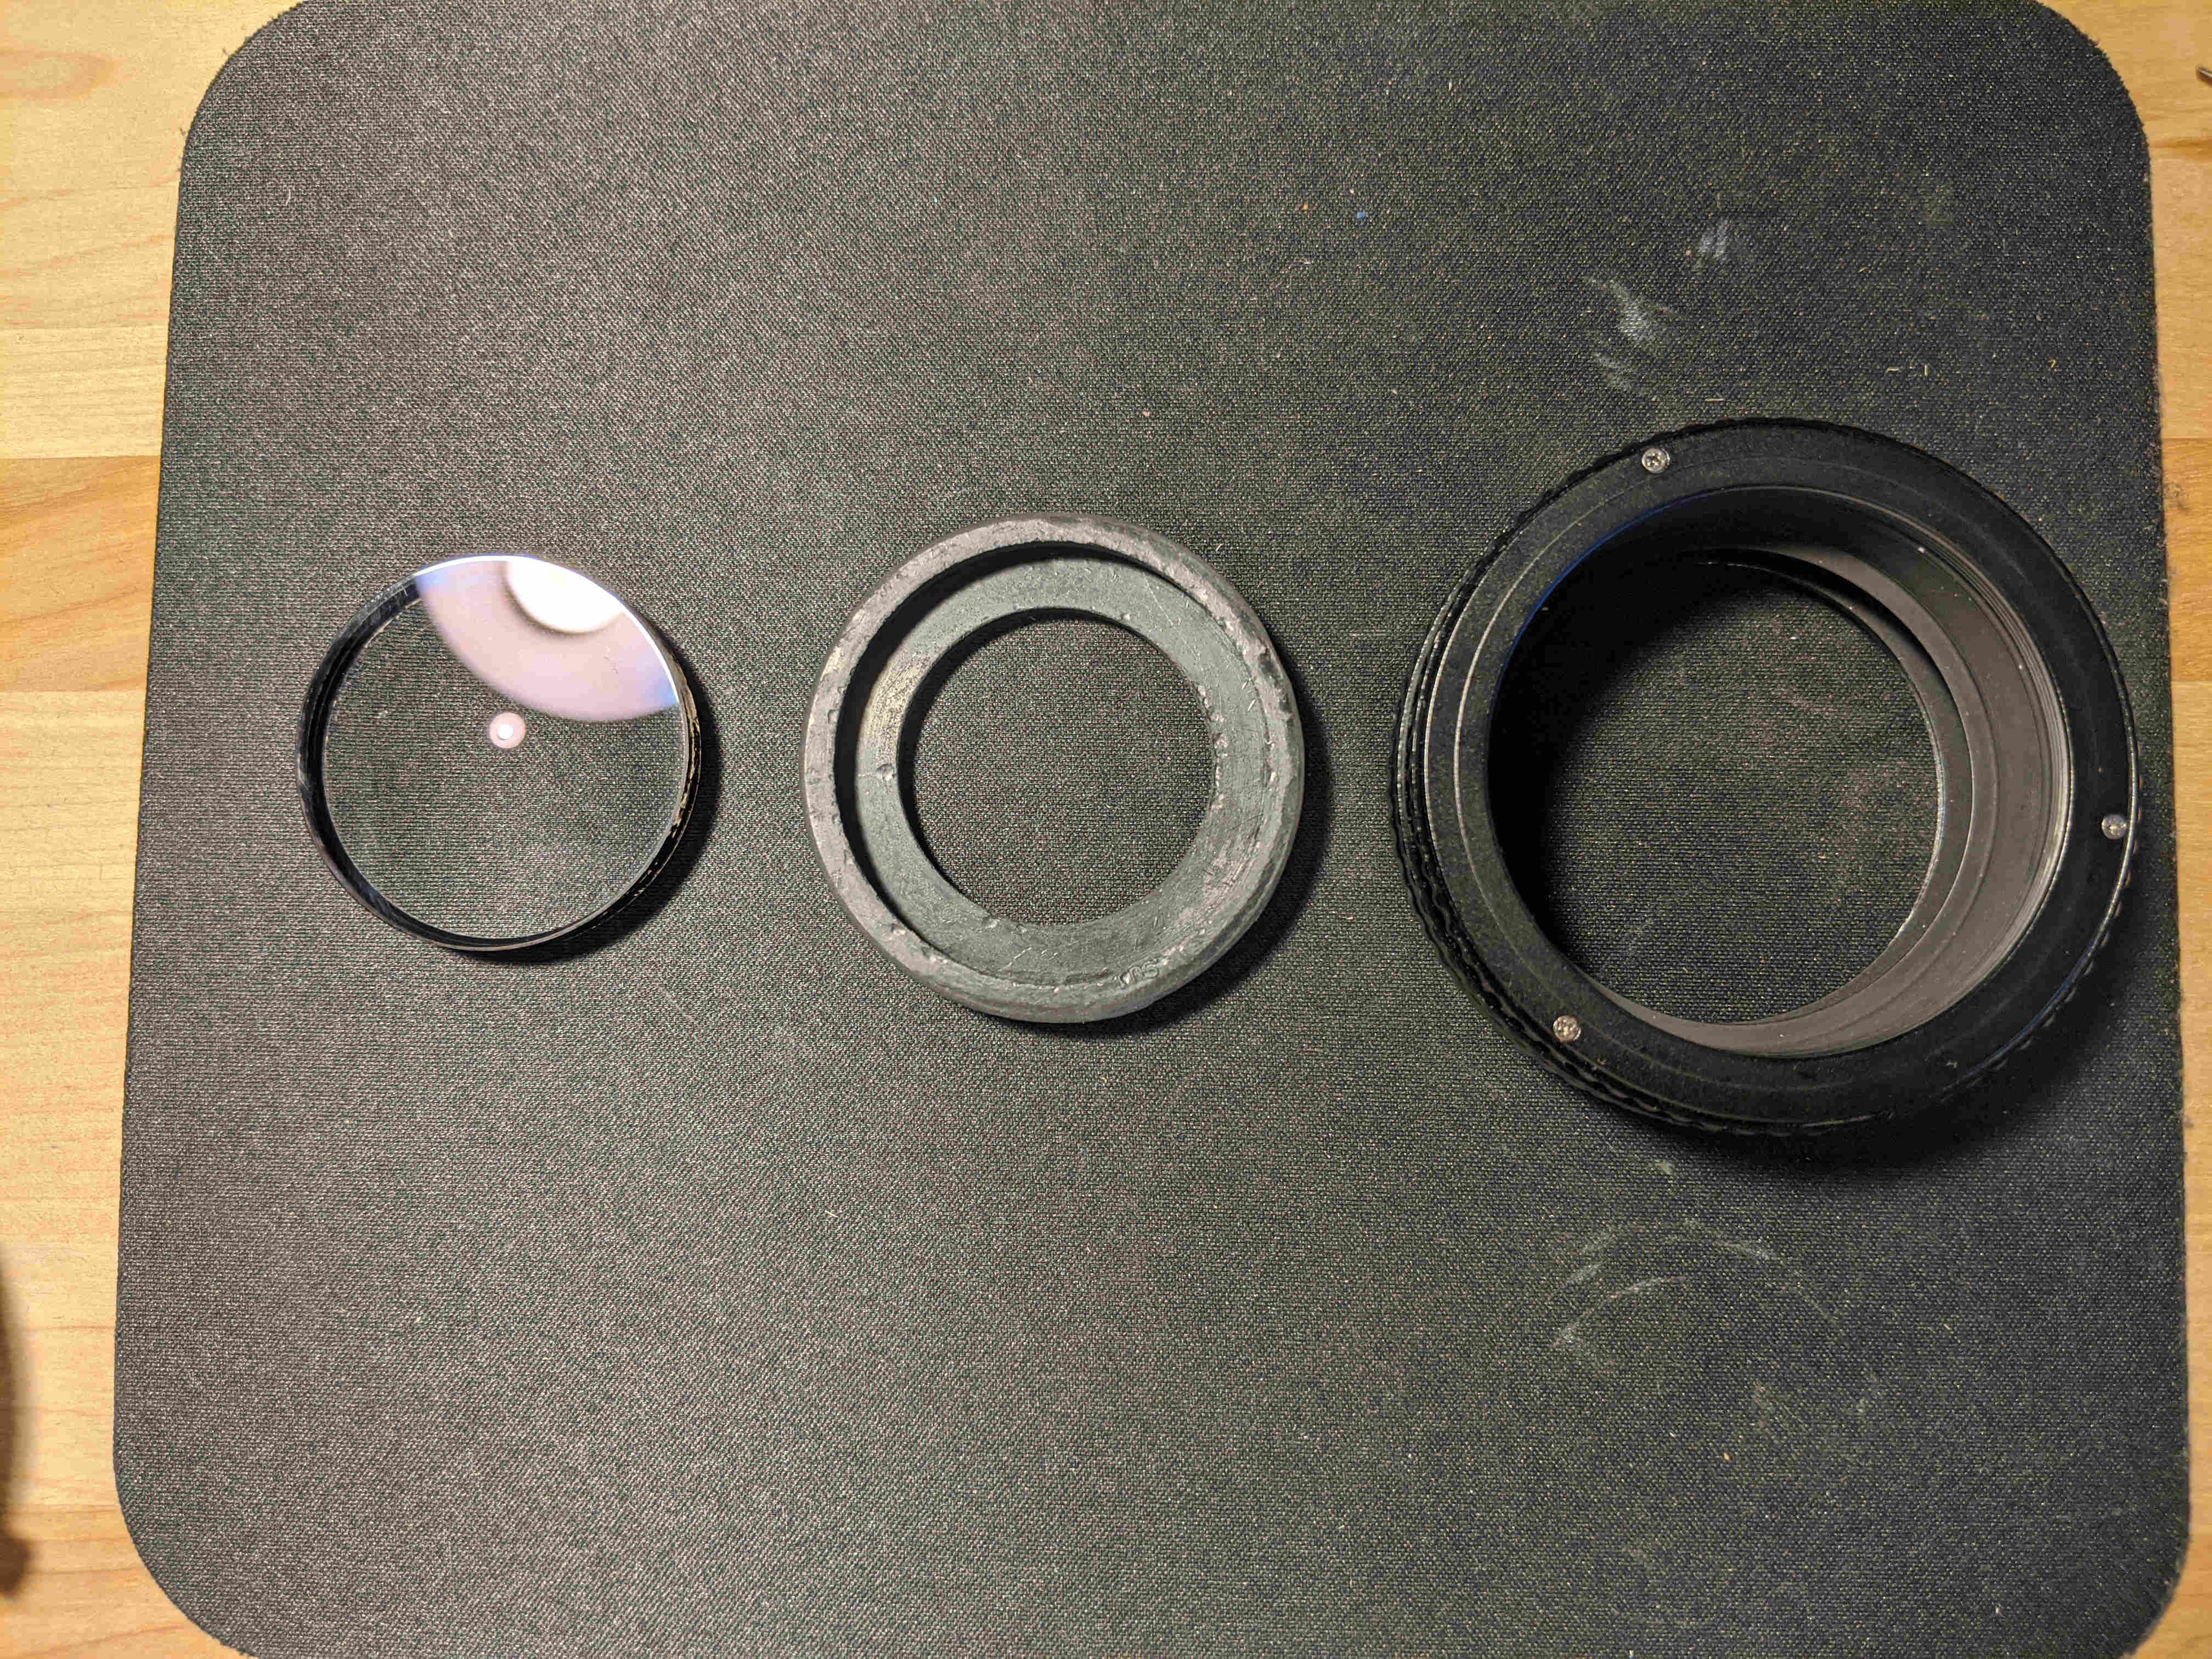
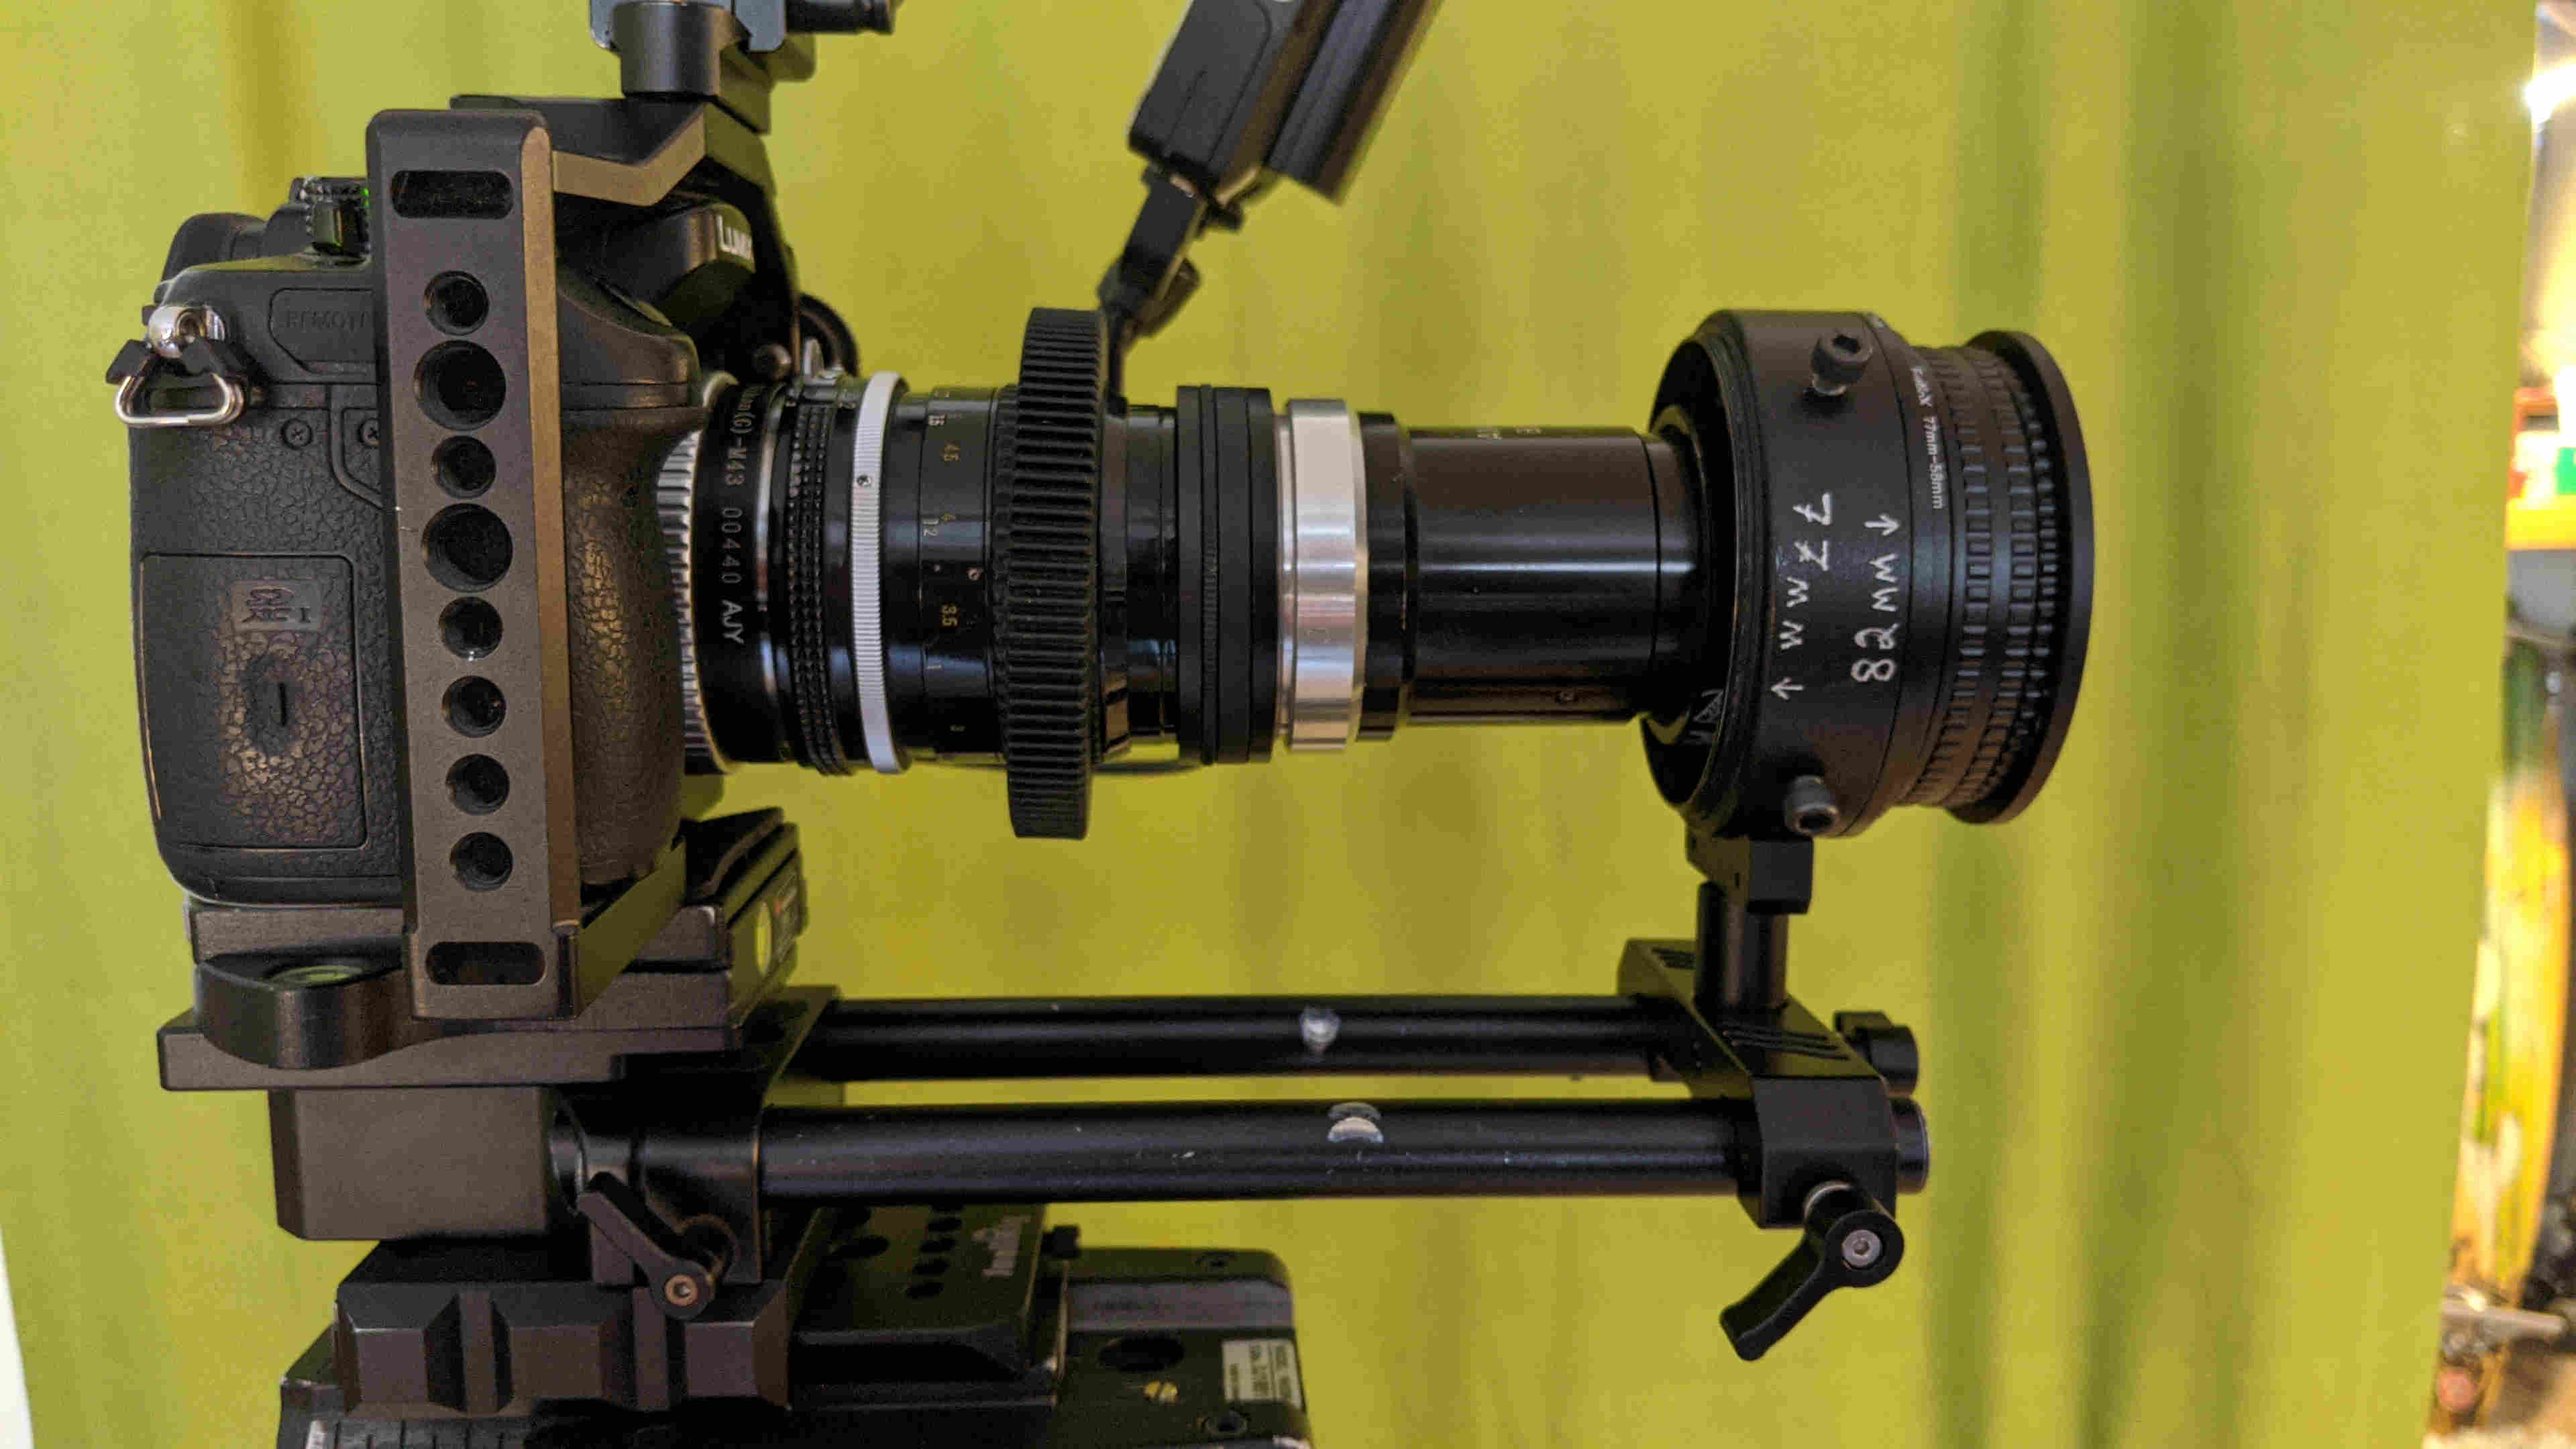
From left to right are the three main parts of the original BH16-2: Spherical Lens, Series 7 Adapter Ring, and the anamorphoser with built in variable diopter. For this mod, we will:
- Replace the spherical lens with one of our own
- Convert the adapter ring to our new spherical lens
- Replace the variable diopter helicoid with a new helicoid
Parts & Tools
You will need the following parts:
-
BH16-2 with original Adapter Ring
-
85mm Lens (this tutorial uses the Nikkor 85mm AIS F2)
-
58mm to Series 7 Step Up Ring
-
58mm Circular Polarizer
-
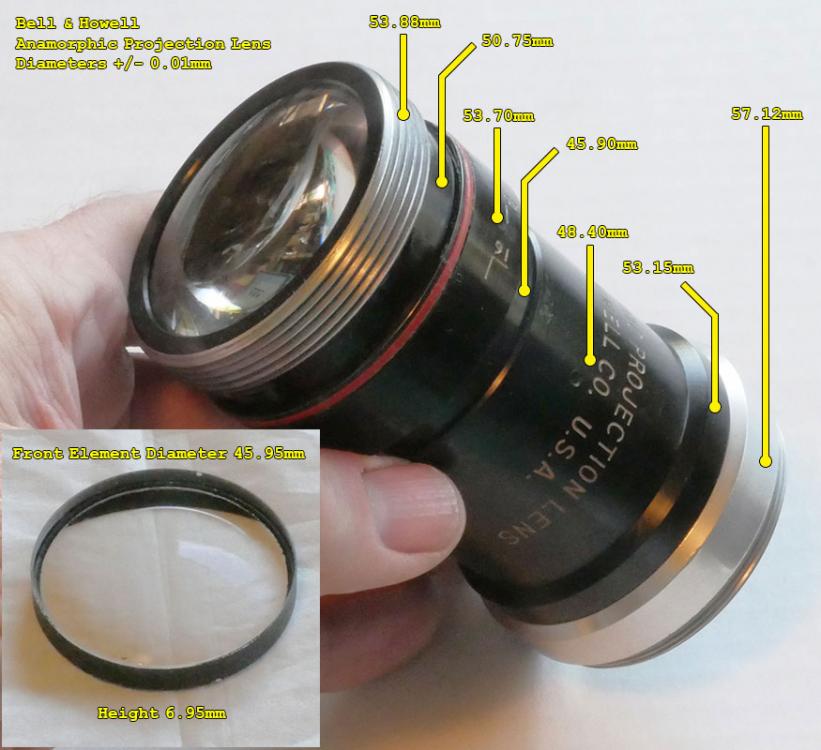
Rubber Gasket about 54mm big with an interior diameter slightly smaller than 45.95mm
-
These are approximations. When in doubt, bring the removed variable and helicoid with you to find the right size gasket.
-
58mm to 58mm Helicoid Focusing Ring 17-31mm
-
Lens Clamp like one from RAF Camera or Vid Atlantic
-
Appropriate step-up/down rings from 77mm to the 58mm Helicoid Focusing Ring
-
1/4 inch 20 lens support point from a Rapido FMJ
-
Appropriate bolt size to mount this support to the Lens Clamp
-
PVC Tape
You will need the following tools:
-
Flat Head Screwdriver
-
Lens Spanner Wrench
-
Rubber Gloves
-
Cotton or cotton like gloves
-
Hex Keys
-
Knife or Dremel Tool
Step 1 - Replace the Spherical Lens
This is the easiest step. The original spherical lens has no aperture control, projects a small image circle, and is near impossible to mount to a camera. Instead, we’ll use a photography lens that can do everything the original spherical lens can not . For this project, we’ll use the vintage
Nikkor 85mm AIS F2:
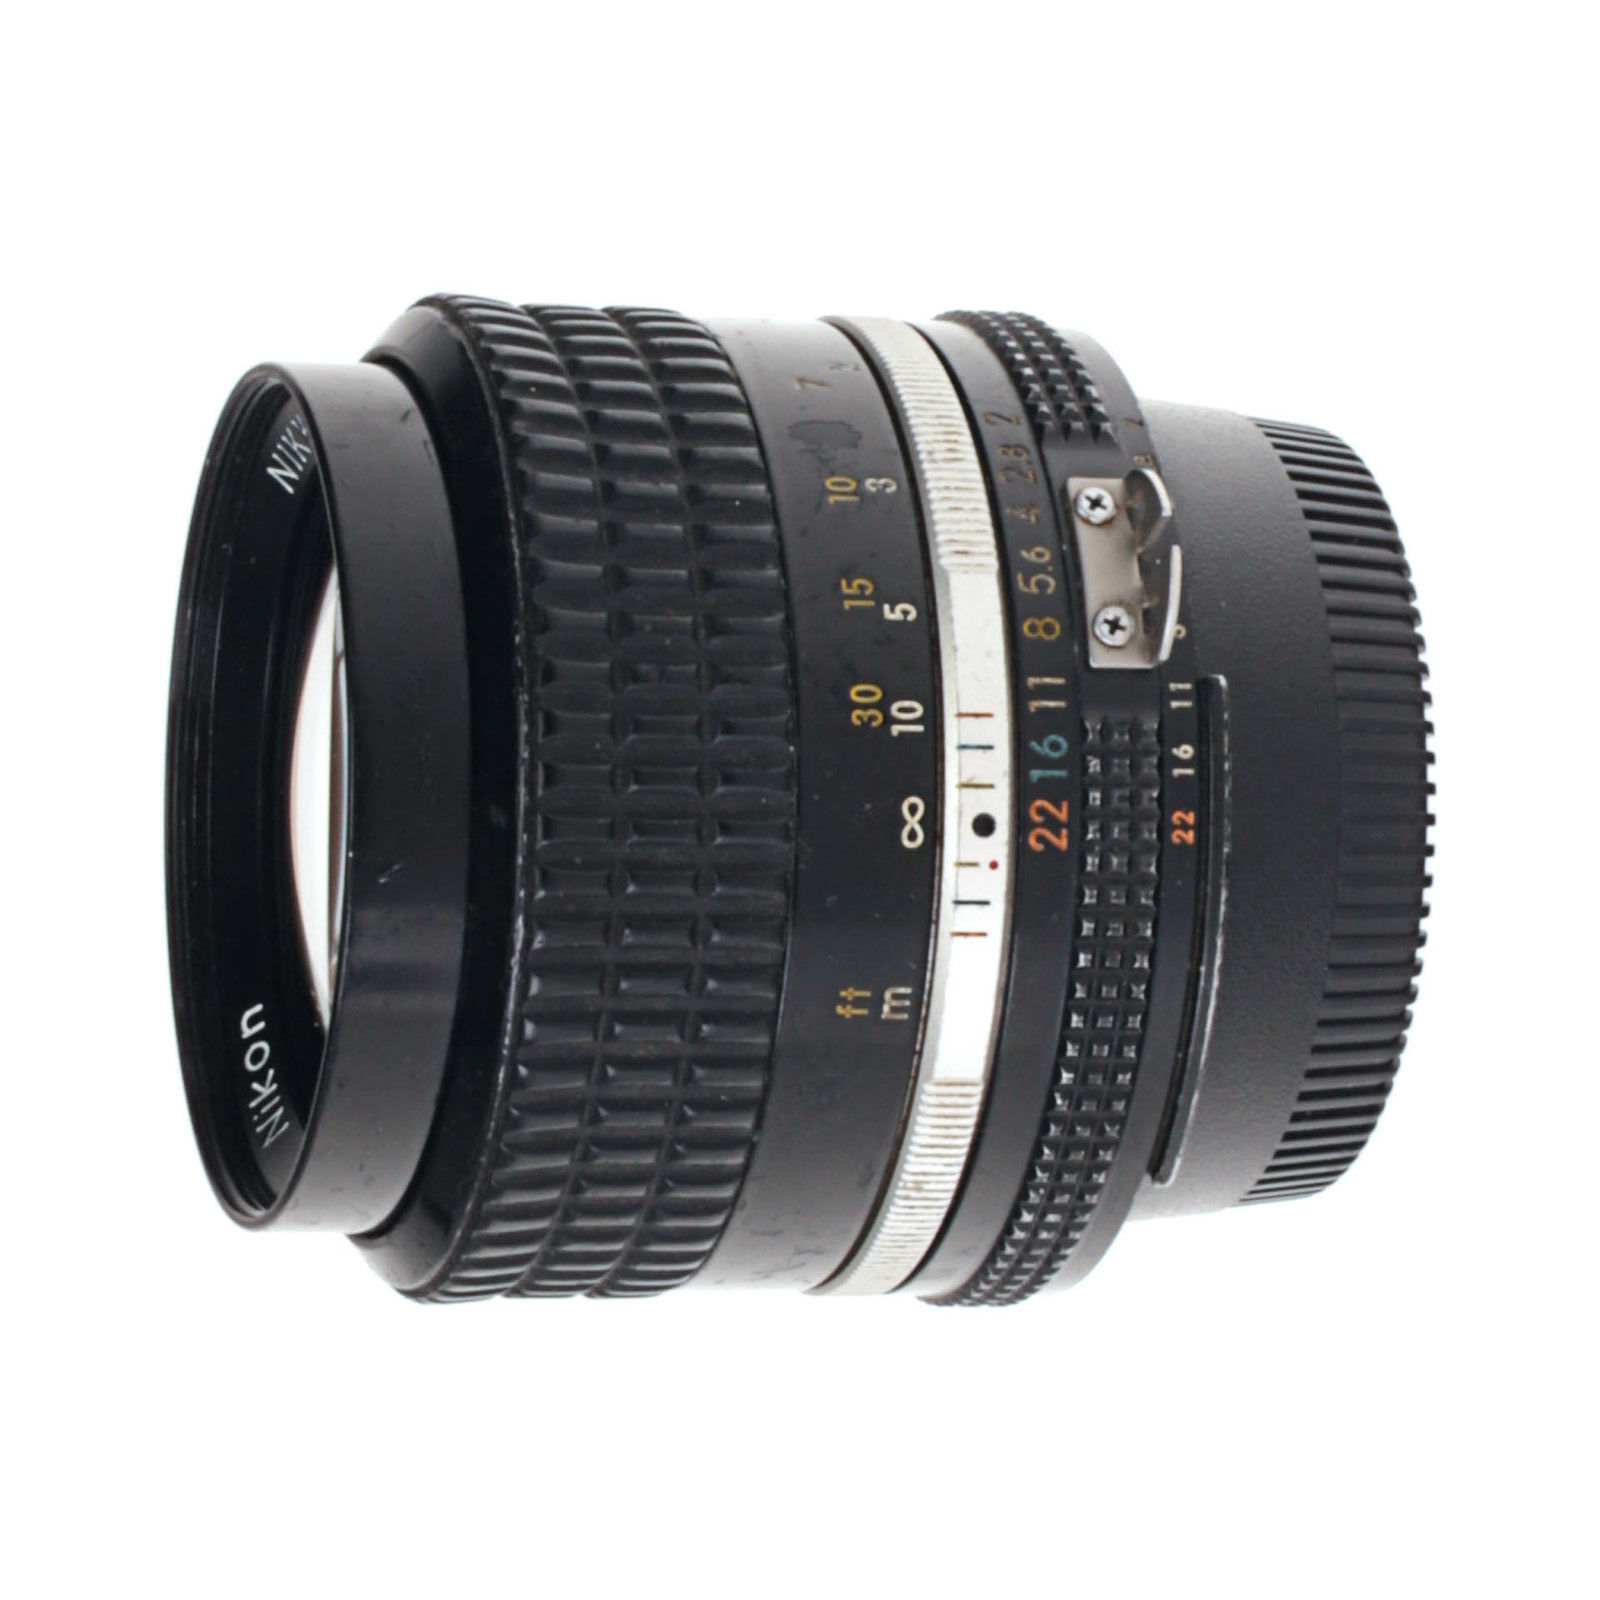
The Nikkor 85mm AIS F2 is a reasonably priced lens that delivers sharp, neutral looking pictures. It doesn’t have the clinical feel of modern lenses, but still maintains the sharpness for even the largest of screens.
Of course, you’re not limited to this focal length, maximum aperture, or lens. The BH16-2 is a narrow lens to begin with, so anything wider than an 85mm vignettes on a S35 sensor. However, tighter lenses like a 105mm or 135mm work well with this anamorphoser.
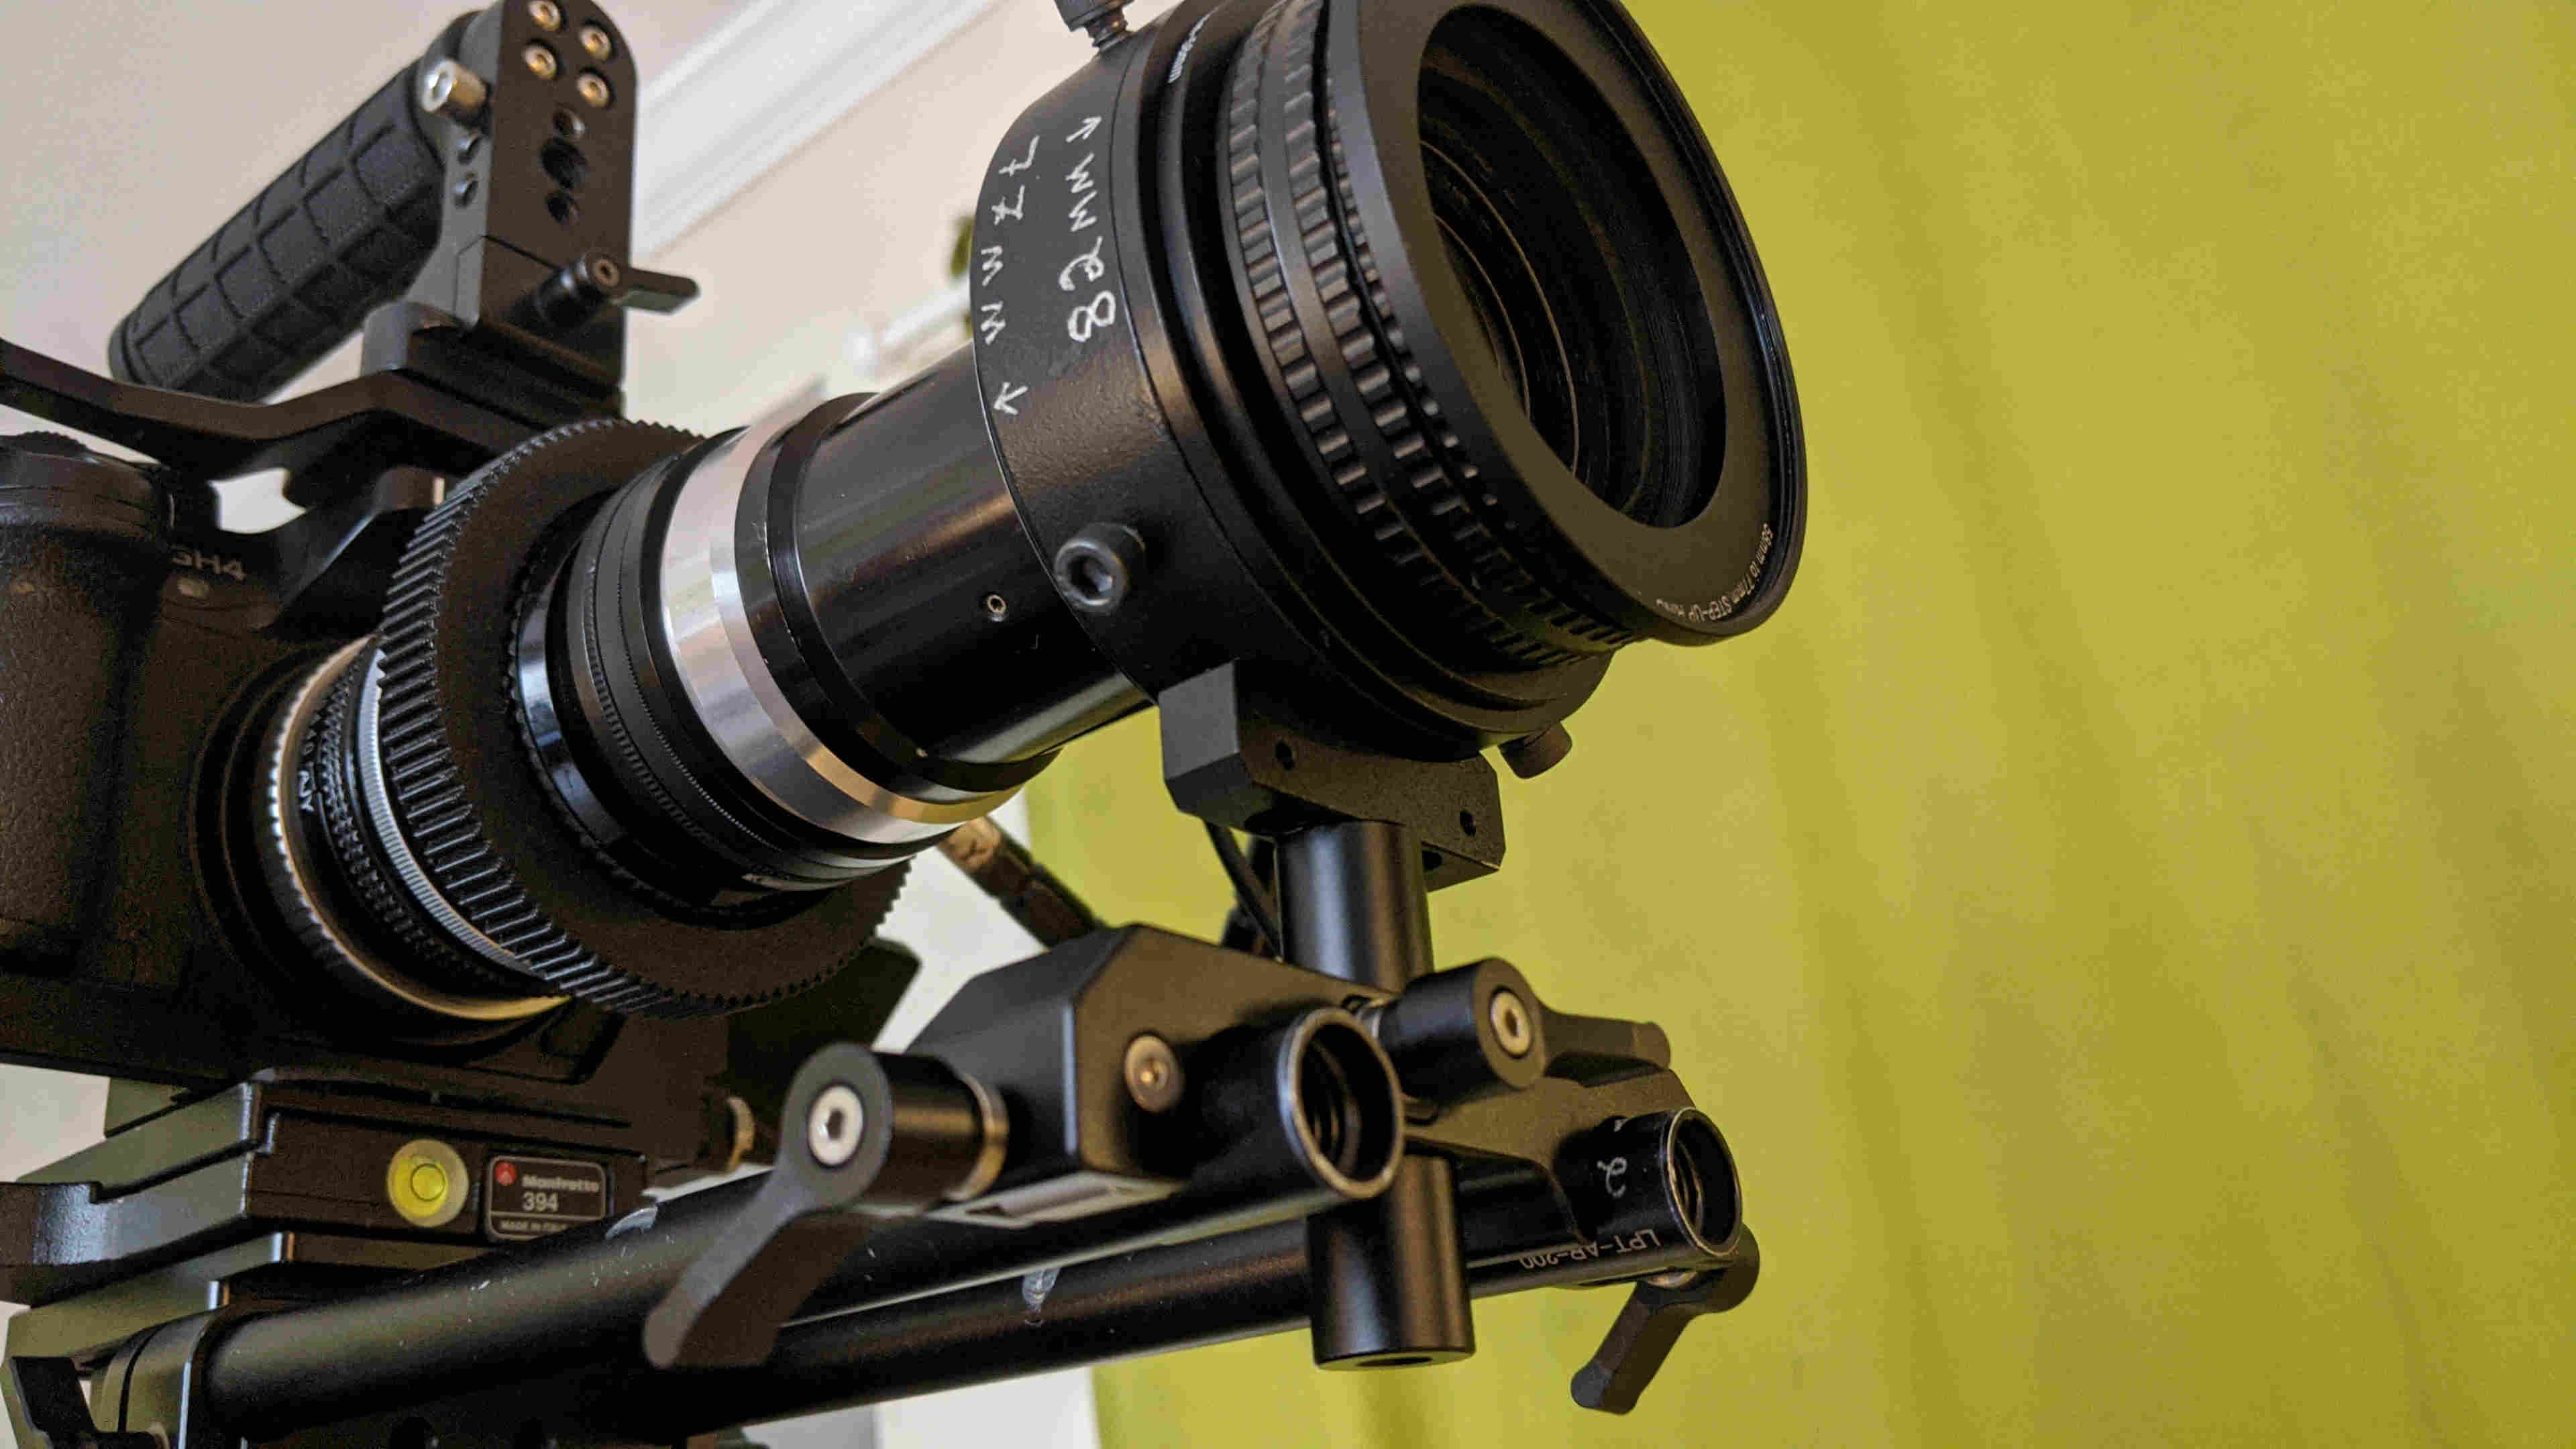
Step 2 - Conver the Adapter Ring
The
adapter ring that comes with the original lens has a specific thread on the inside that screws to the anamorphoser. The thread on the rear of the anamorphoser isn’t an industry standard thread and requires the original adapter ring if a cinematographer wishes to use step-up rings to attach the new spherical lens. If you do not have the adapter ring, then you’ll have to use another lens clamp to attach the spherical lens to the anamorphoser. This guide will focus on using the original adapter ring.
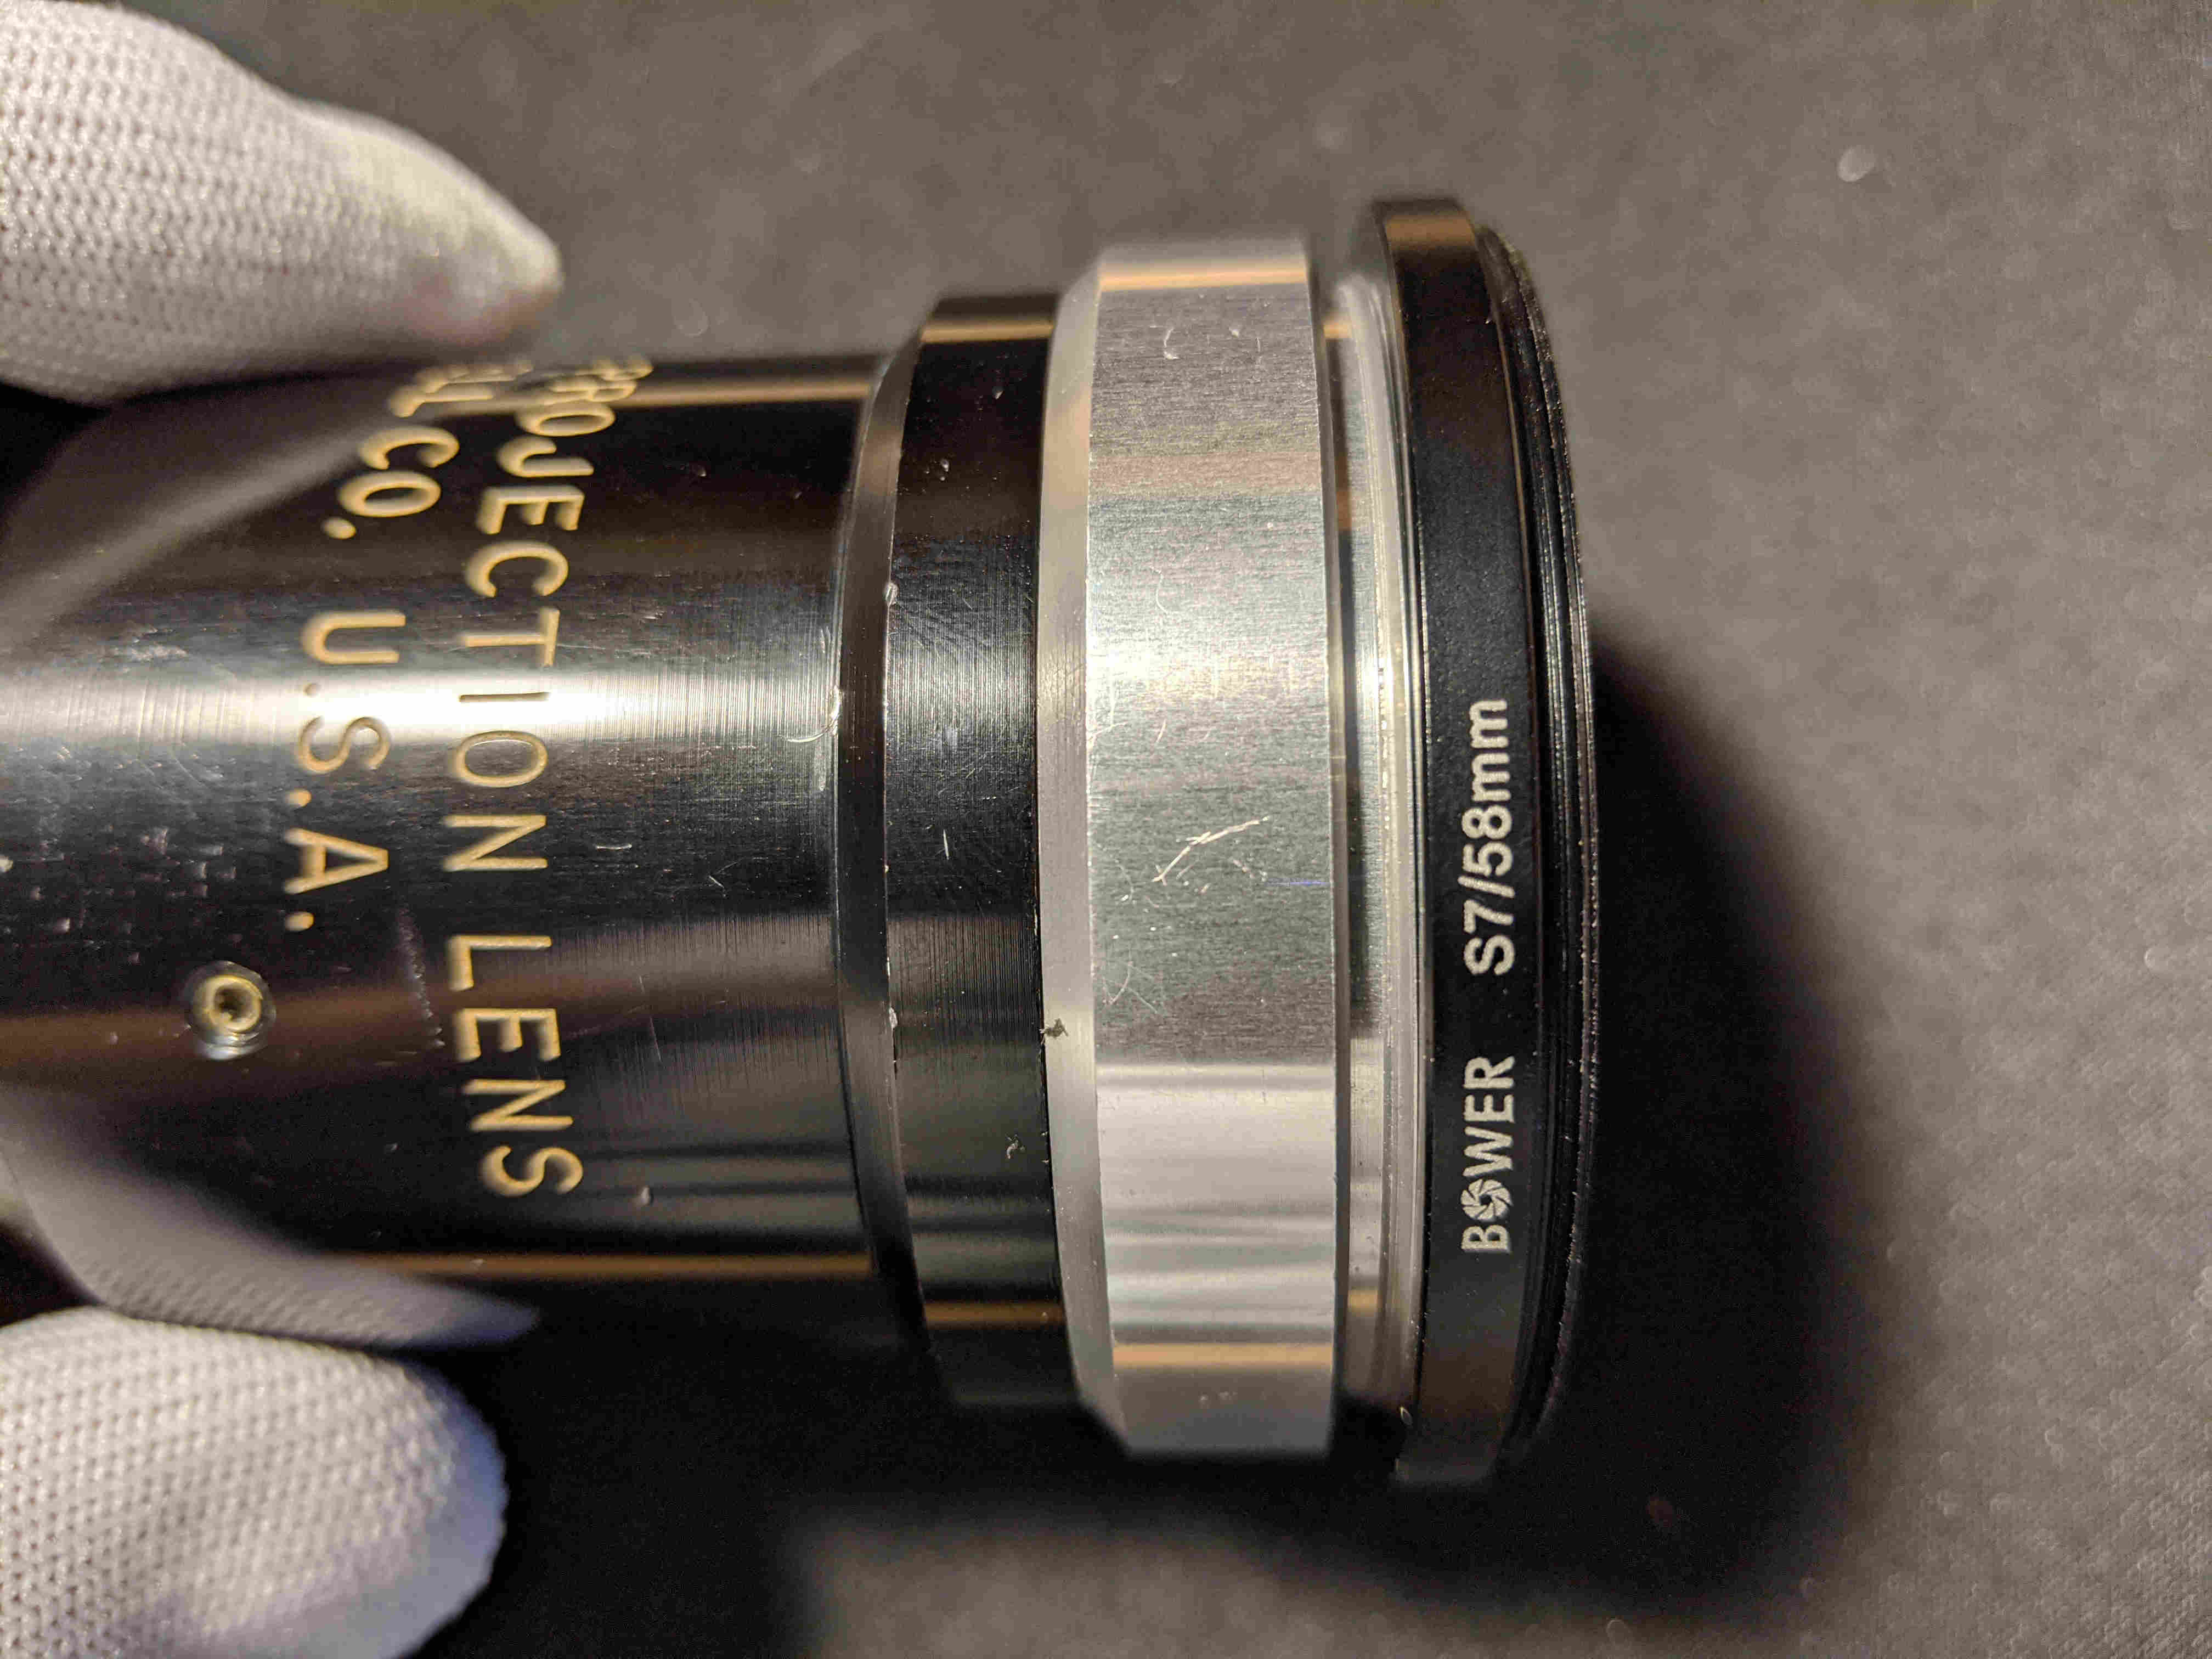
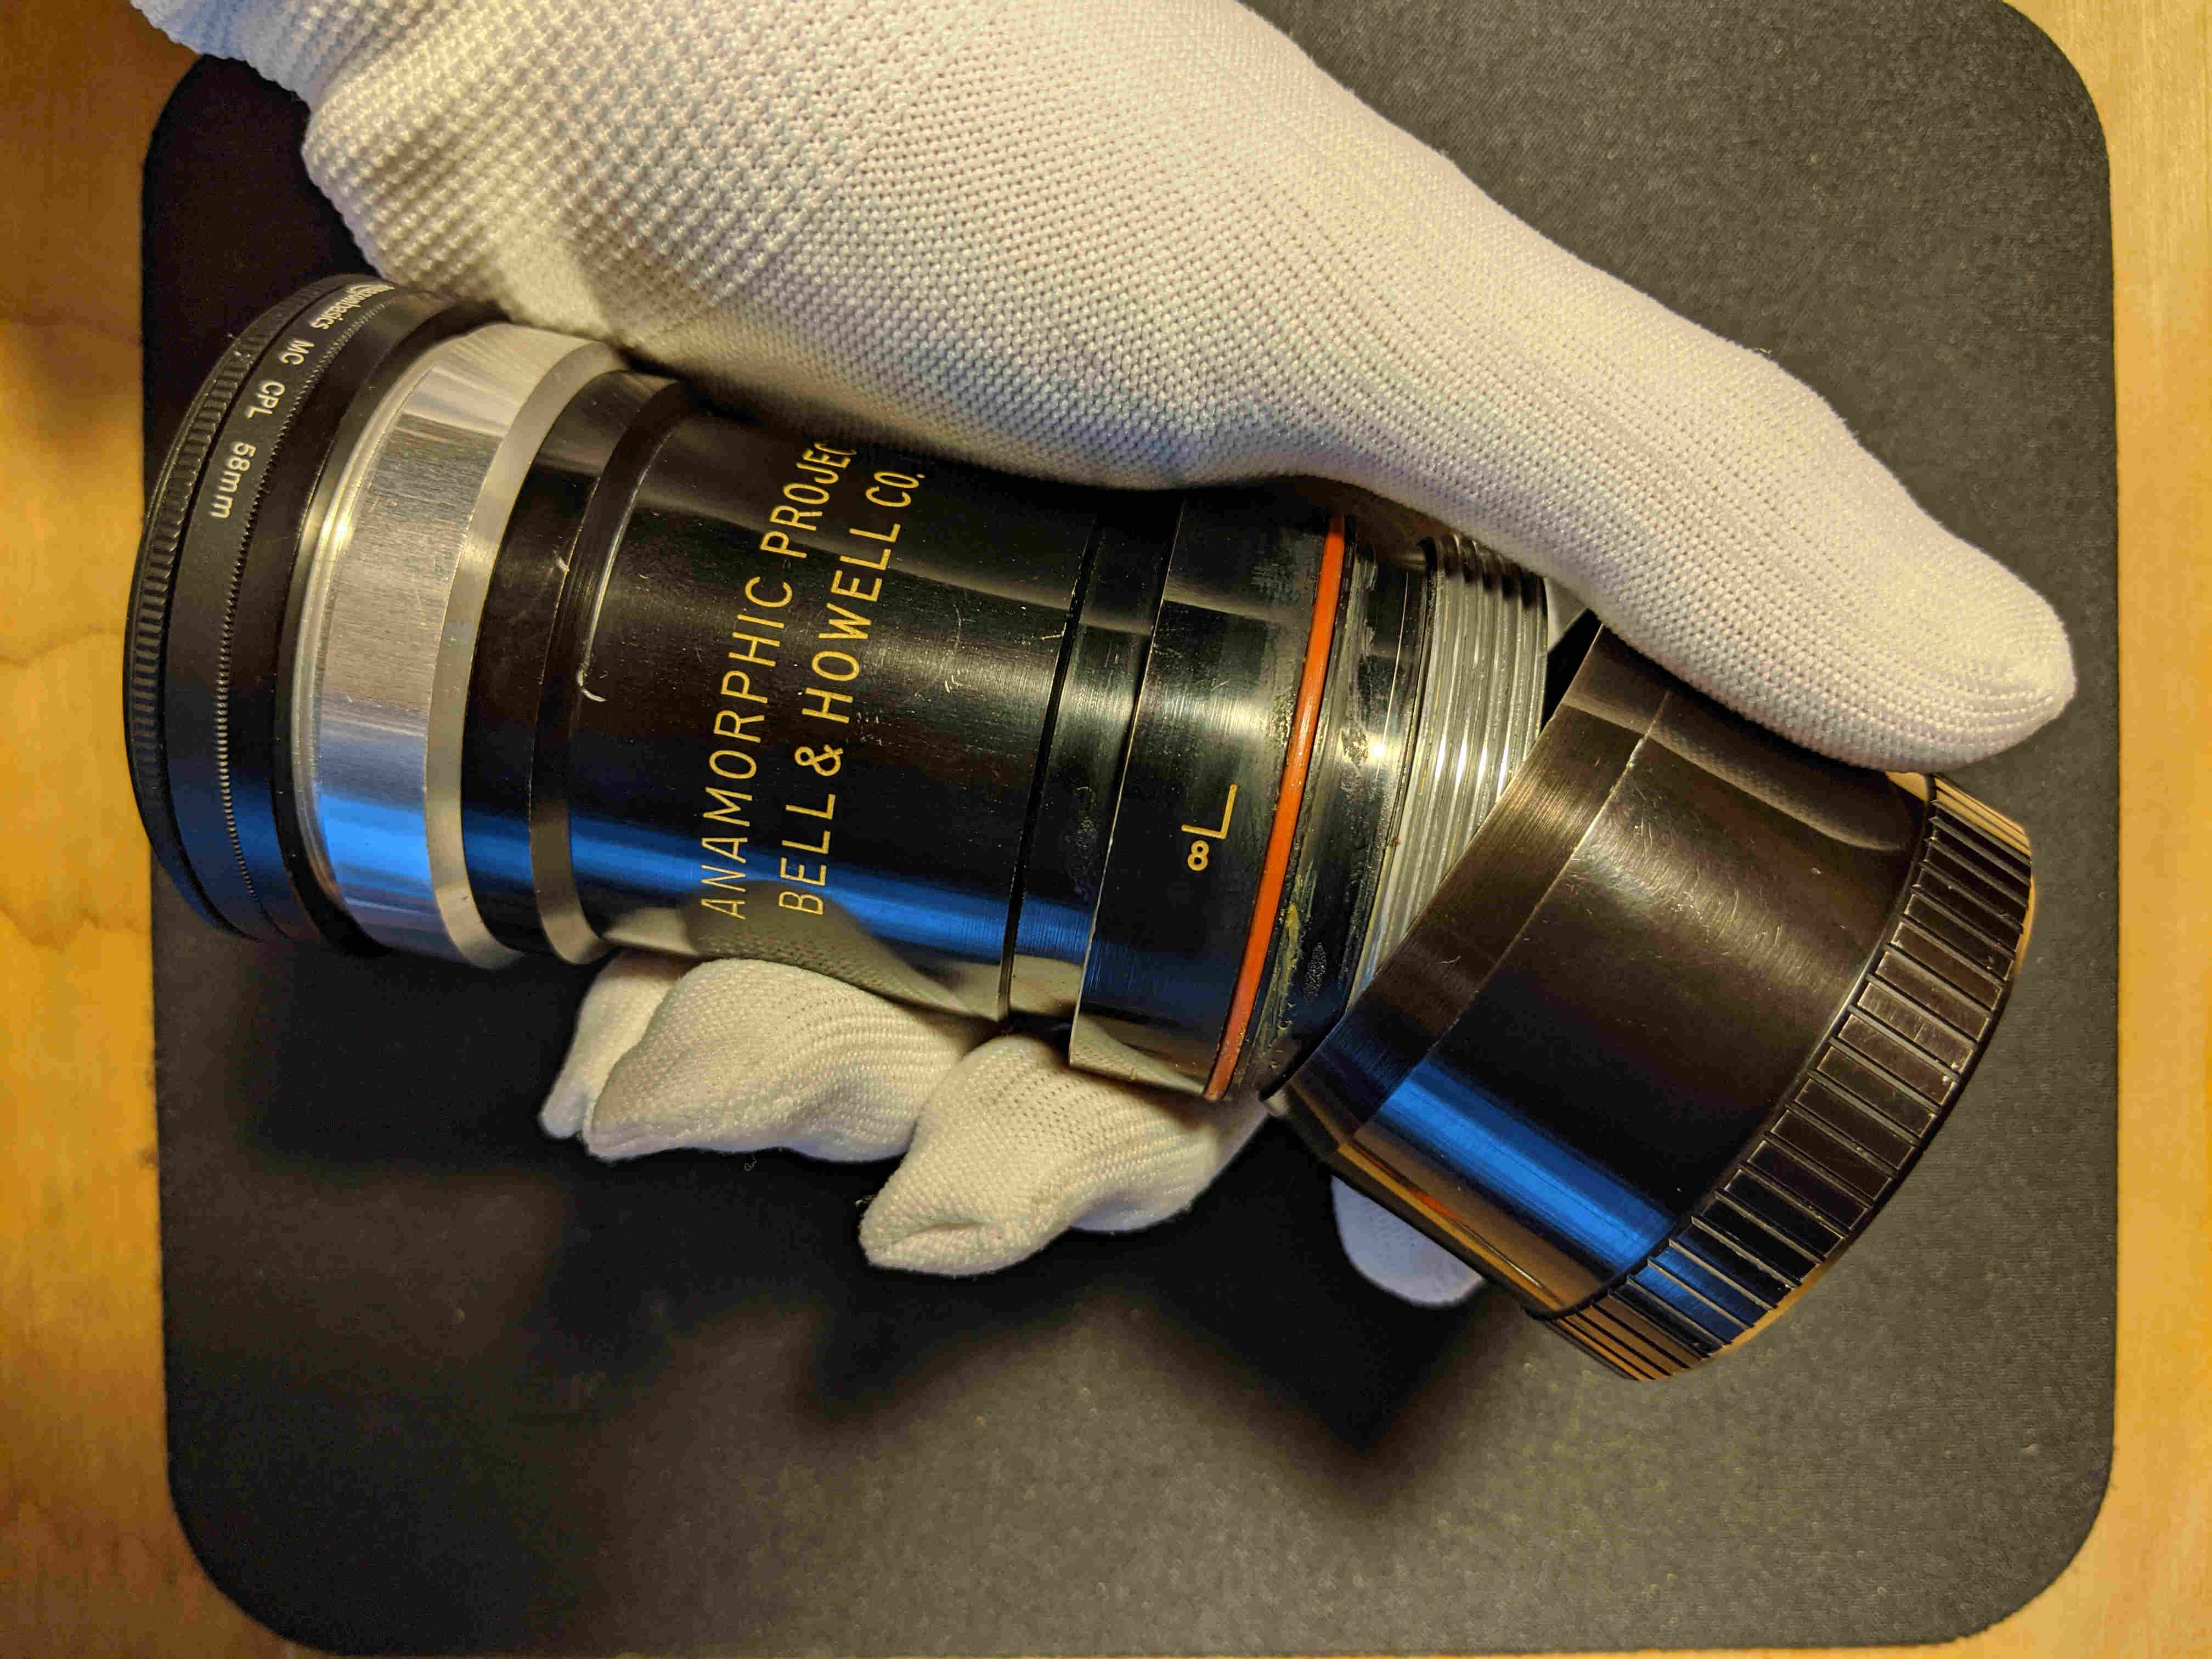
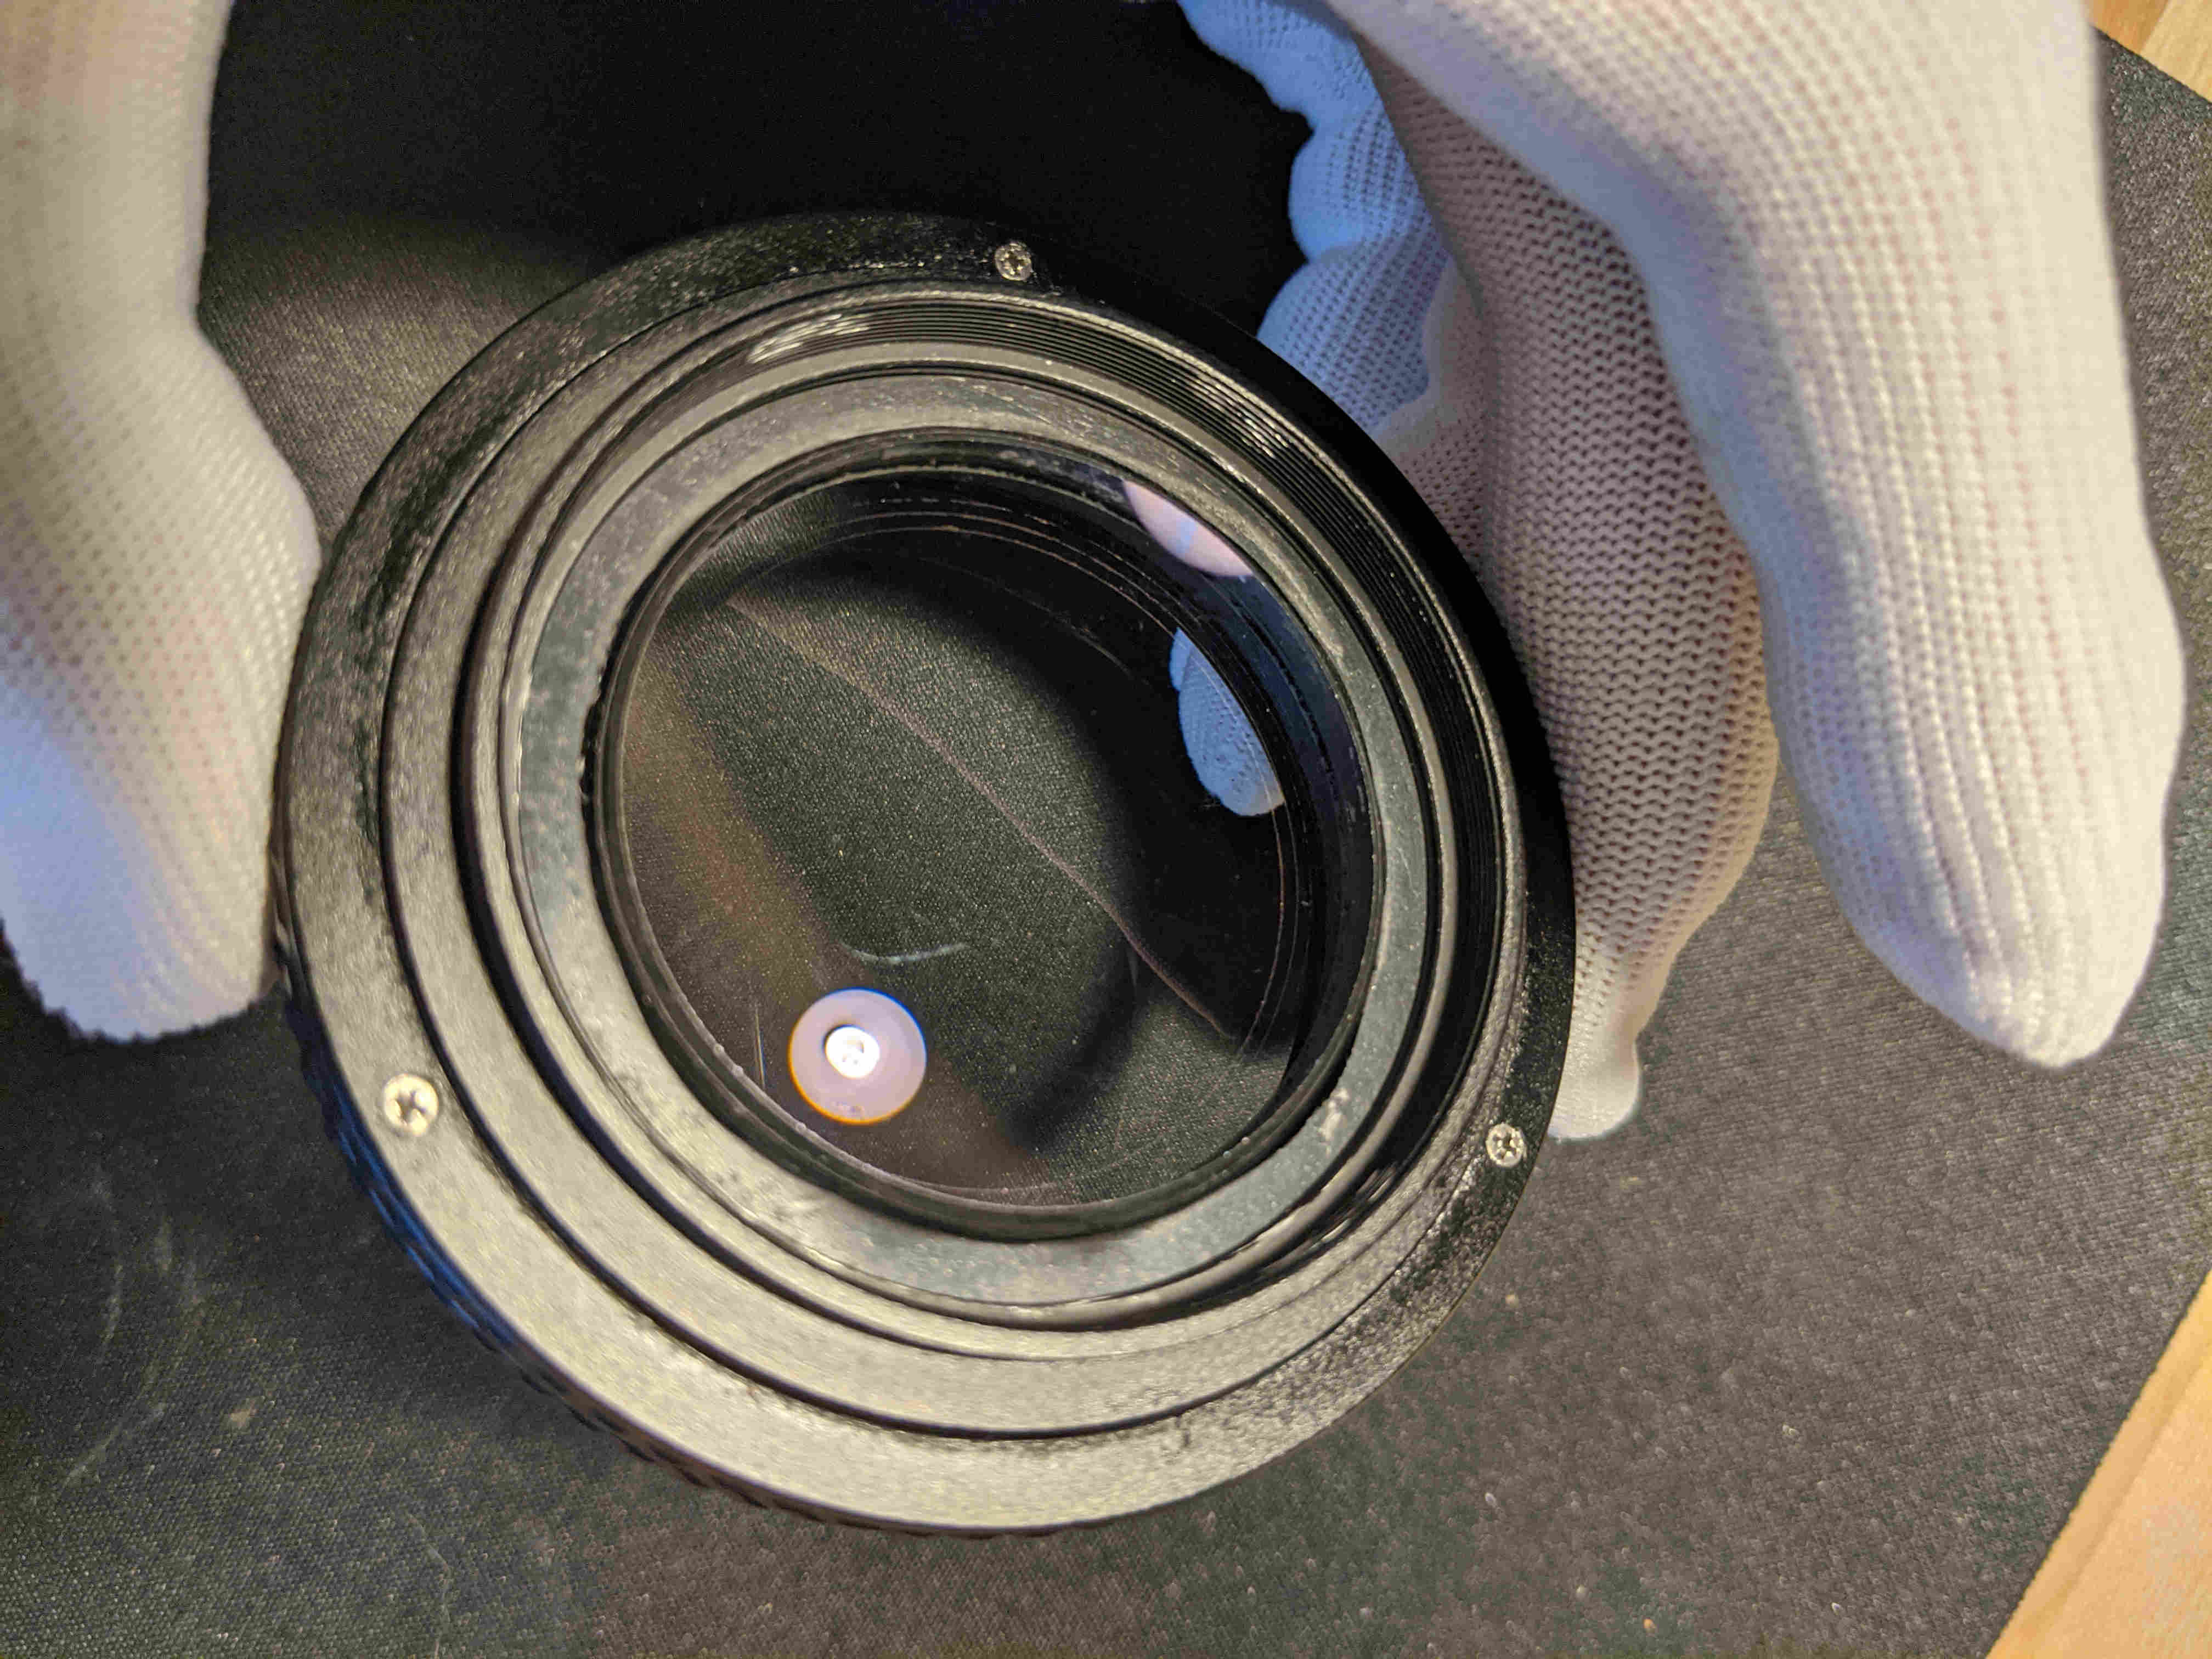
The rear exterior threading of the adapter ring is Series 7. In the above photo, a 58mm to Series 7 Step-Up Ring is screwed snugly onto the adapter ring. Additionally, the adapter ring is then screwed back onto the anamorphoser.
In Section 3 of this guide, the anamorphoser will be modified to stay locked in alignment via 15mm rod support. Currently, the adapter ring with the step-up ring attached will make it impossible to correctly mount the spherical lens to the camera because there is no ability for the lens to rotate. To fix this issue, a
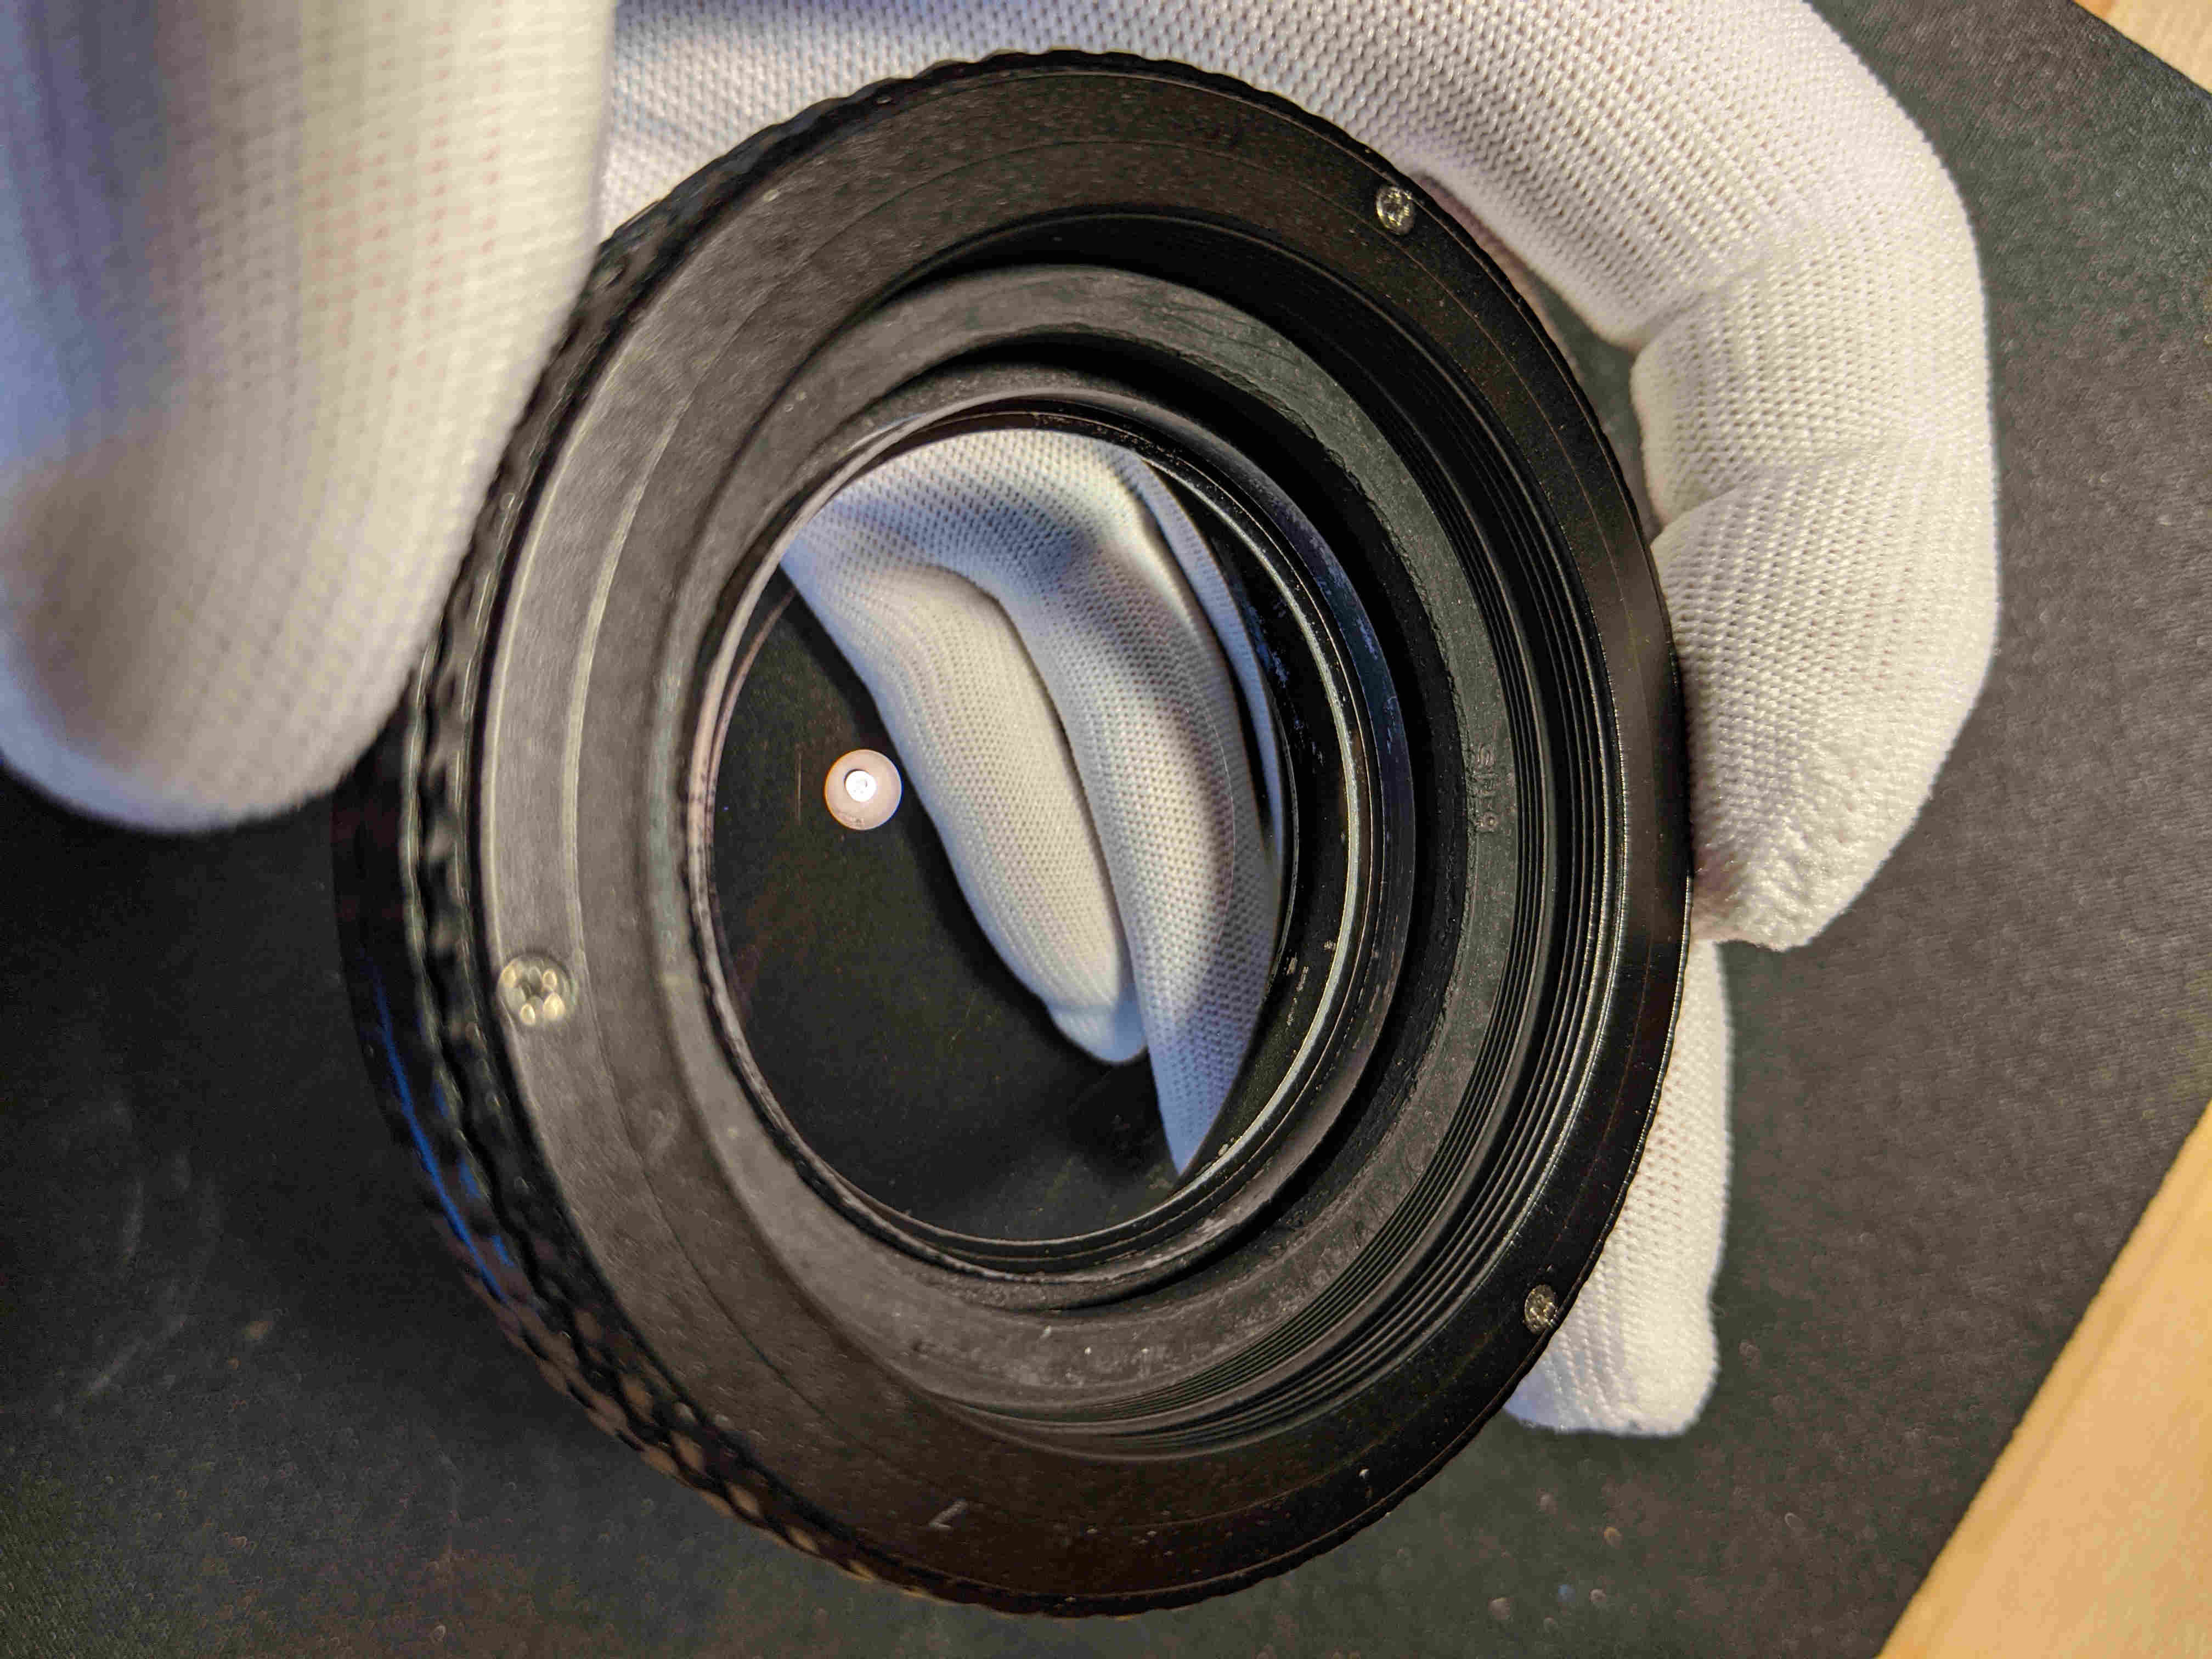
modified circular polarizer (CPL) will be attached.
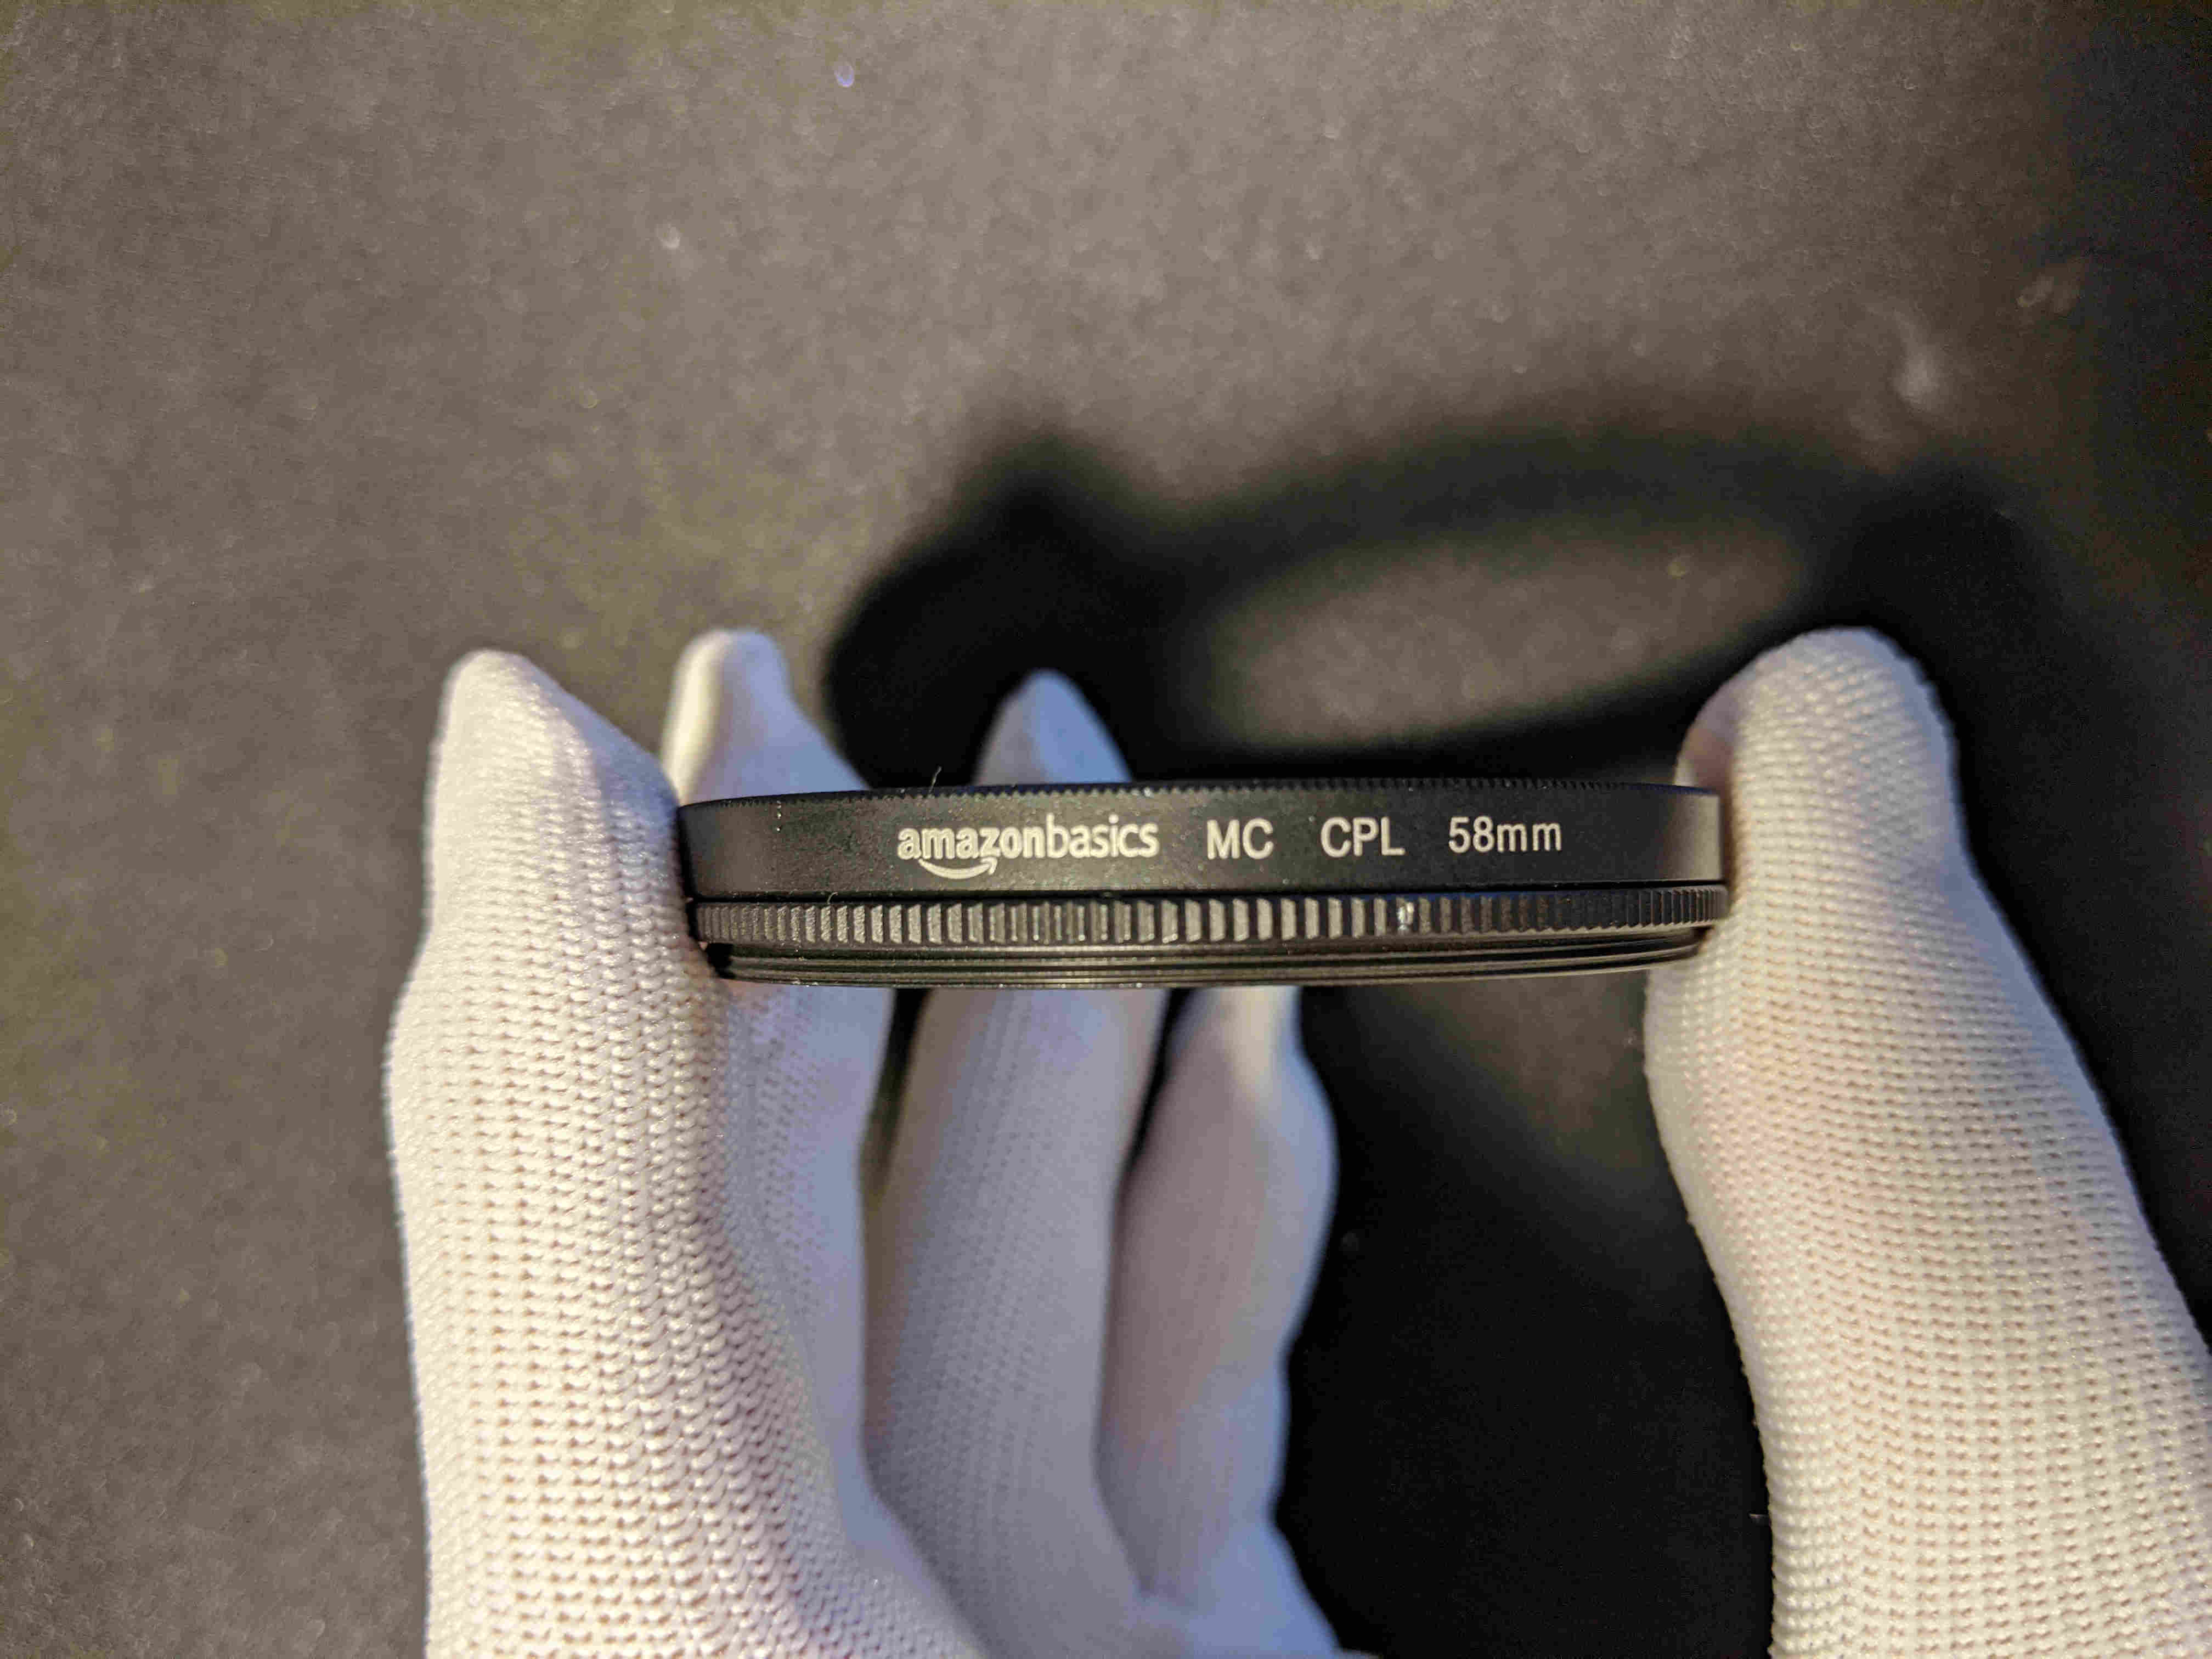
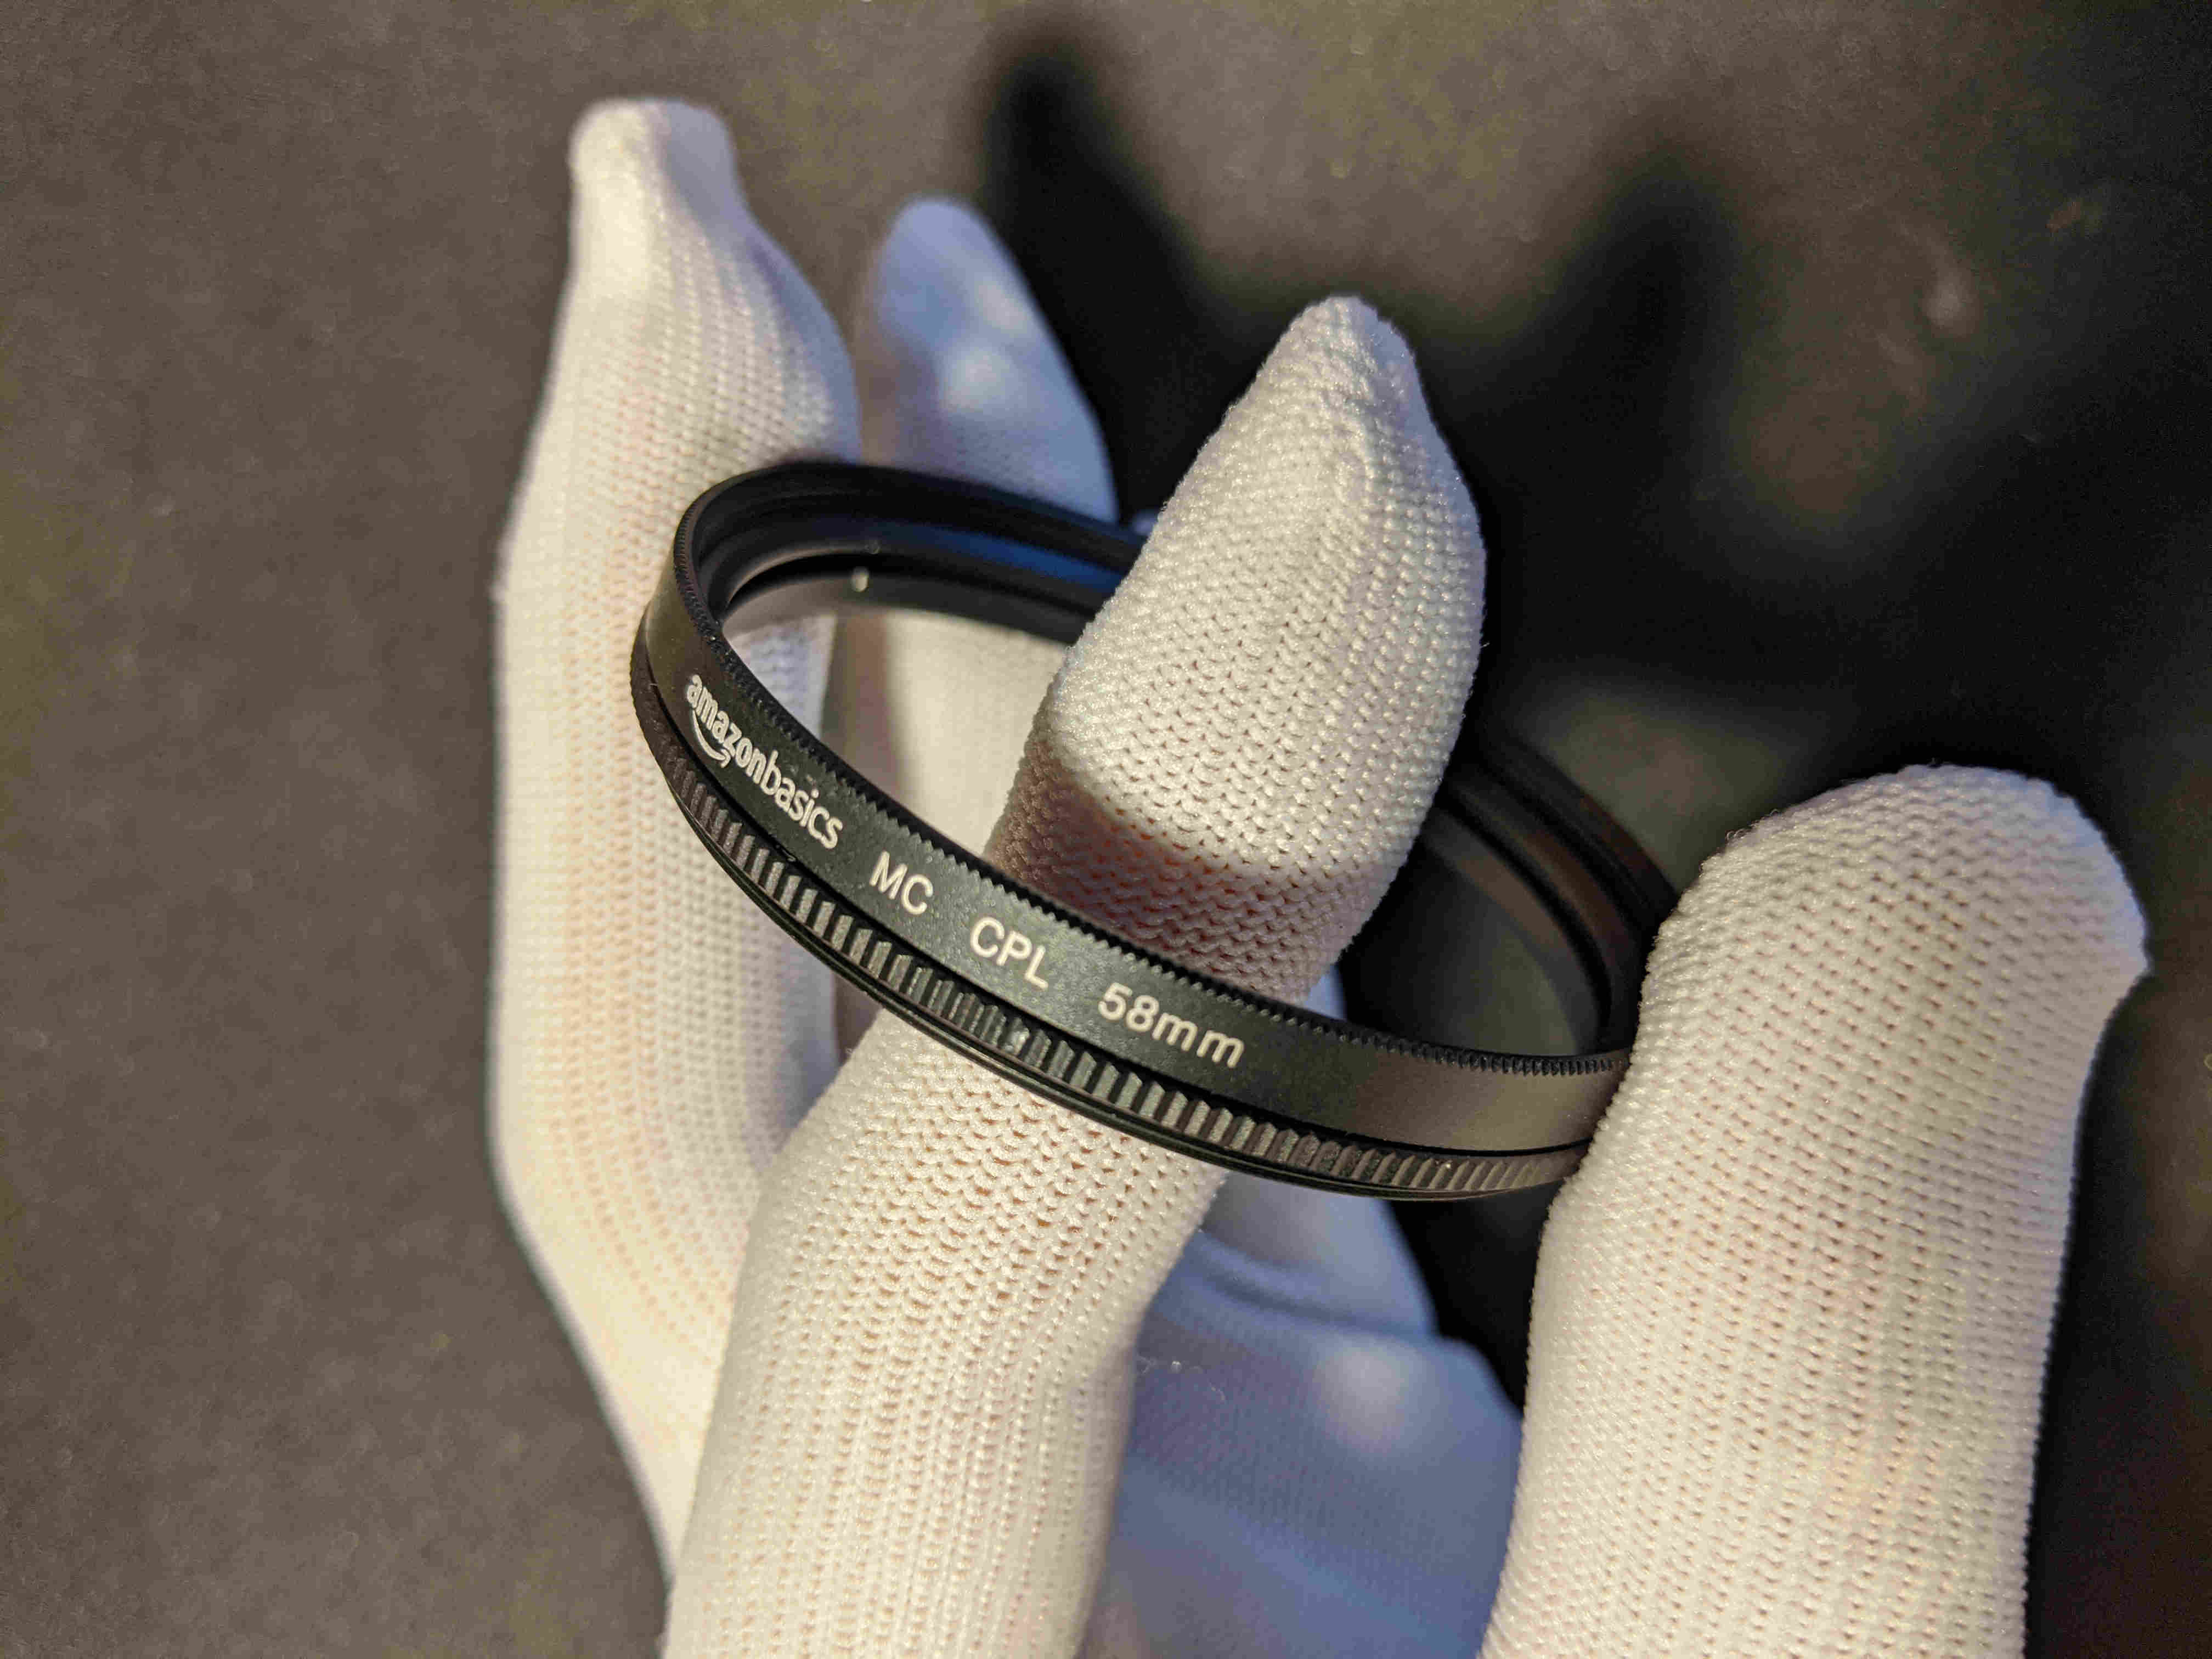
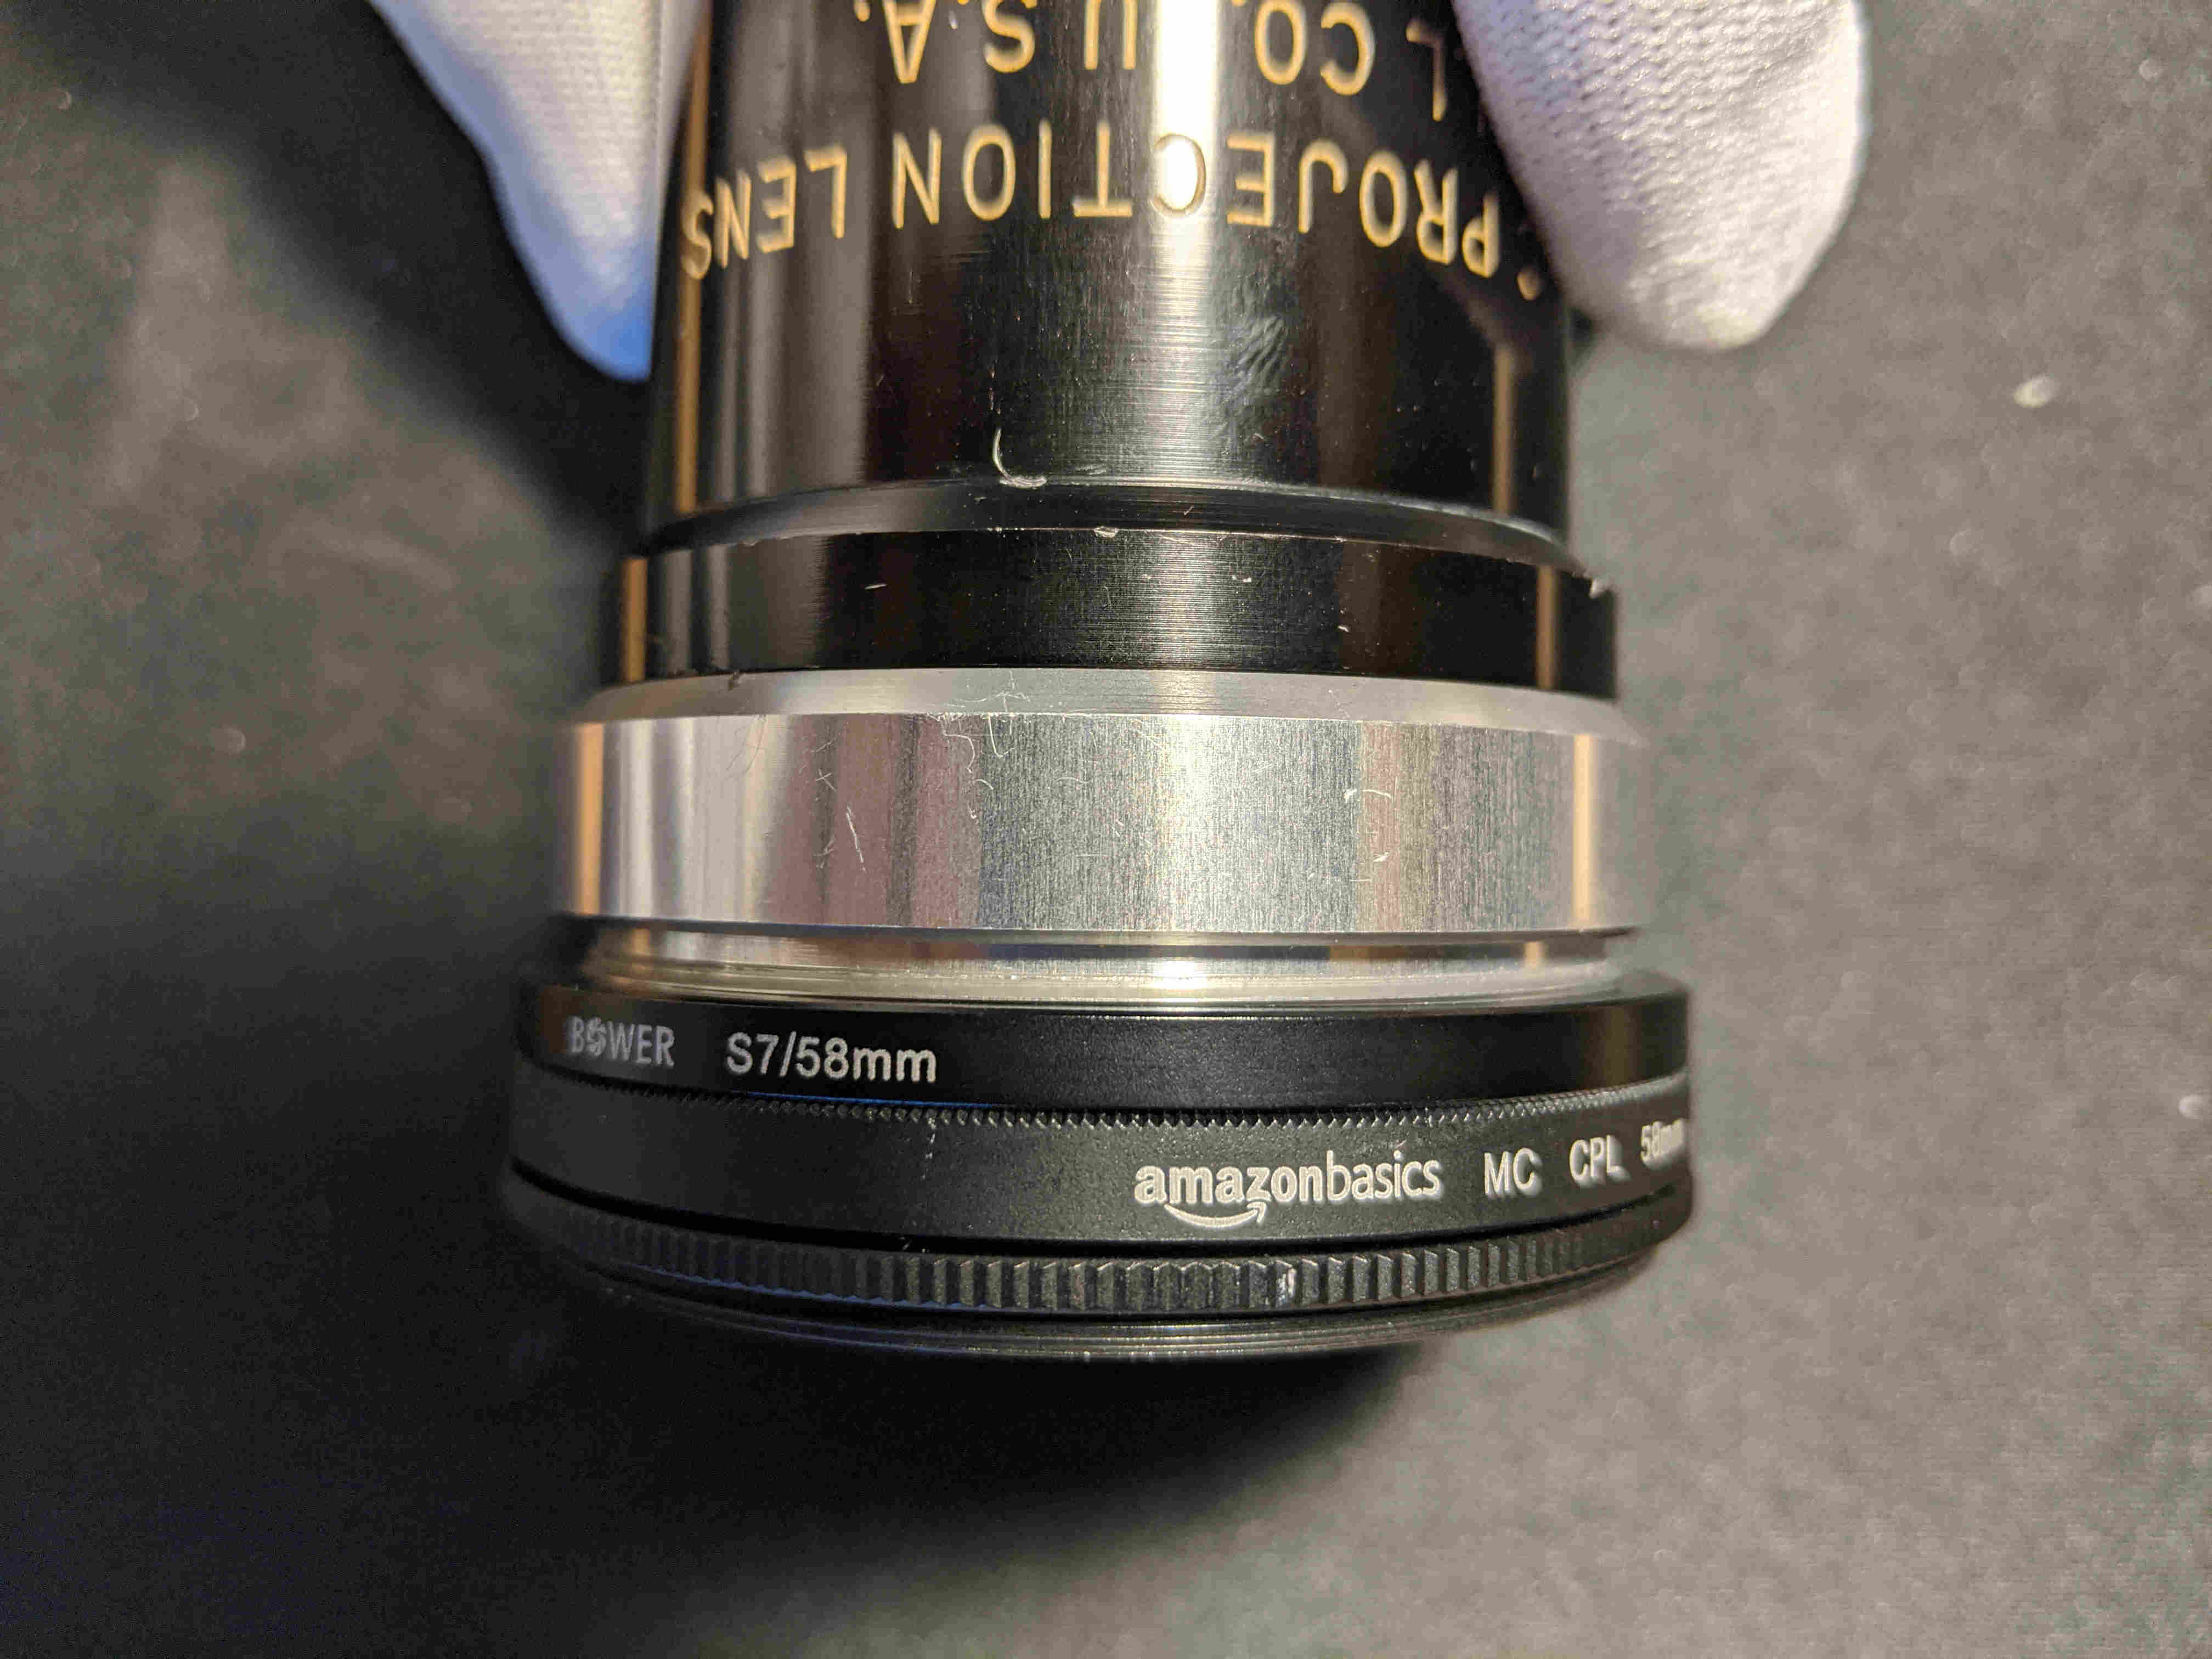
Using a spanner wrench, remove the polarizer glass from the CPL. Screw this empty CPL to the modified adapter ring. Now you can mount the spherical lens to the anamorphoser and still rotate the spherical lens into the camera mount.
Step 3 - Replace Variable Diopter Helicoid
The next, and most complicated step is to replace the variable diopter helicoid (VDH).
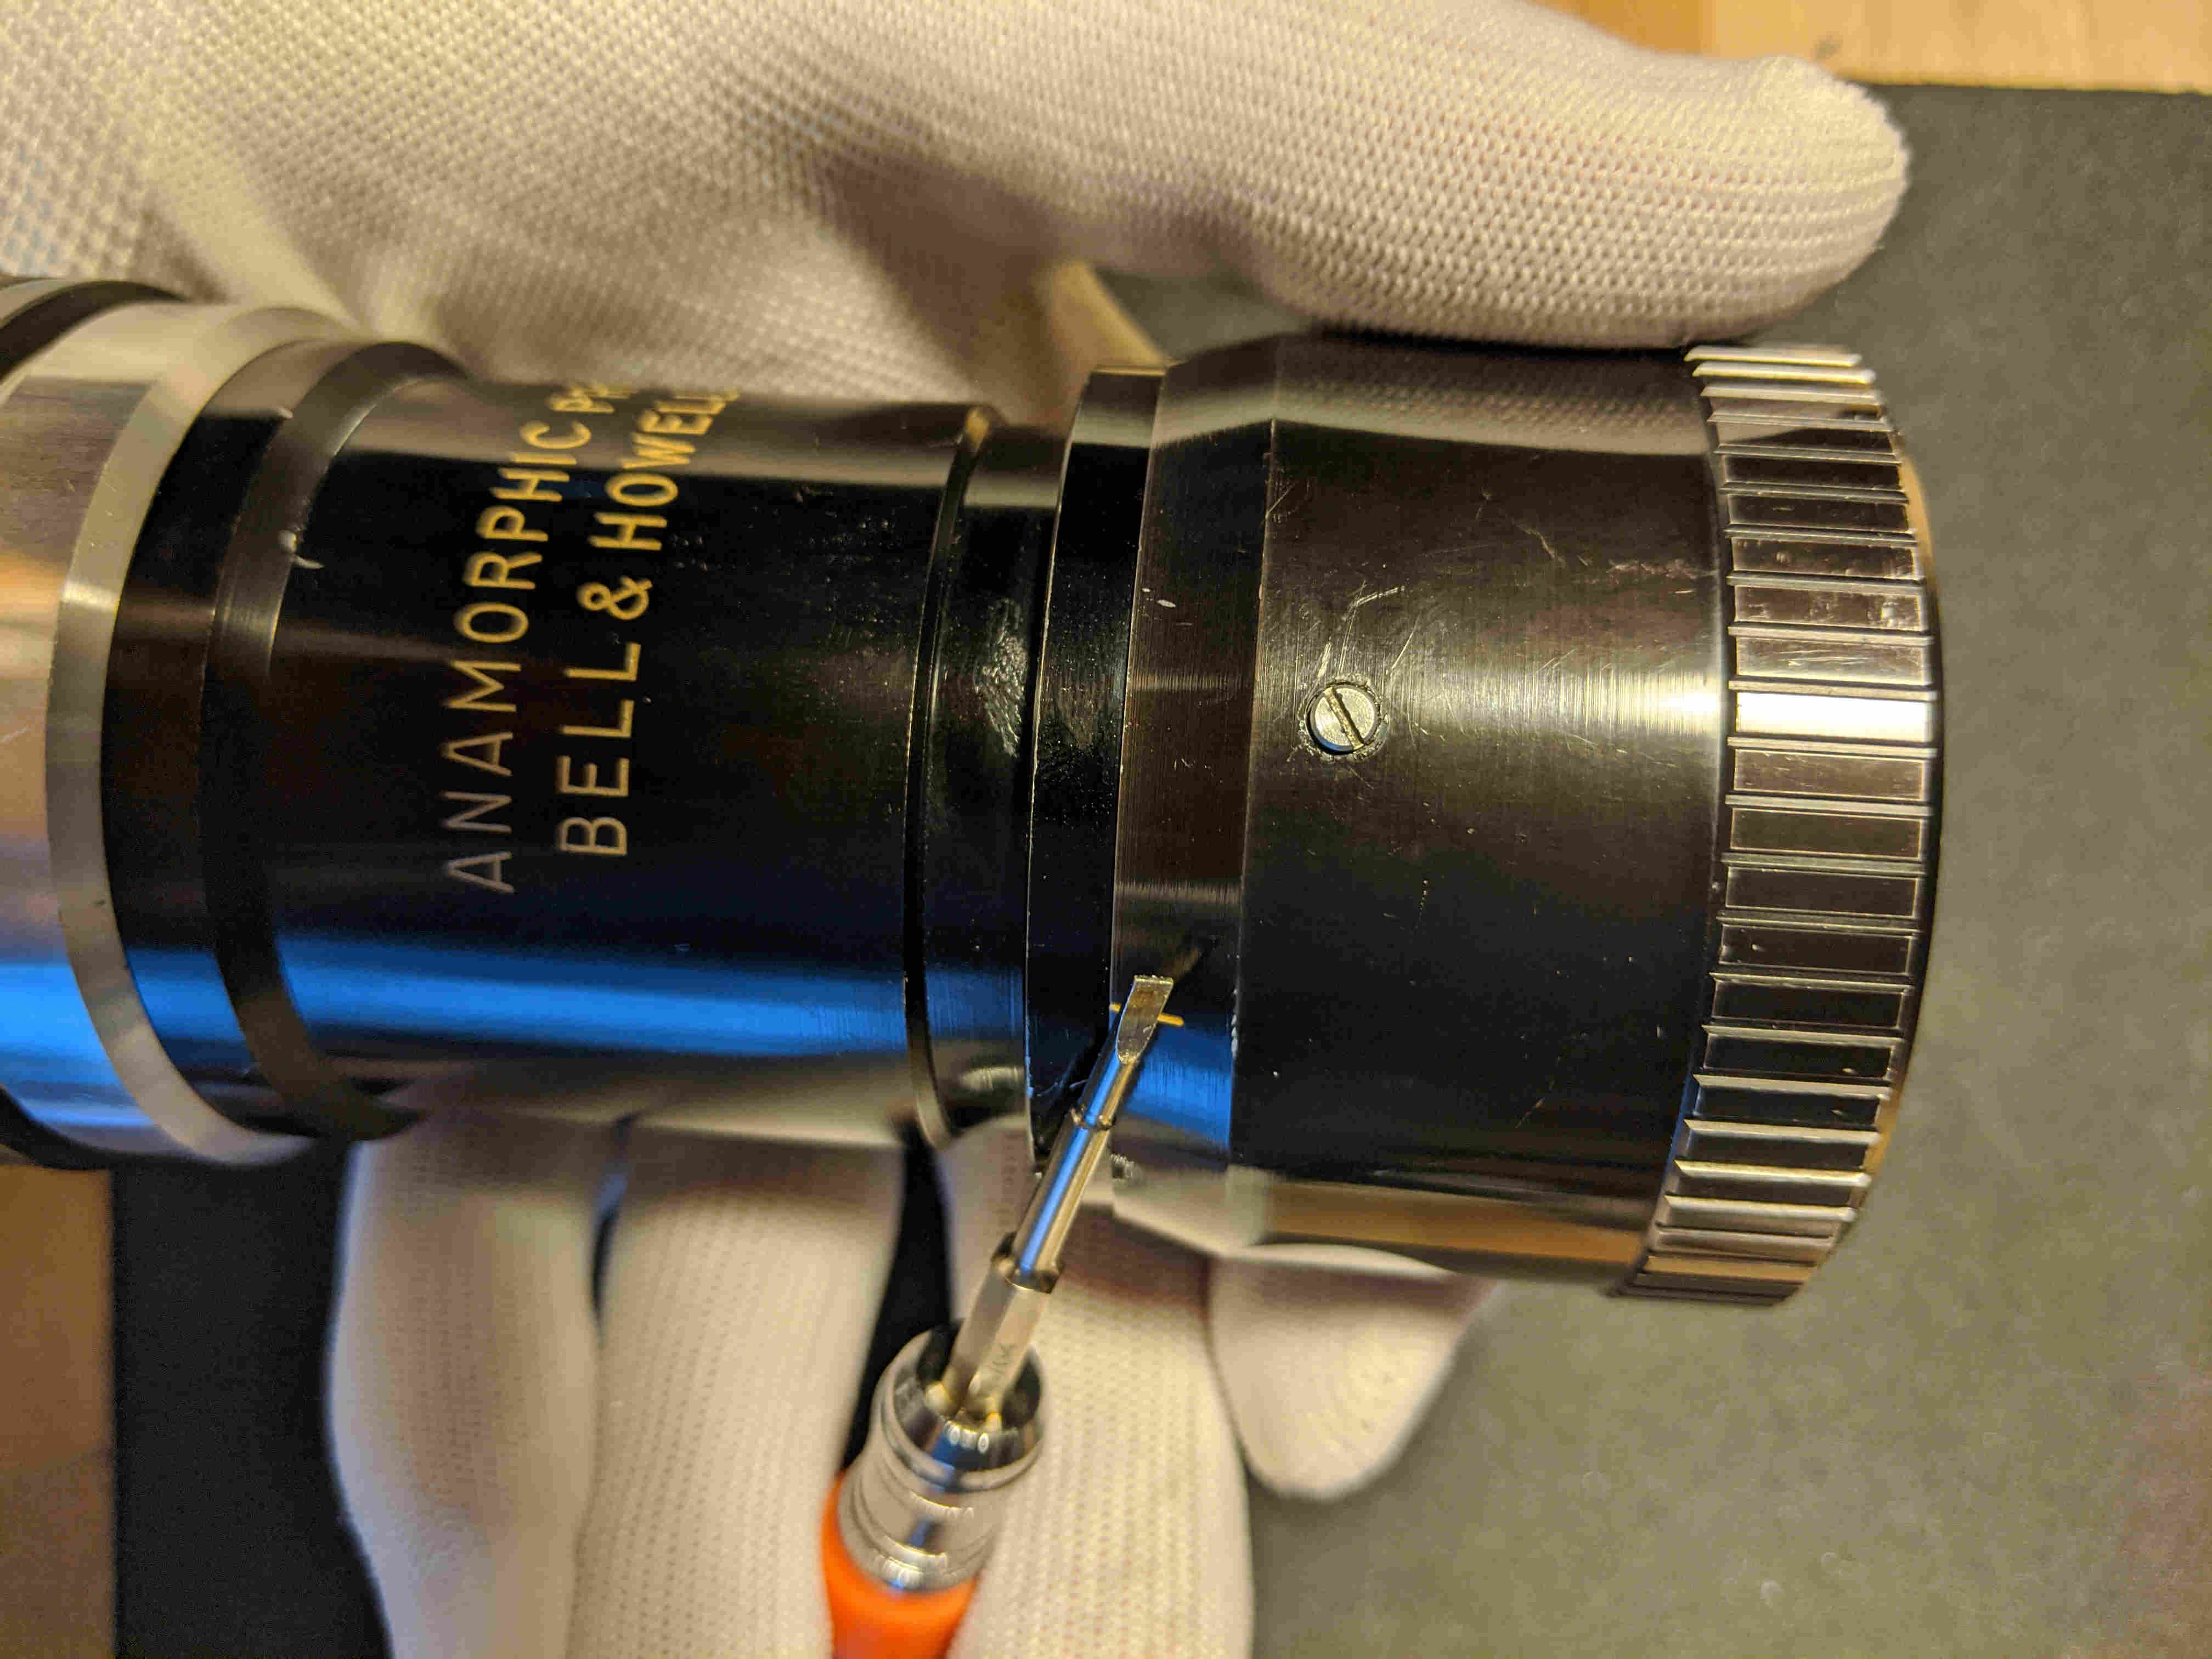
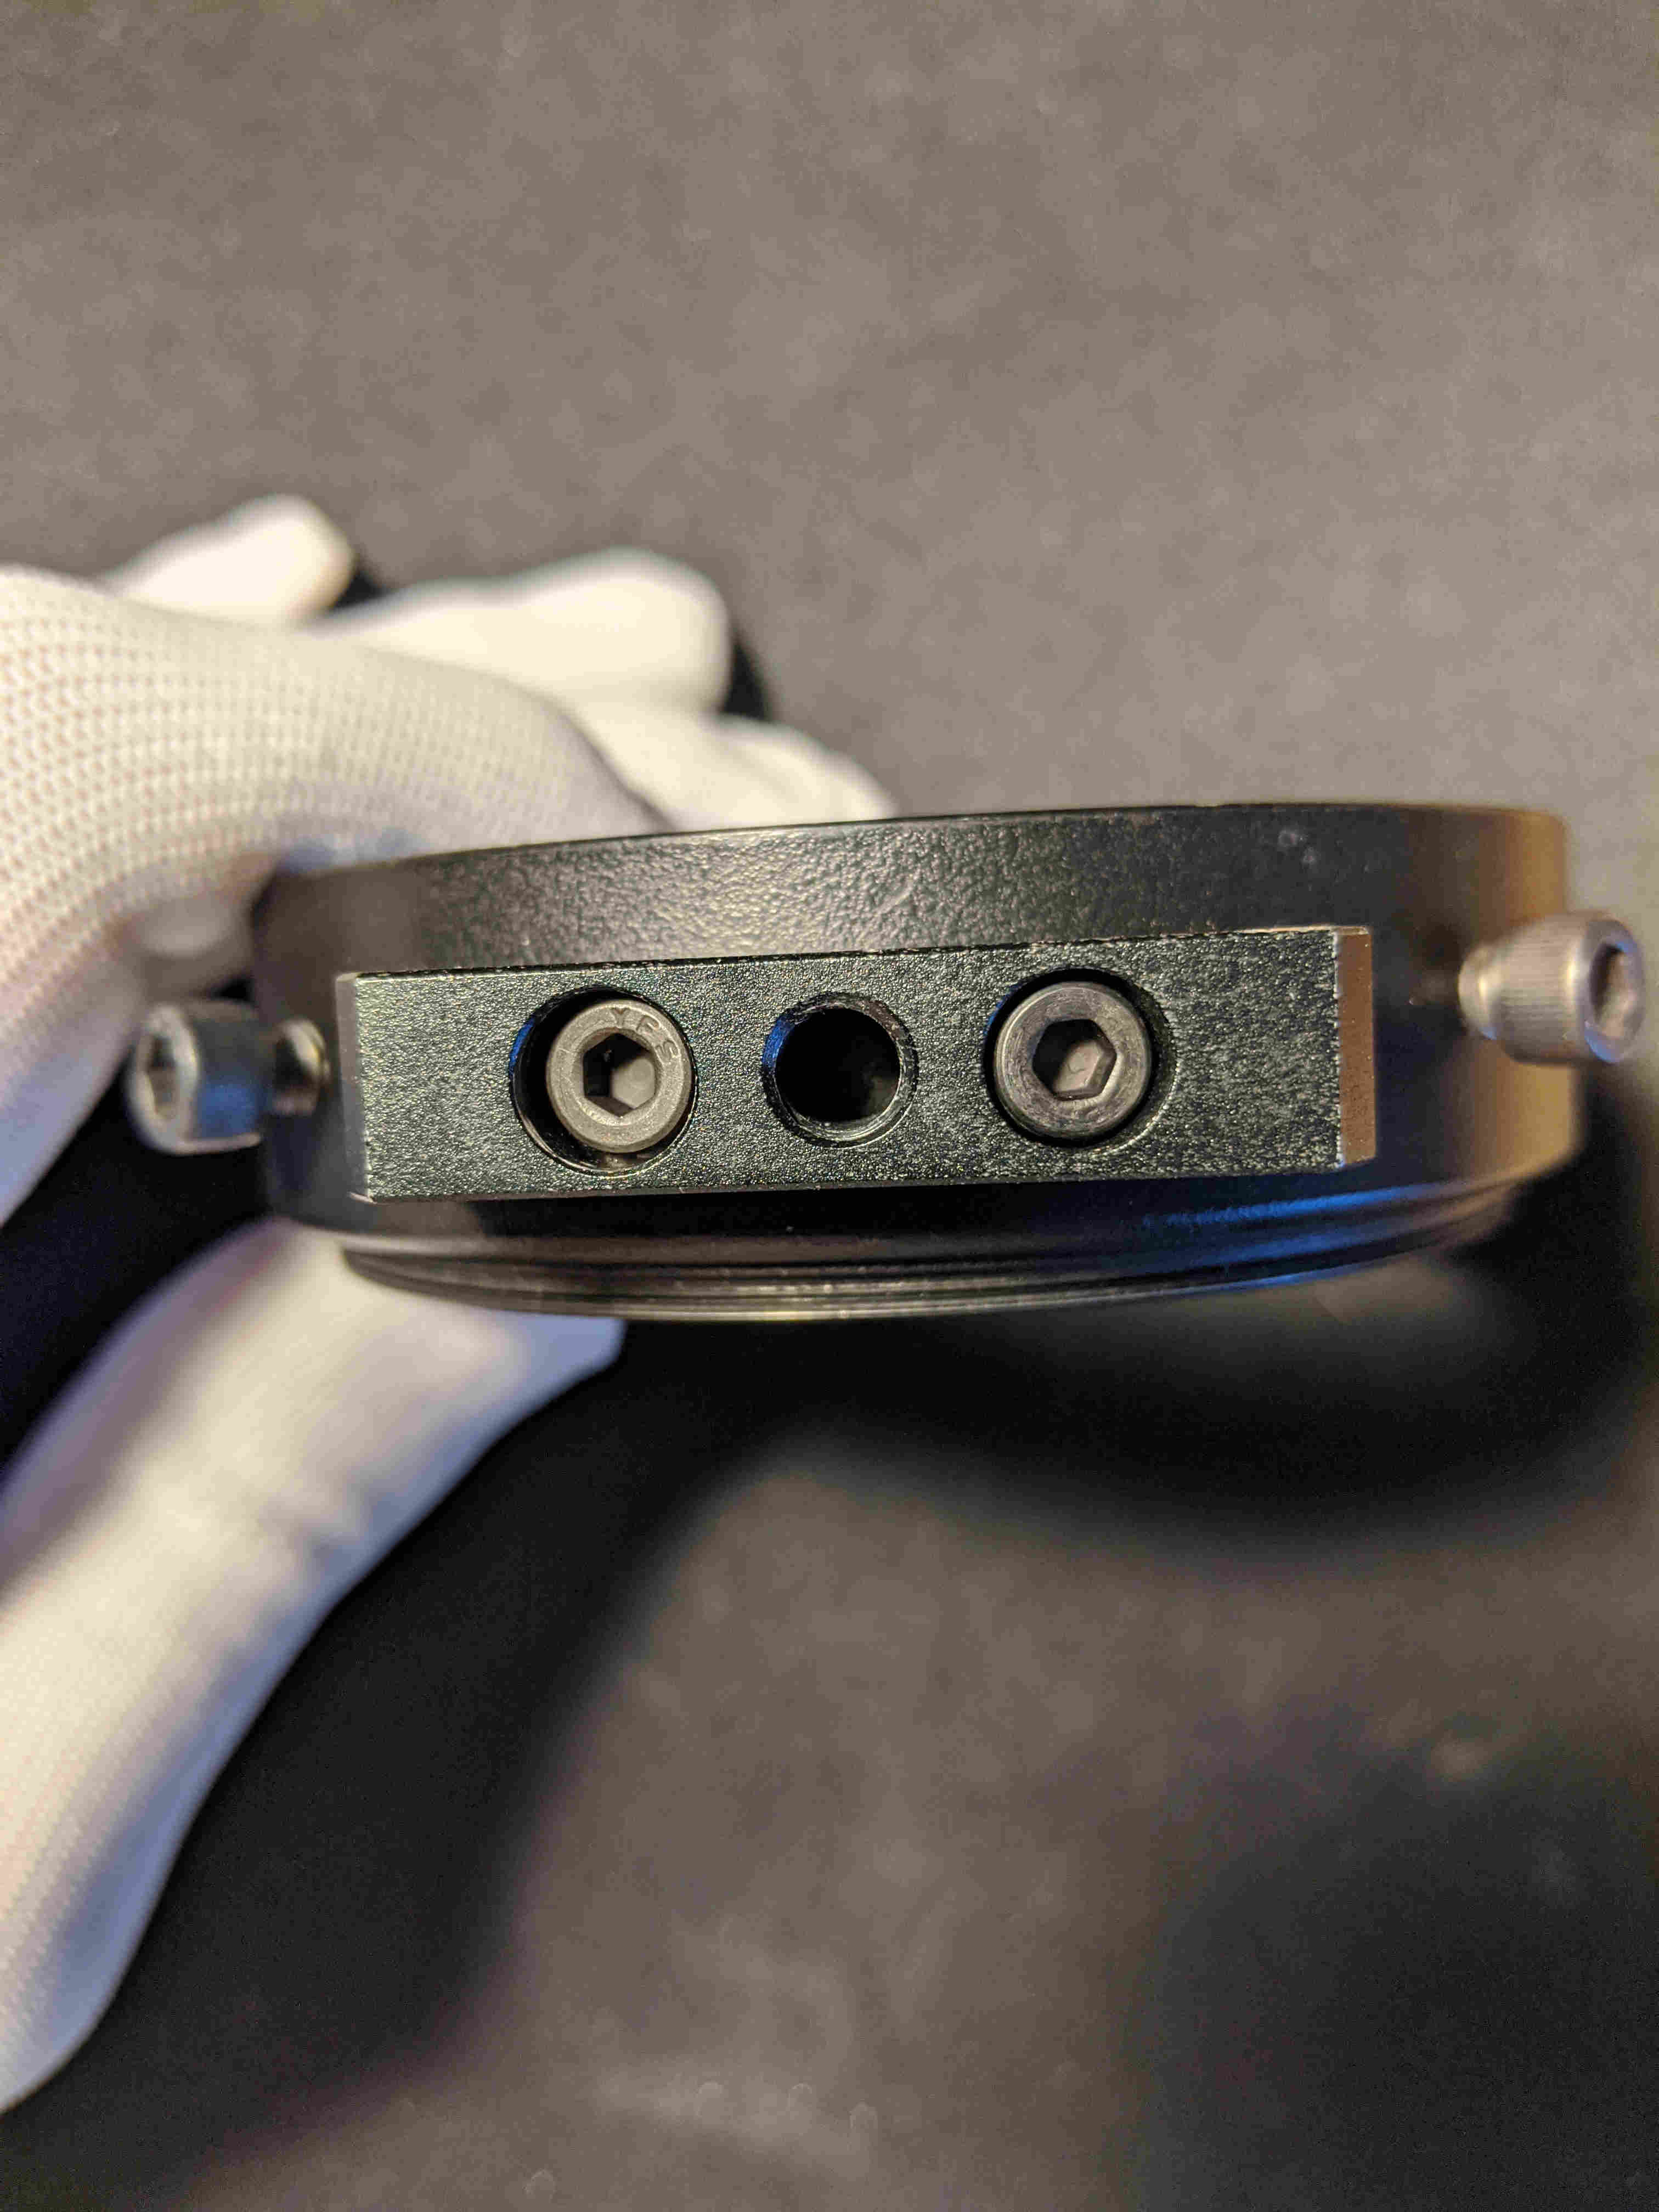
 Two flat head screws
 prevent the original VDH from being completely screwed off. Remove these two screws:
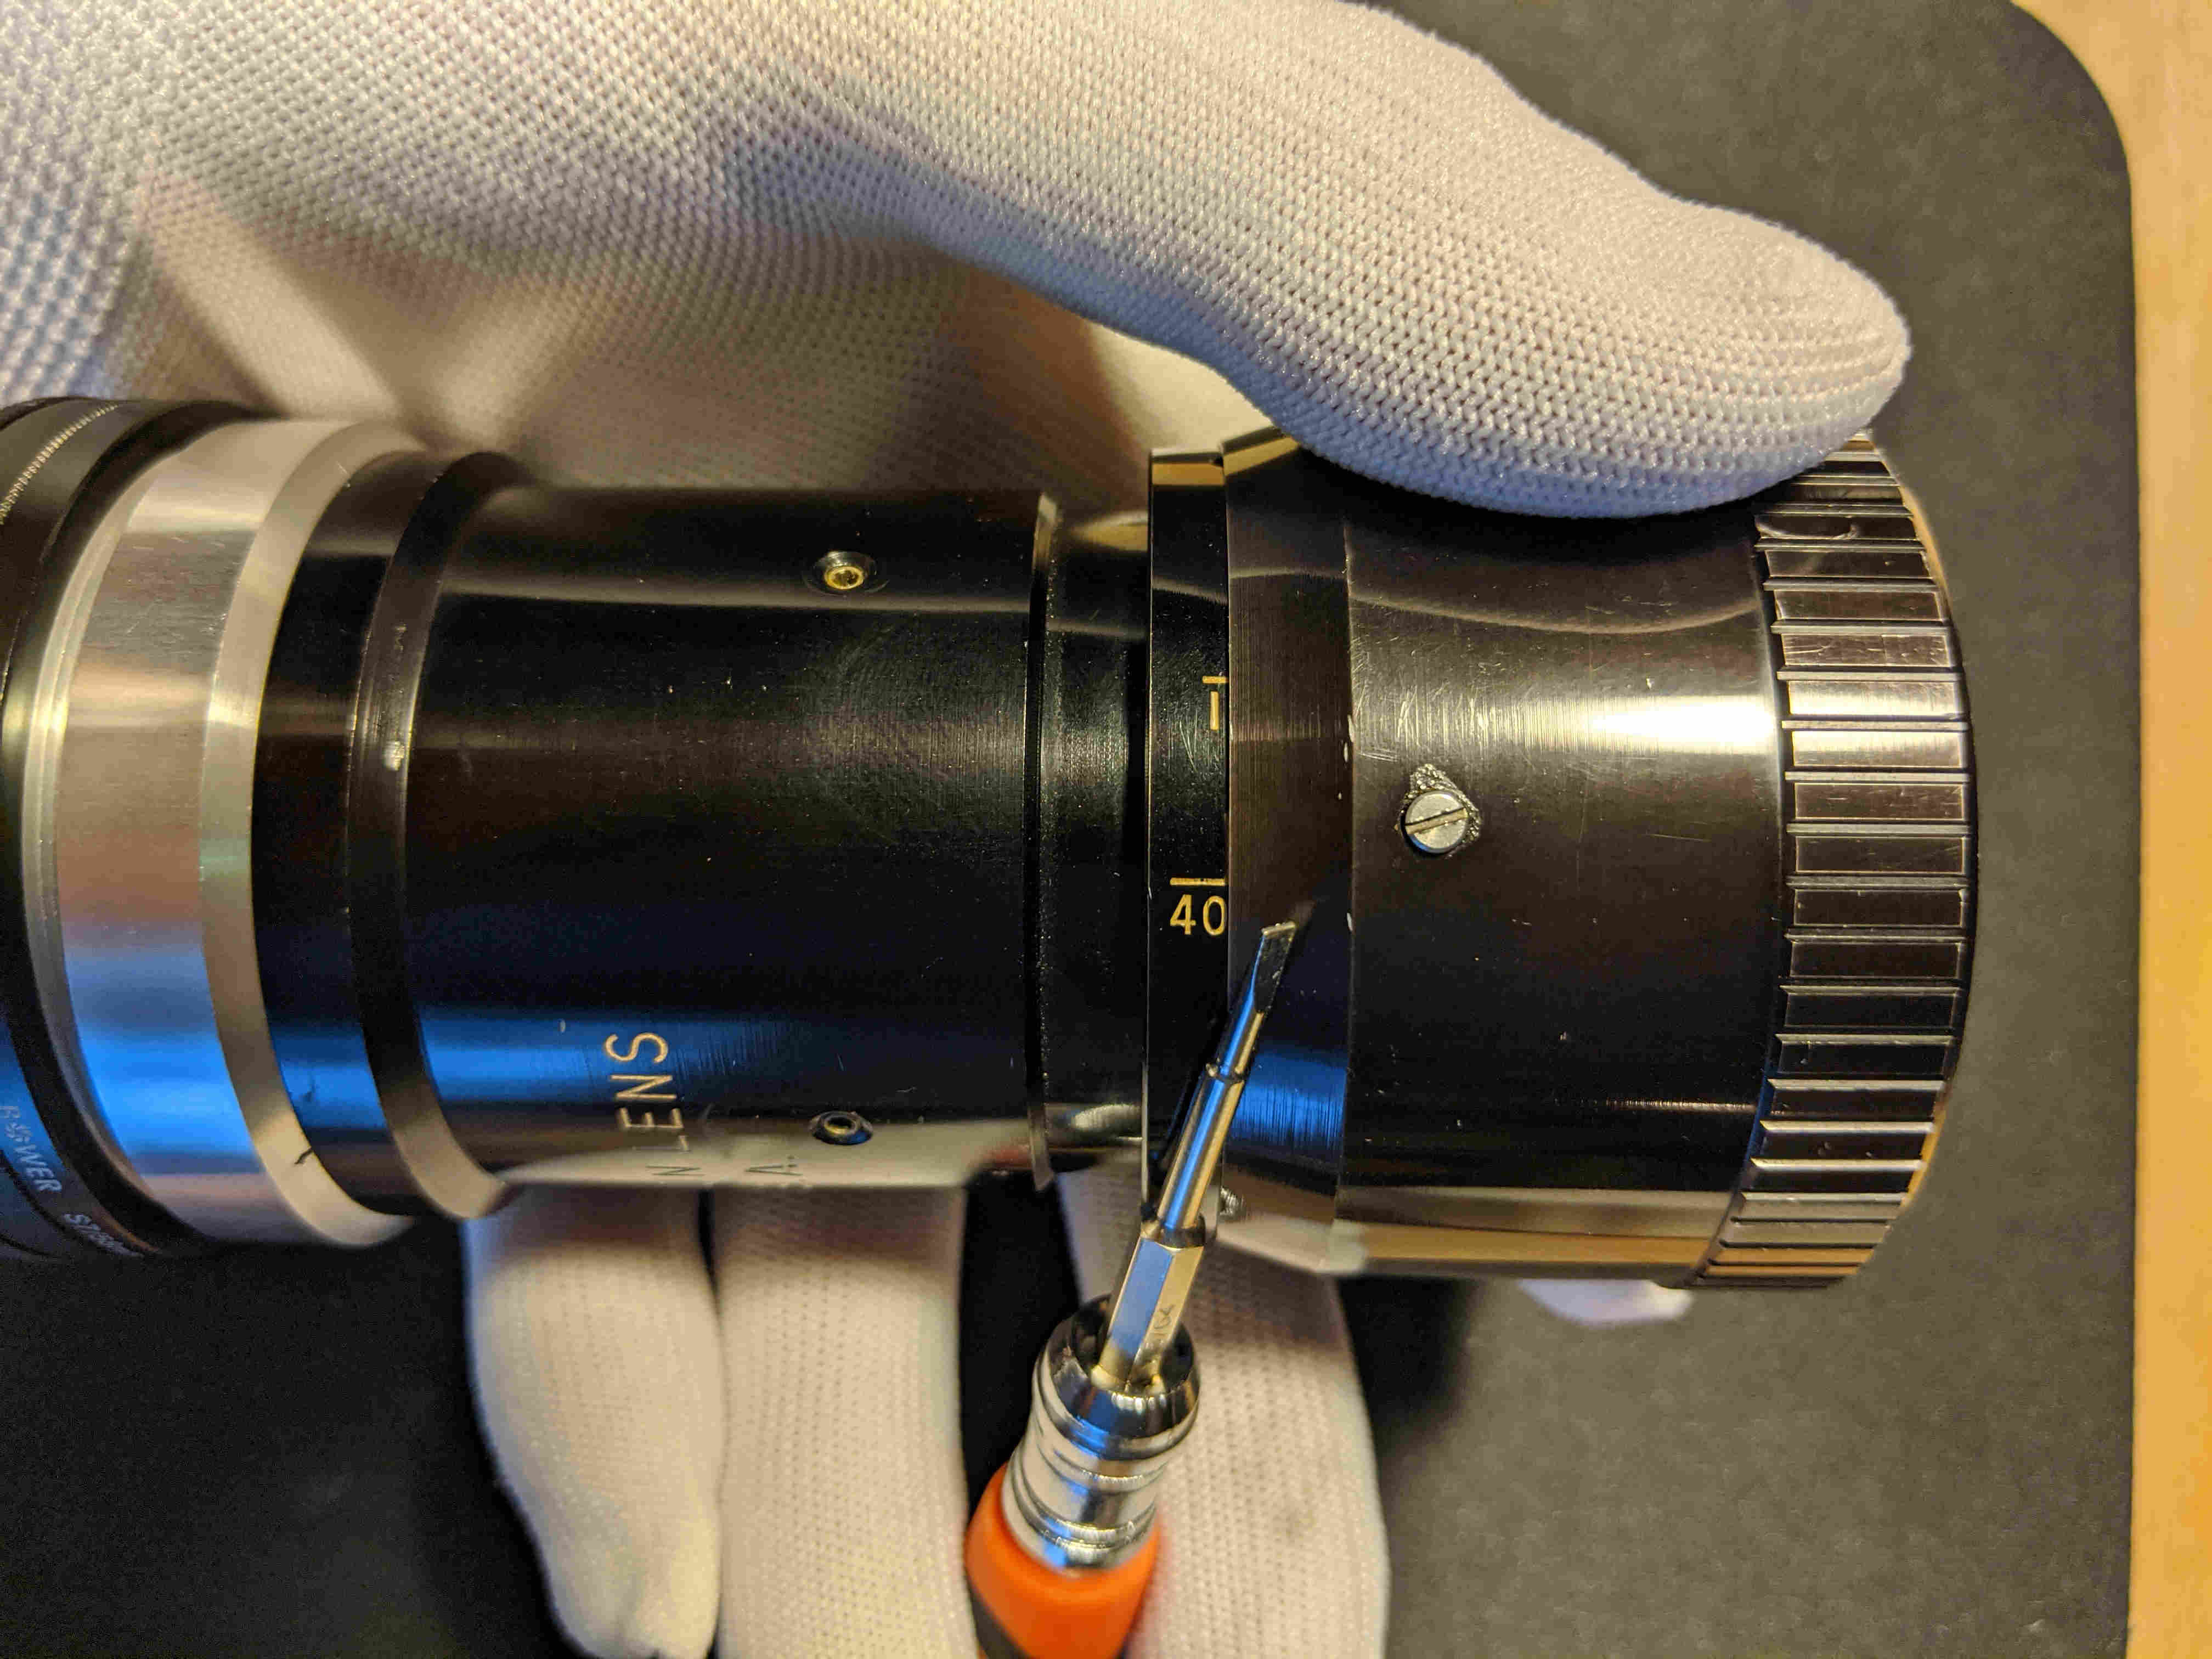
Once the screws are removed, twist off the original VDH completely:
The original VDH only contains one of the diopter elements, the other is built onto the anamorphoser. Our mod will remove the diopter in the original VDH and place it into the new VDH.
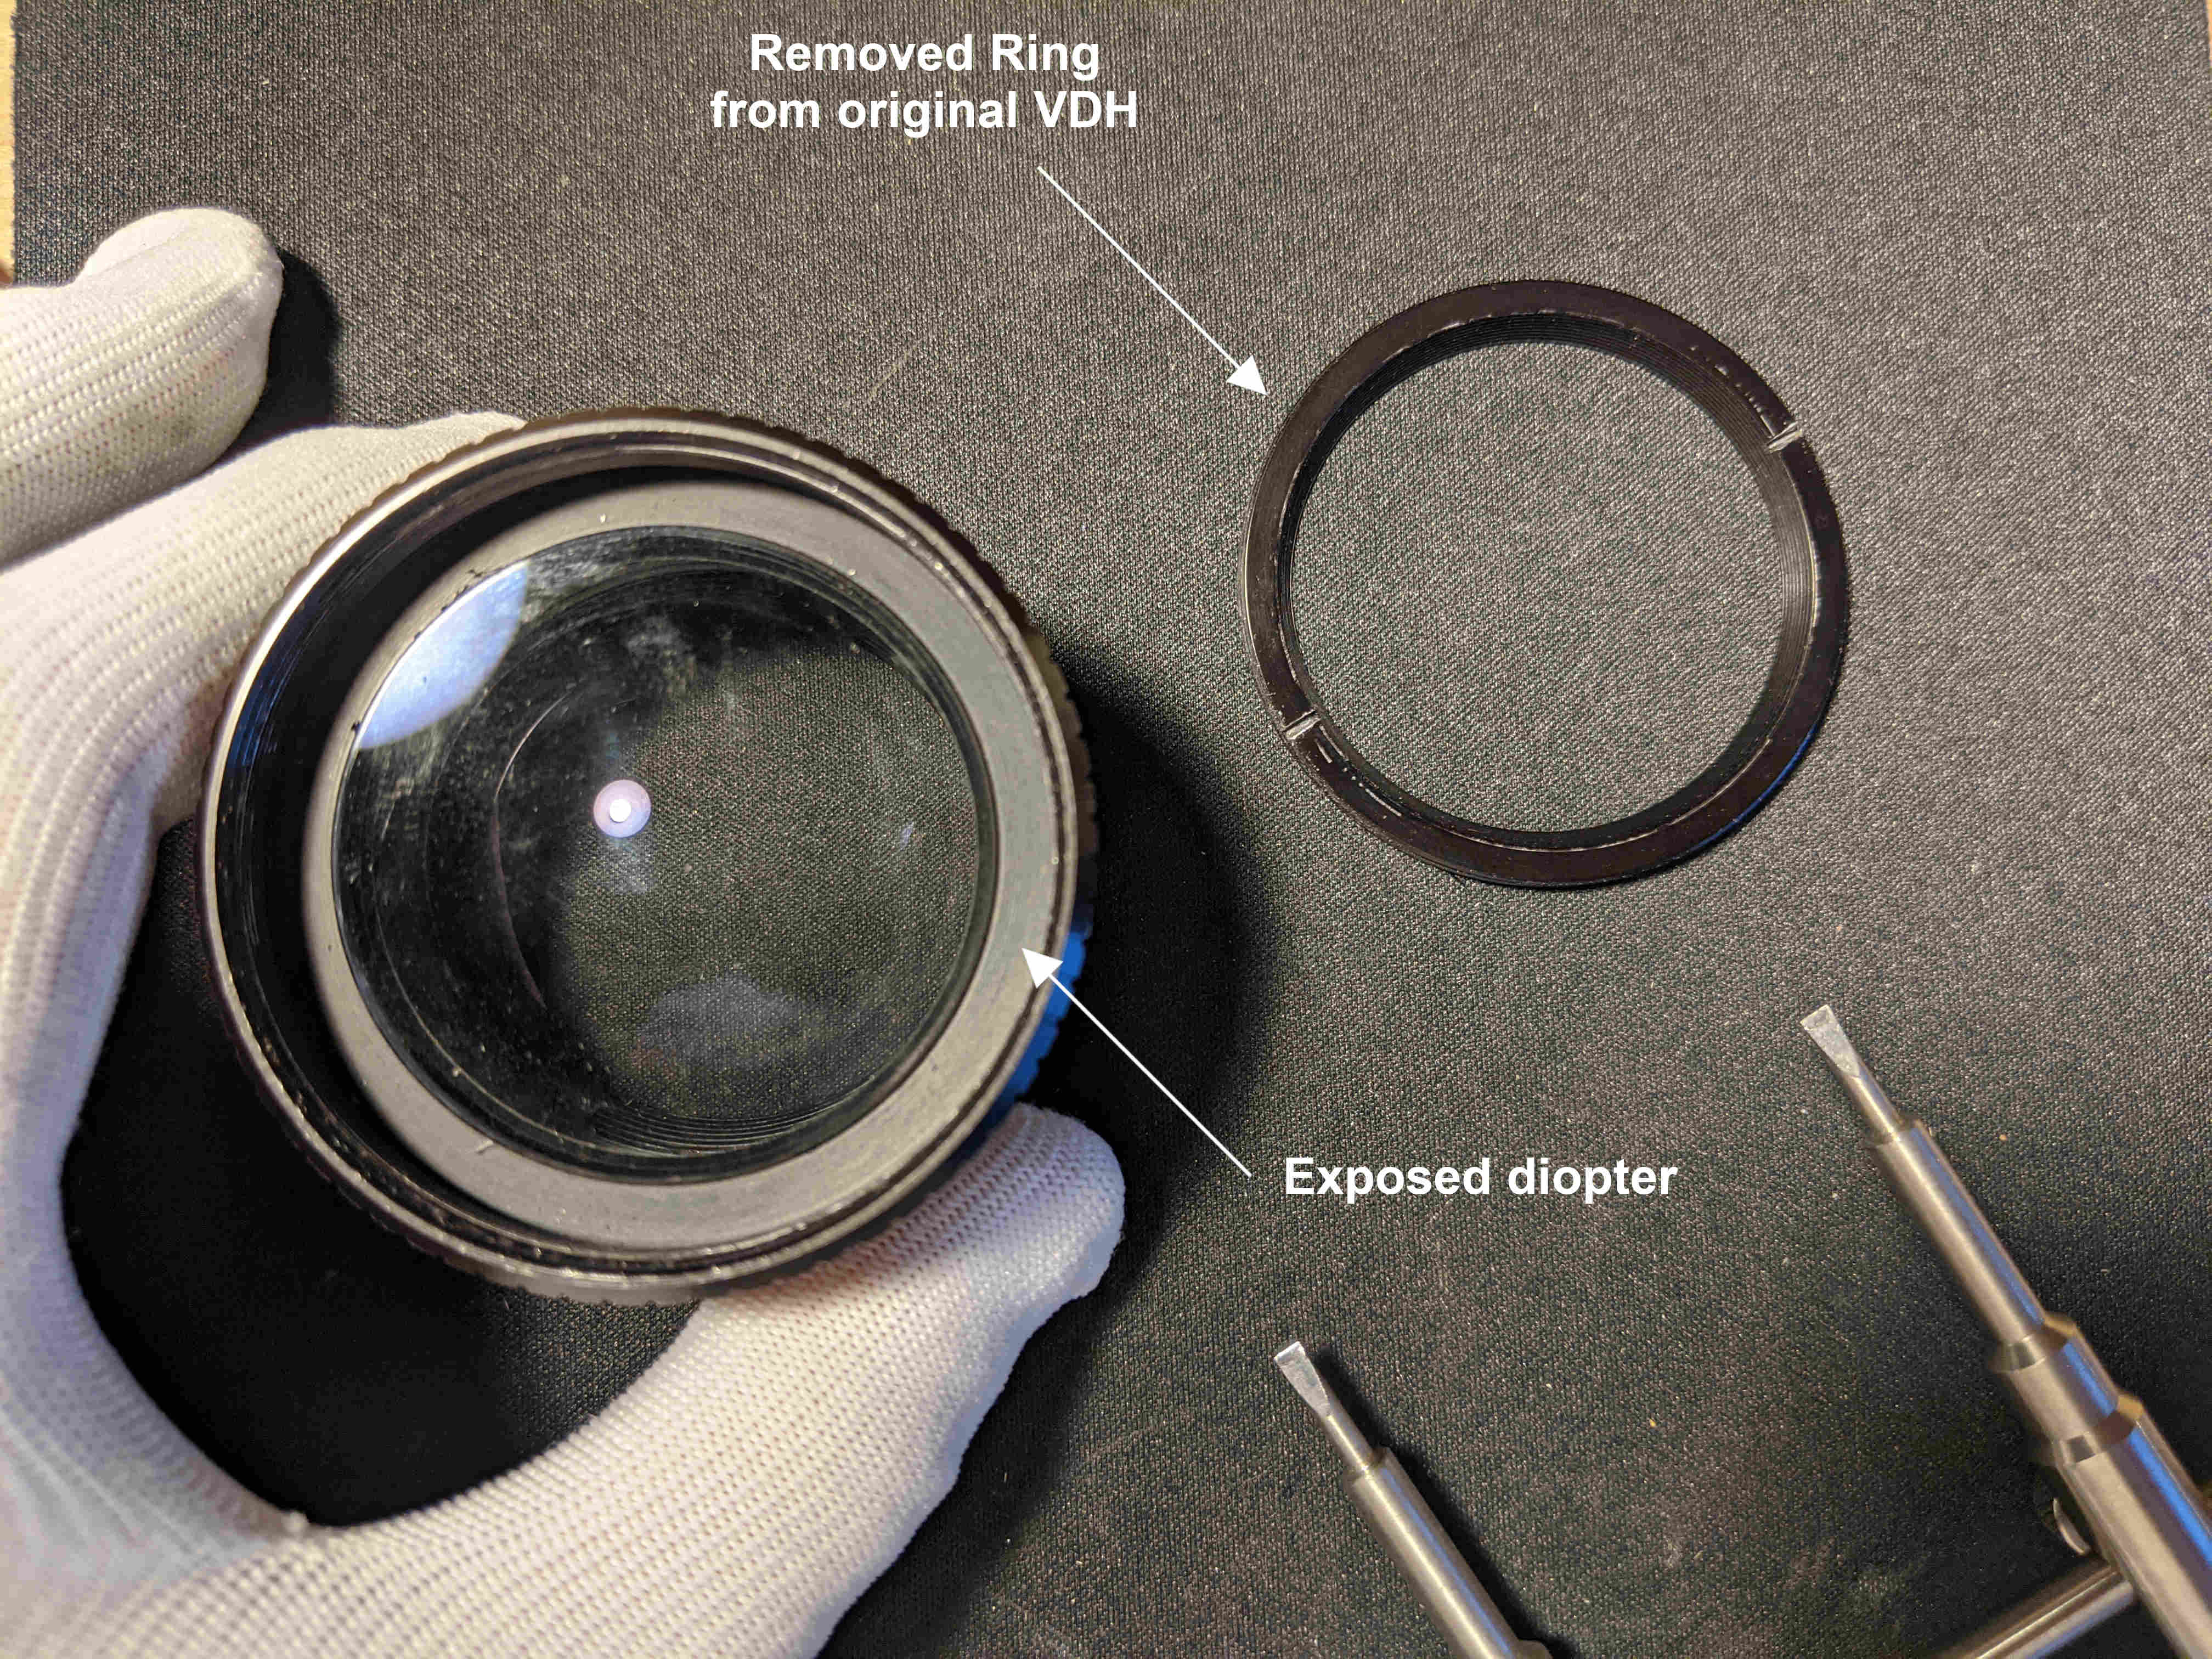
Using a
spanner wrench, unscrew the ring that holds the diopter in the original VDH.
This ring will be tough to unscrew and will require a considerable amount of force. It’s best to lock the spanner wrench and use
rubber gloves to grip the VDH. Other cinematographers have tried lightly tapping the exterior of the VDH to help loosen the ring. There is no glue in the rings of the VDH. Once the ring is removed, push out the diopter with your finger. (It’s recommended to use
cotton or cotton like gloves to avoid smudges and scratches)
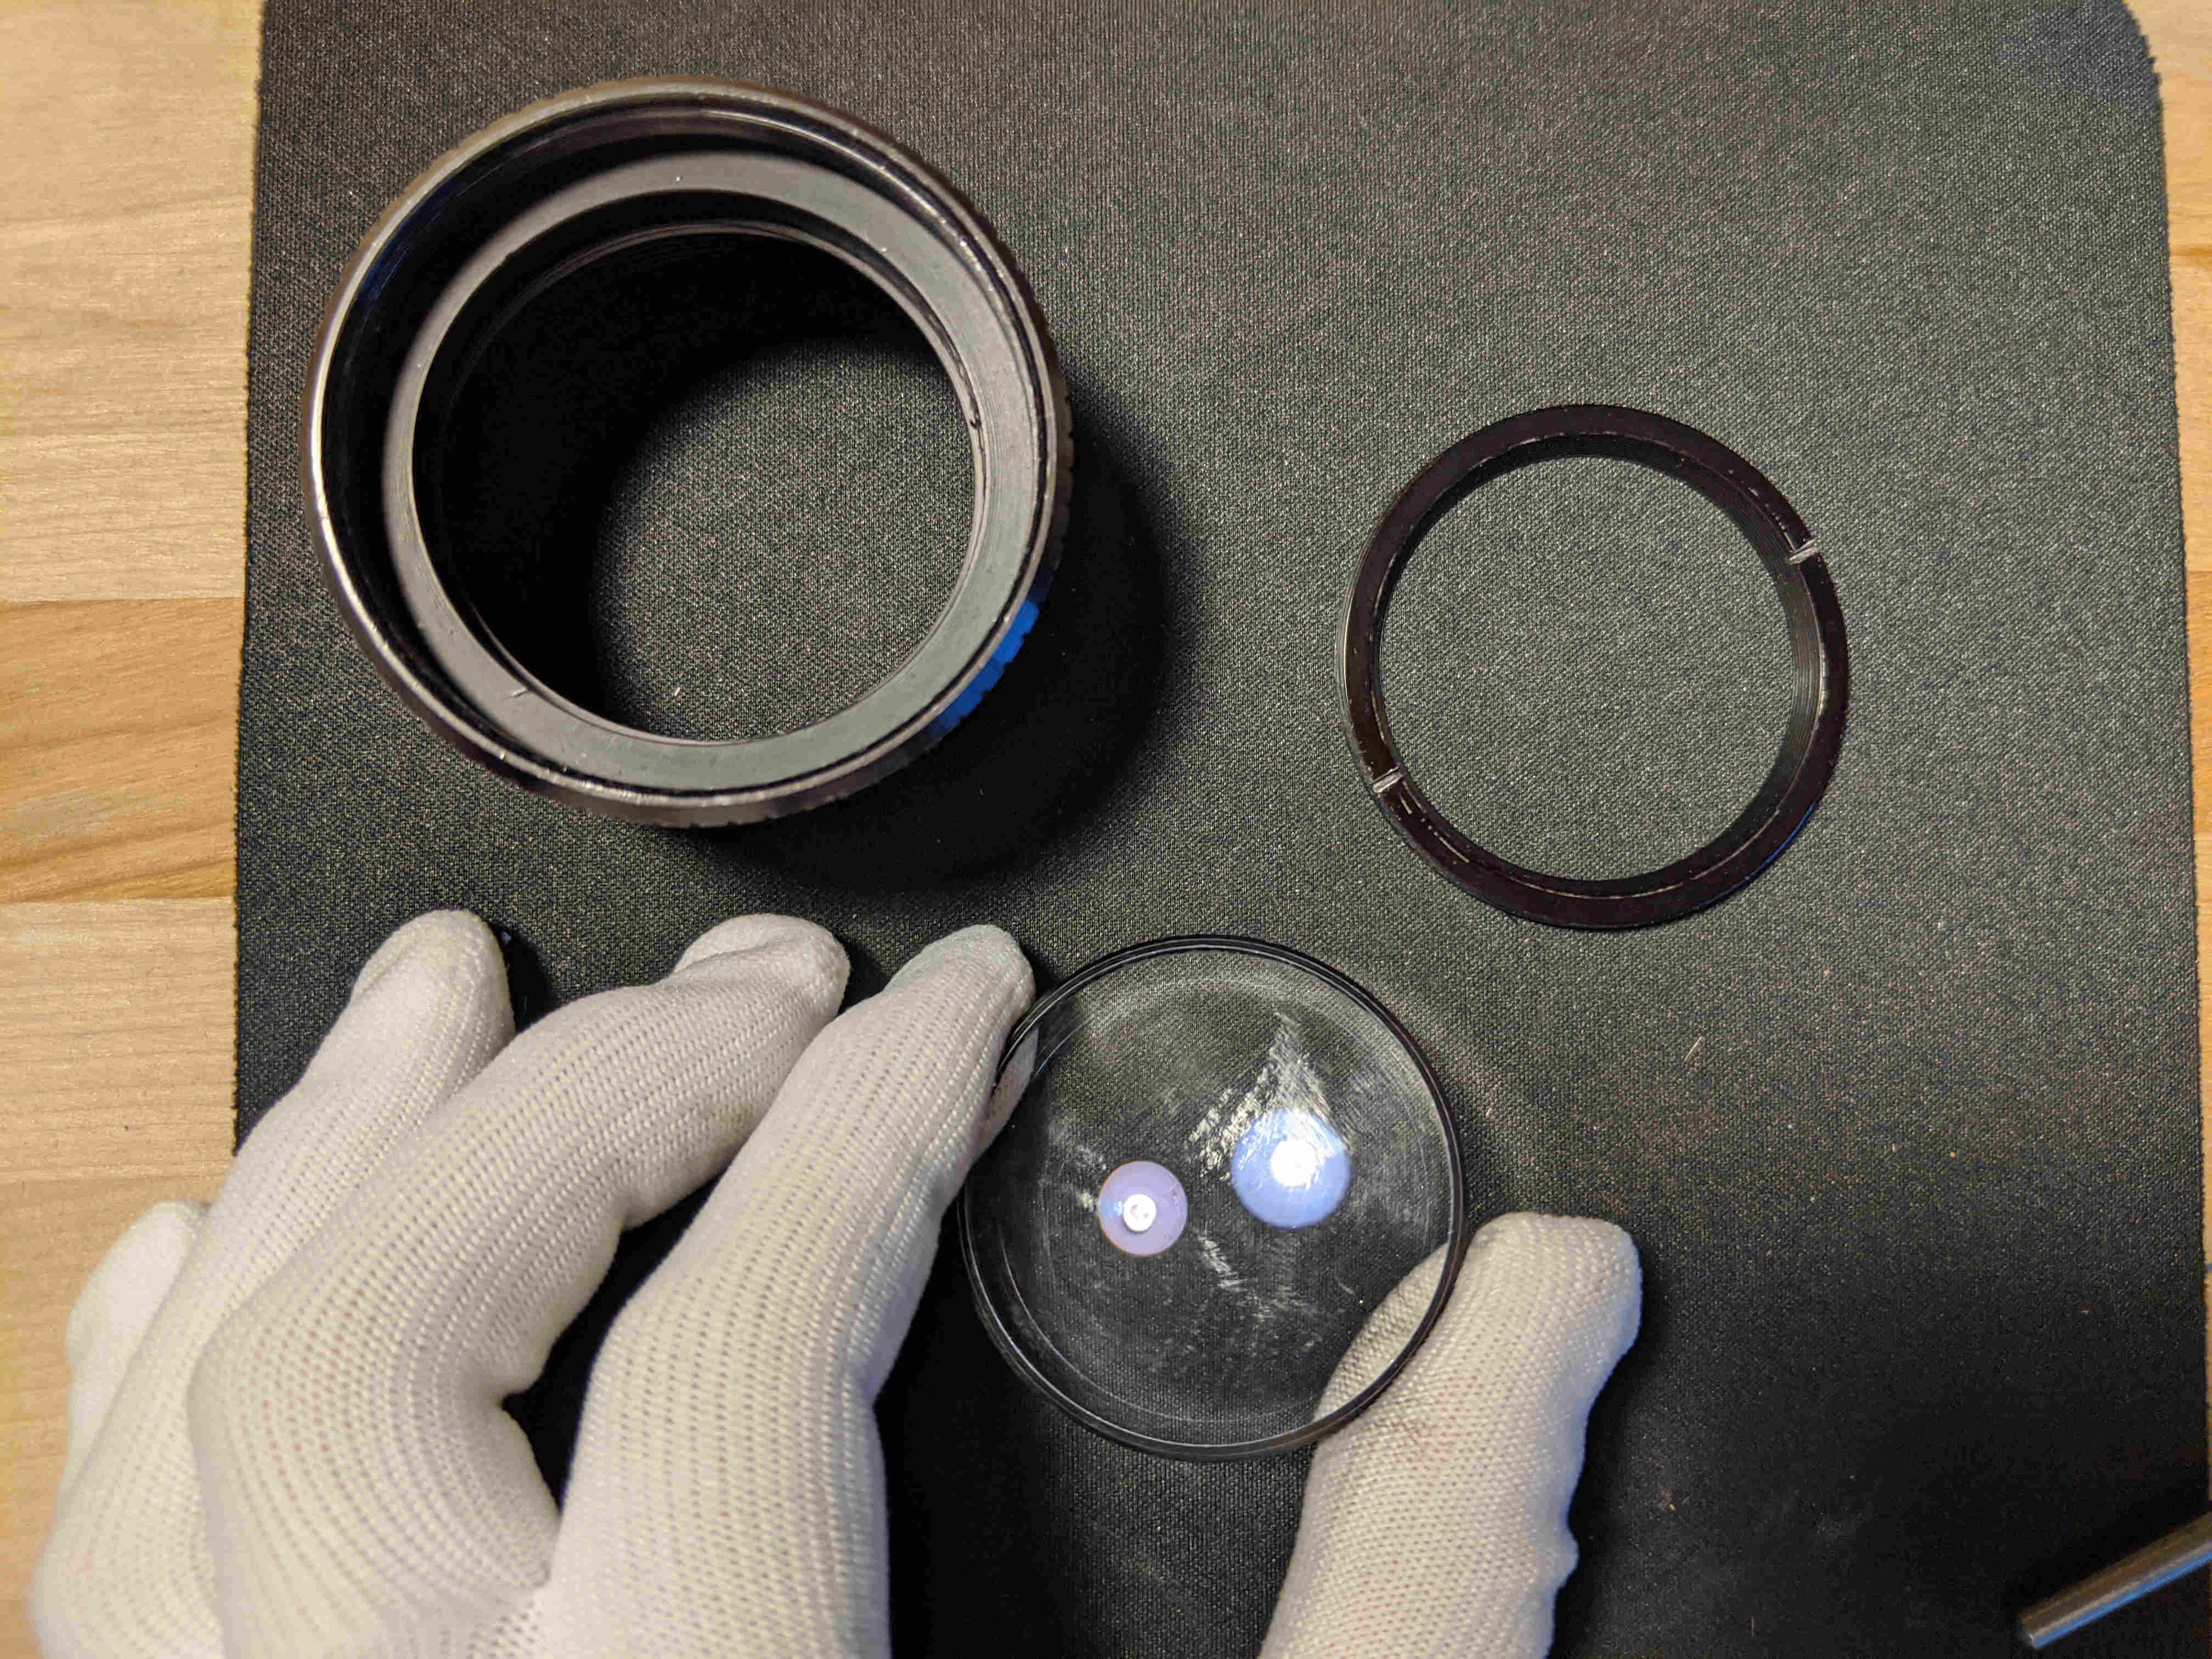
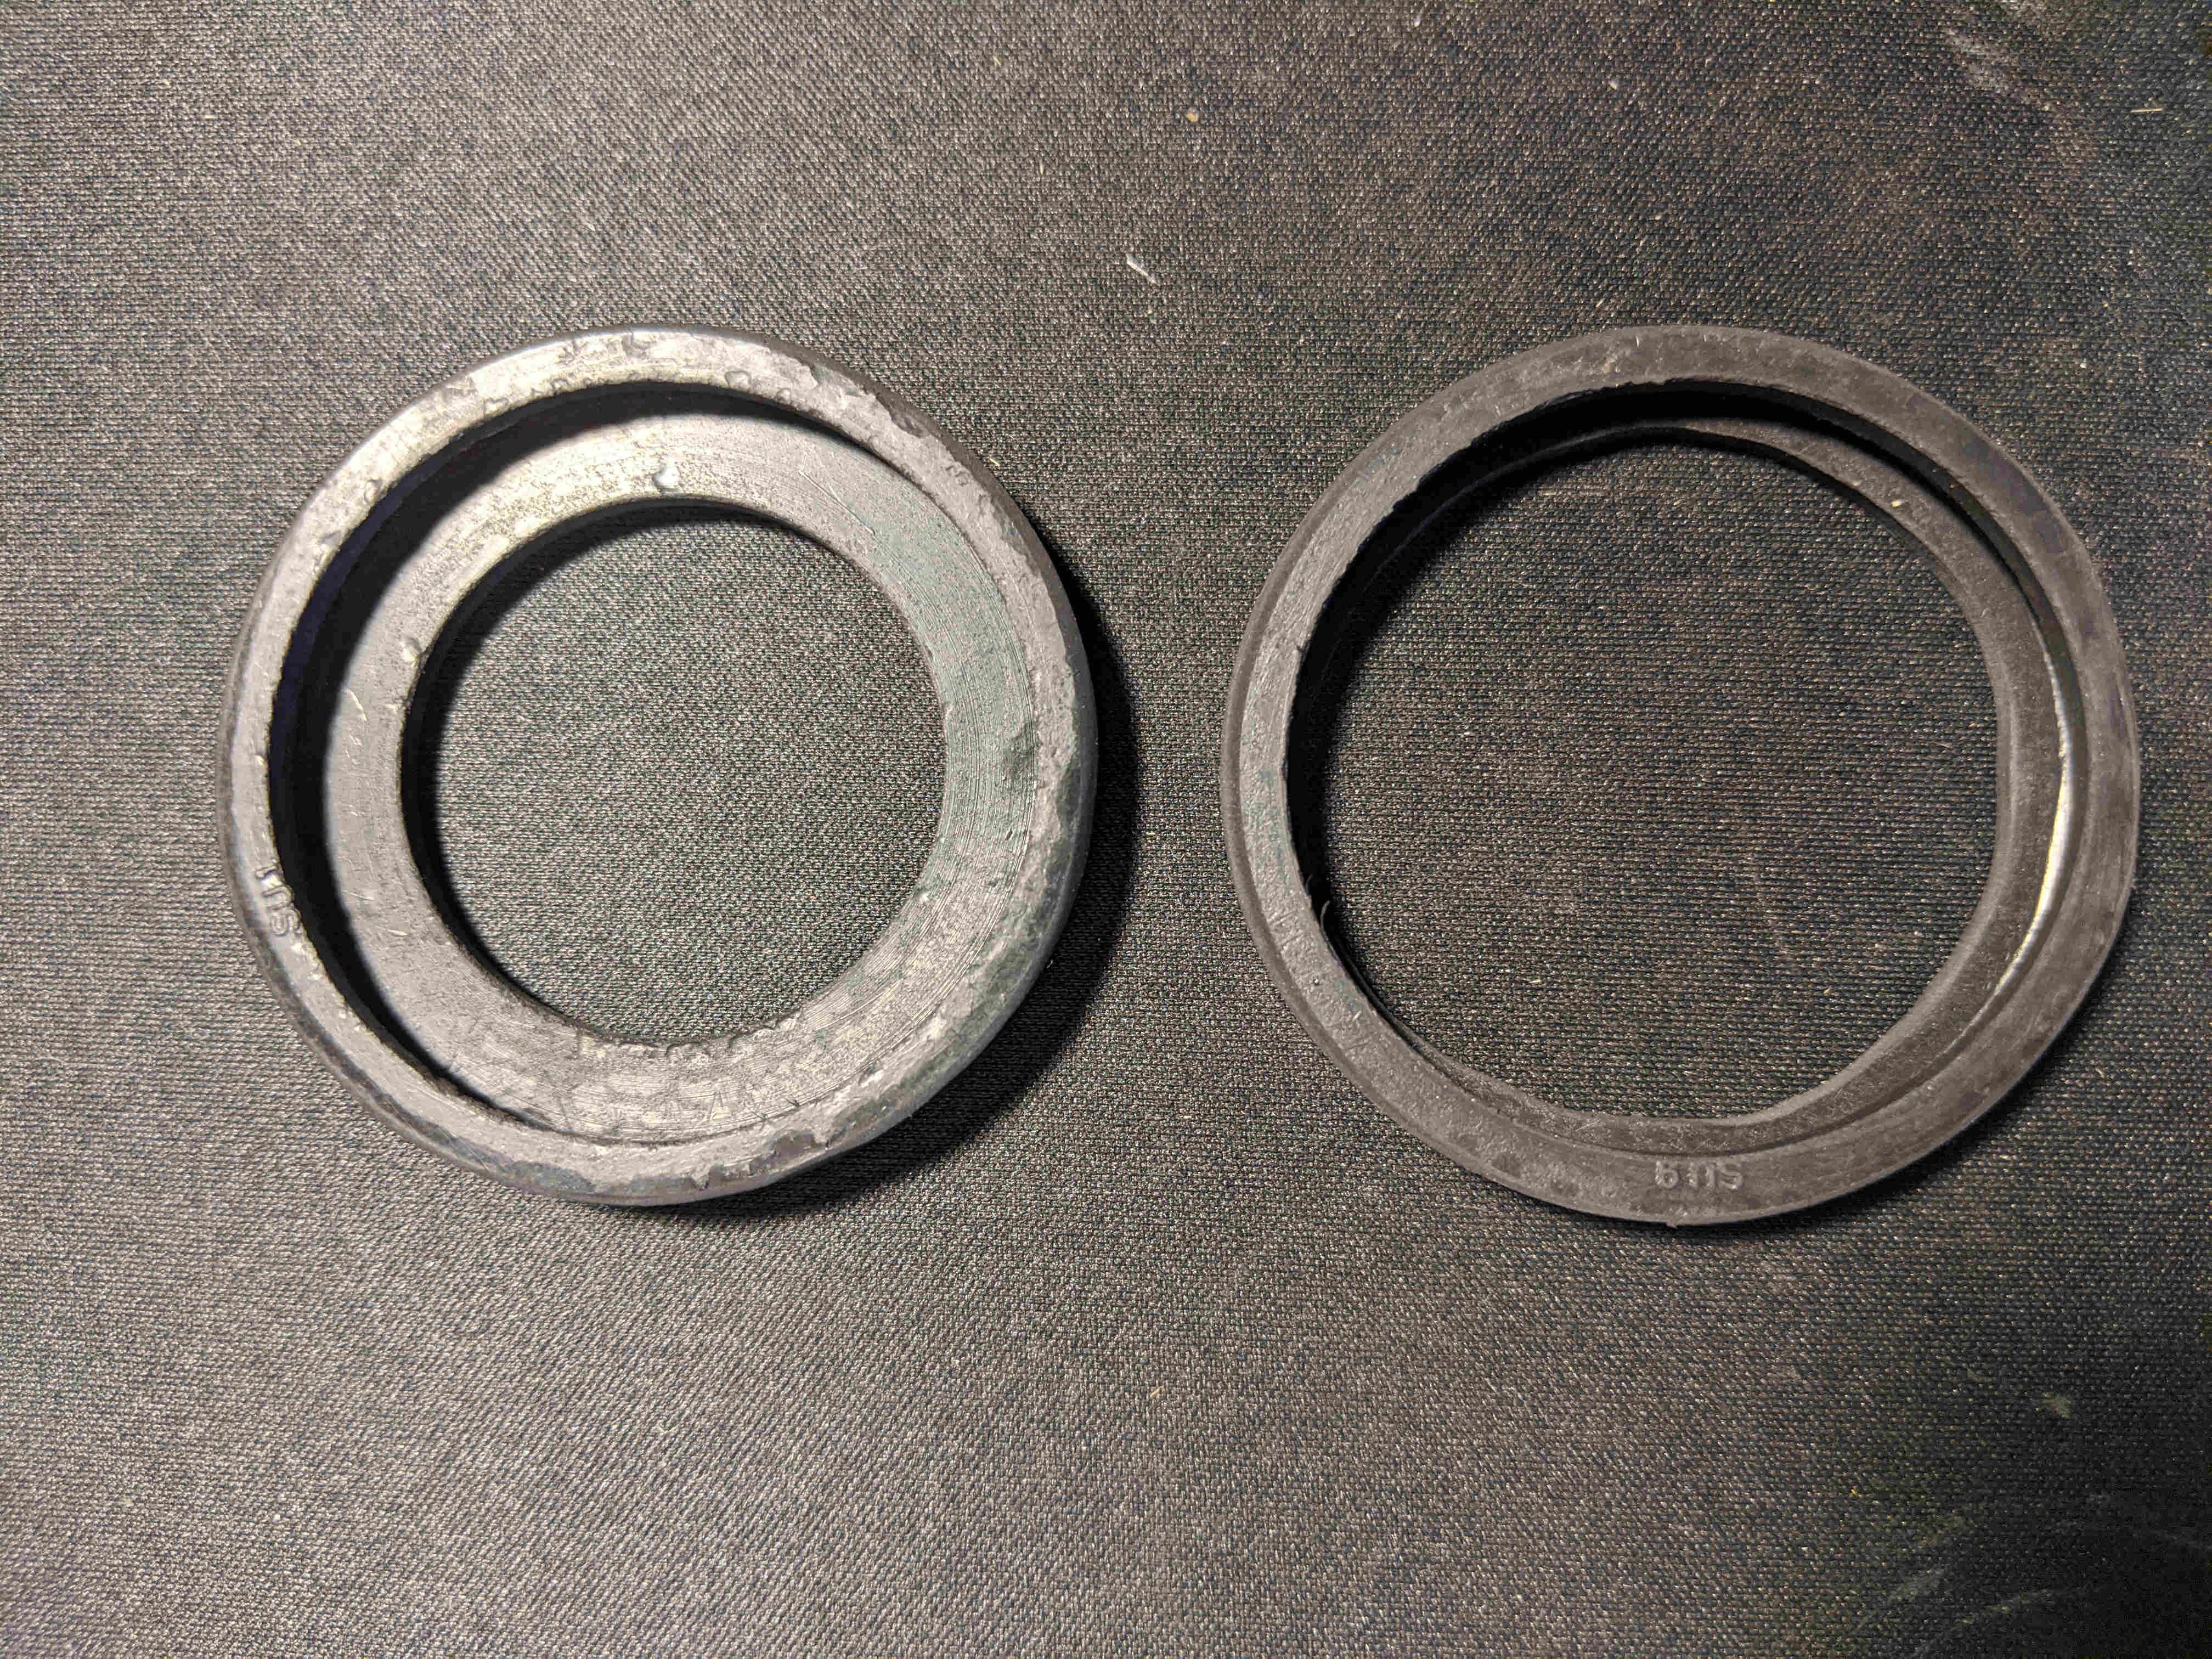
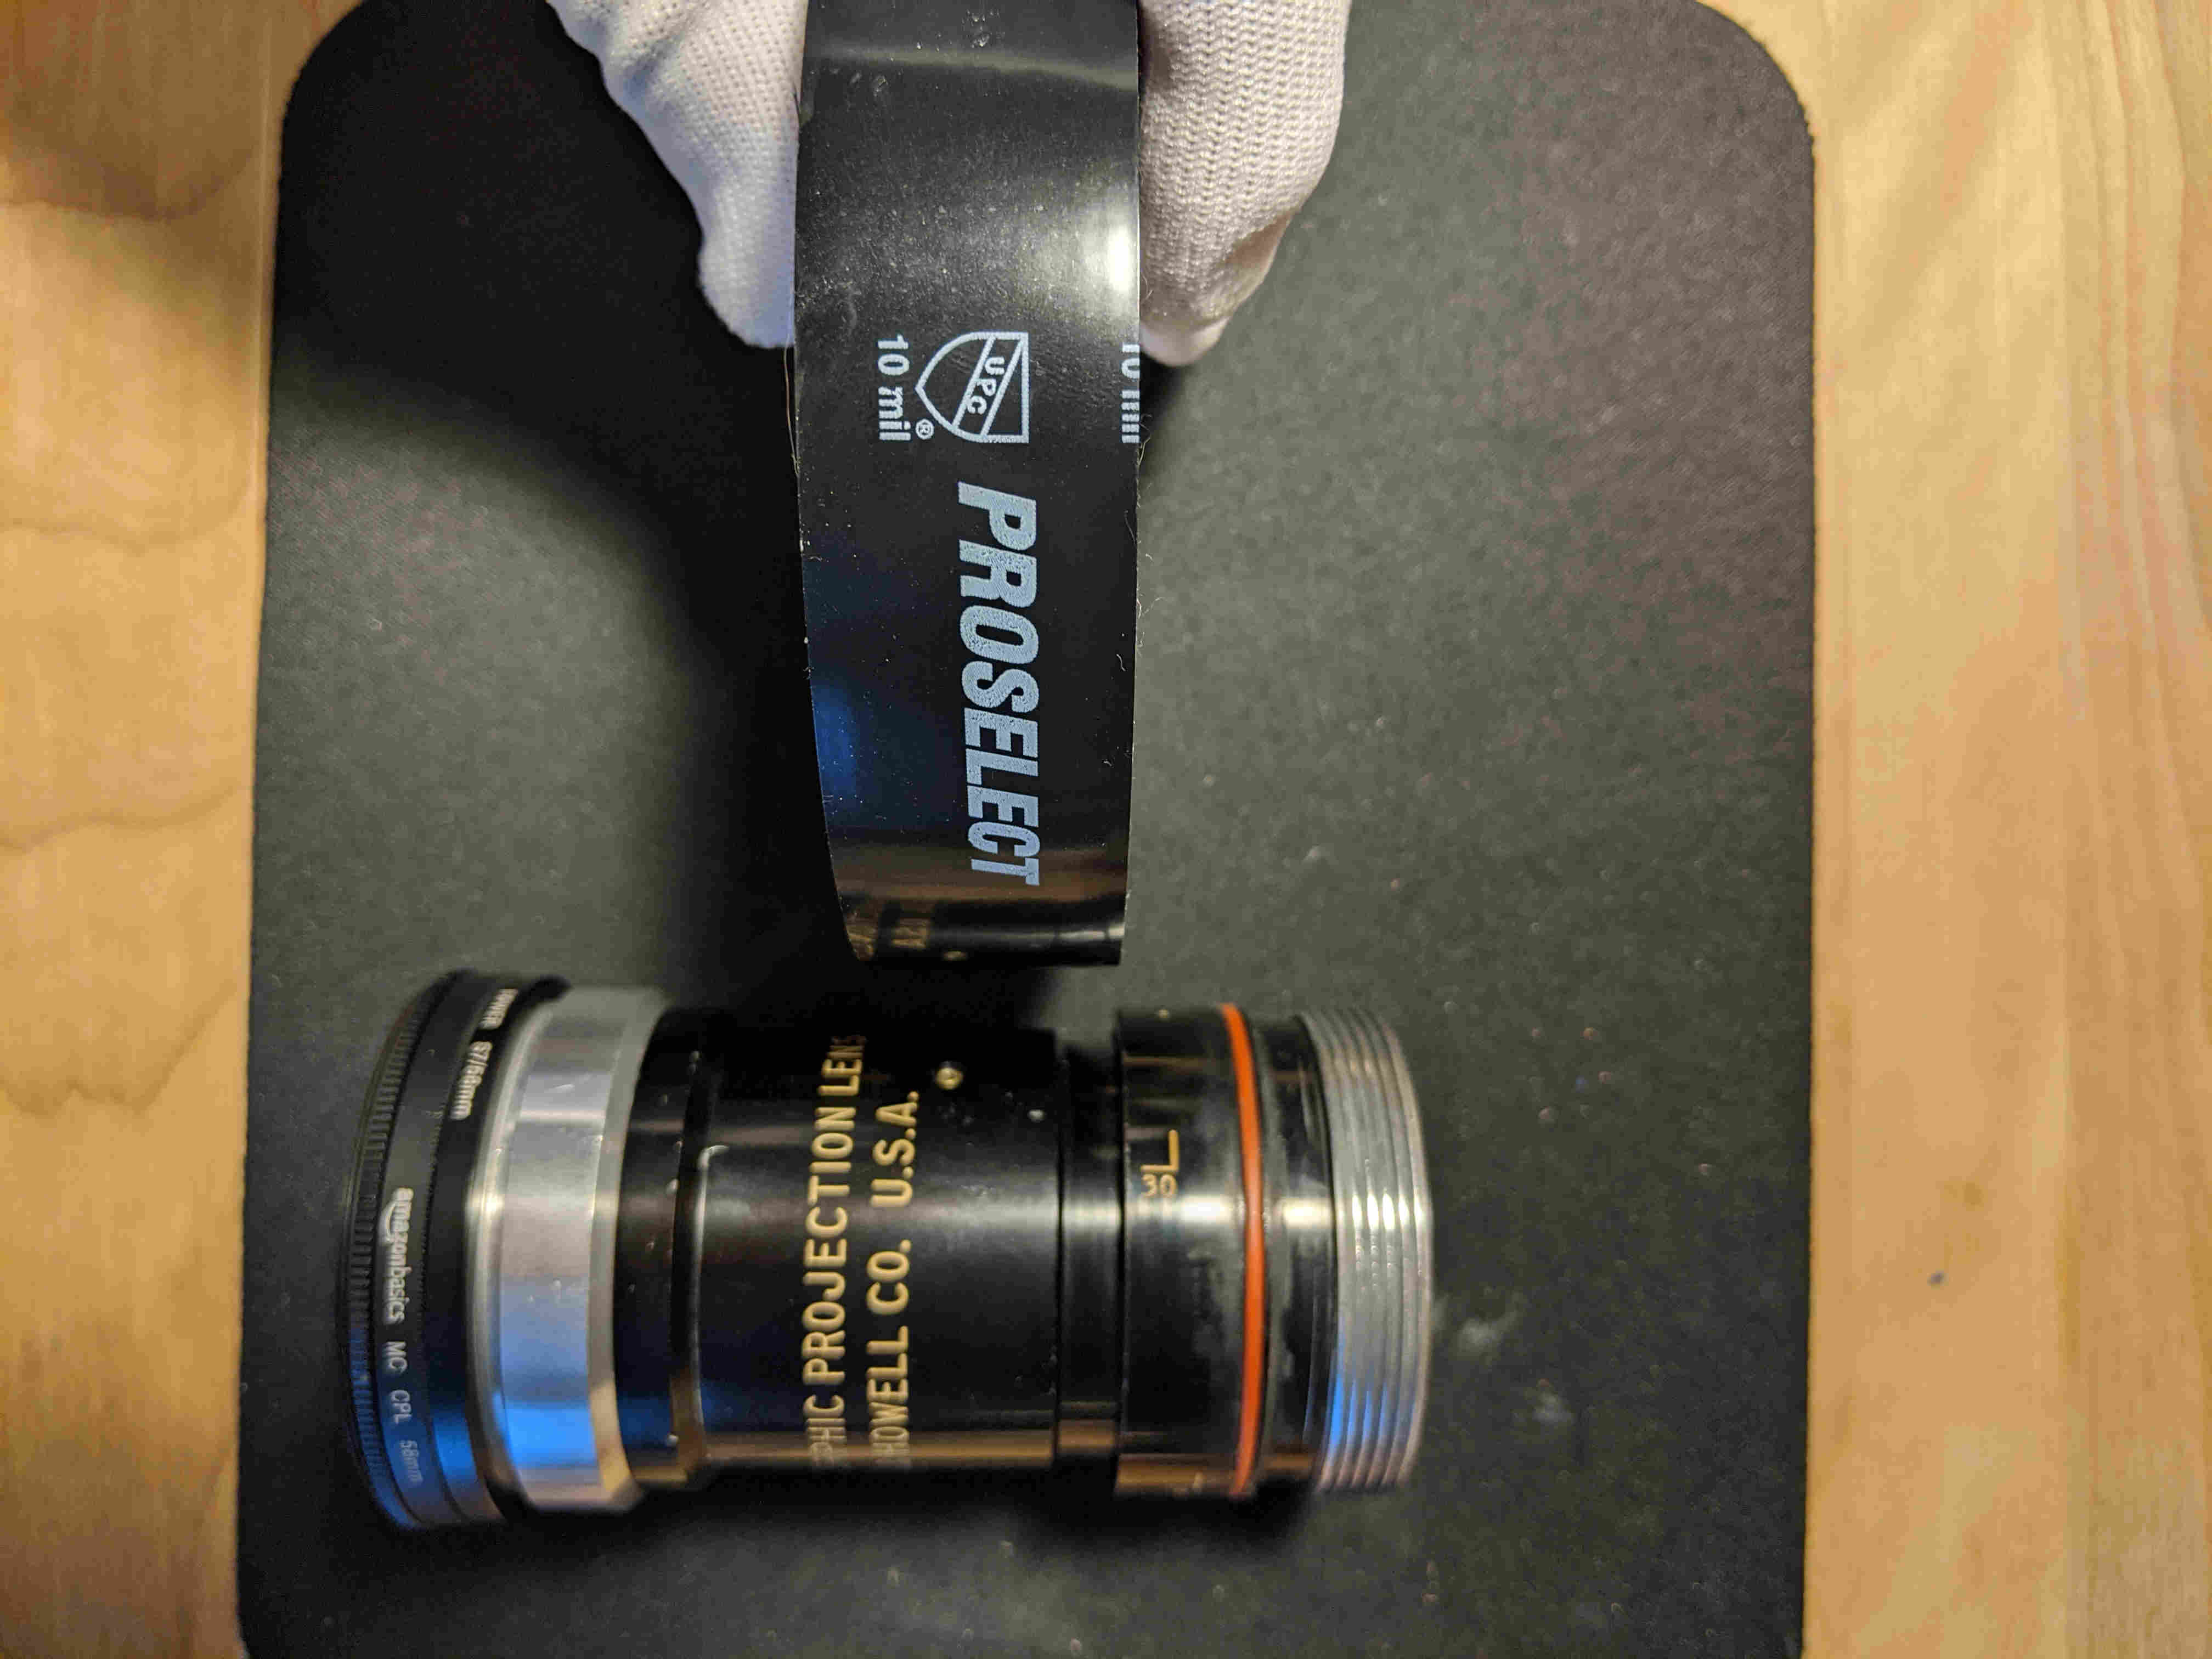
Above are the three removed items: the original helicoid, the ring that held the diopter, and the diopter itself.
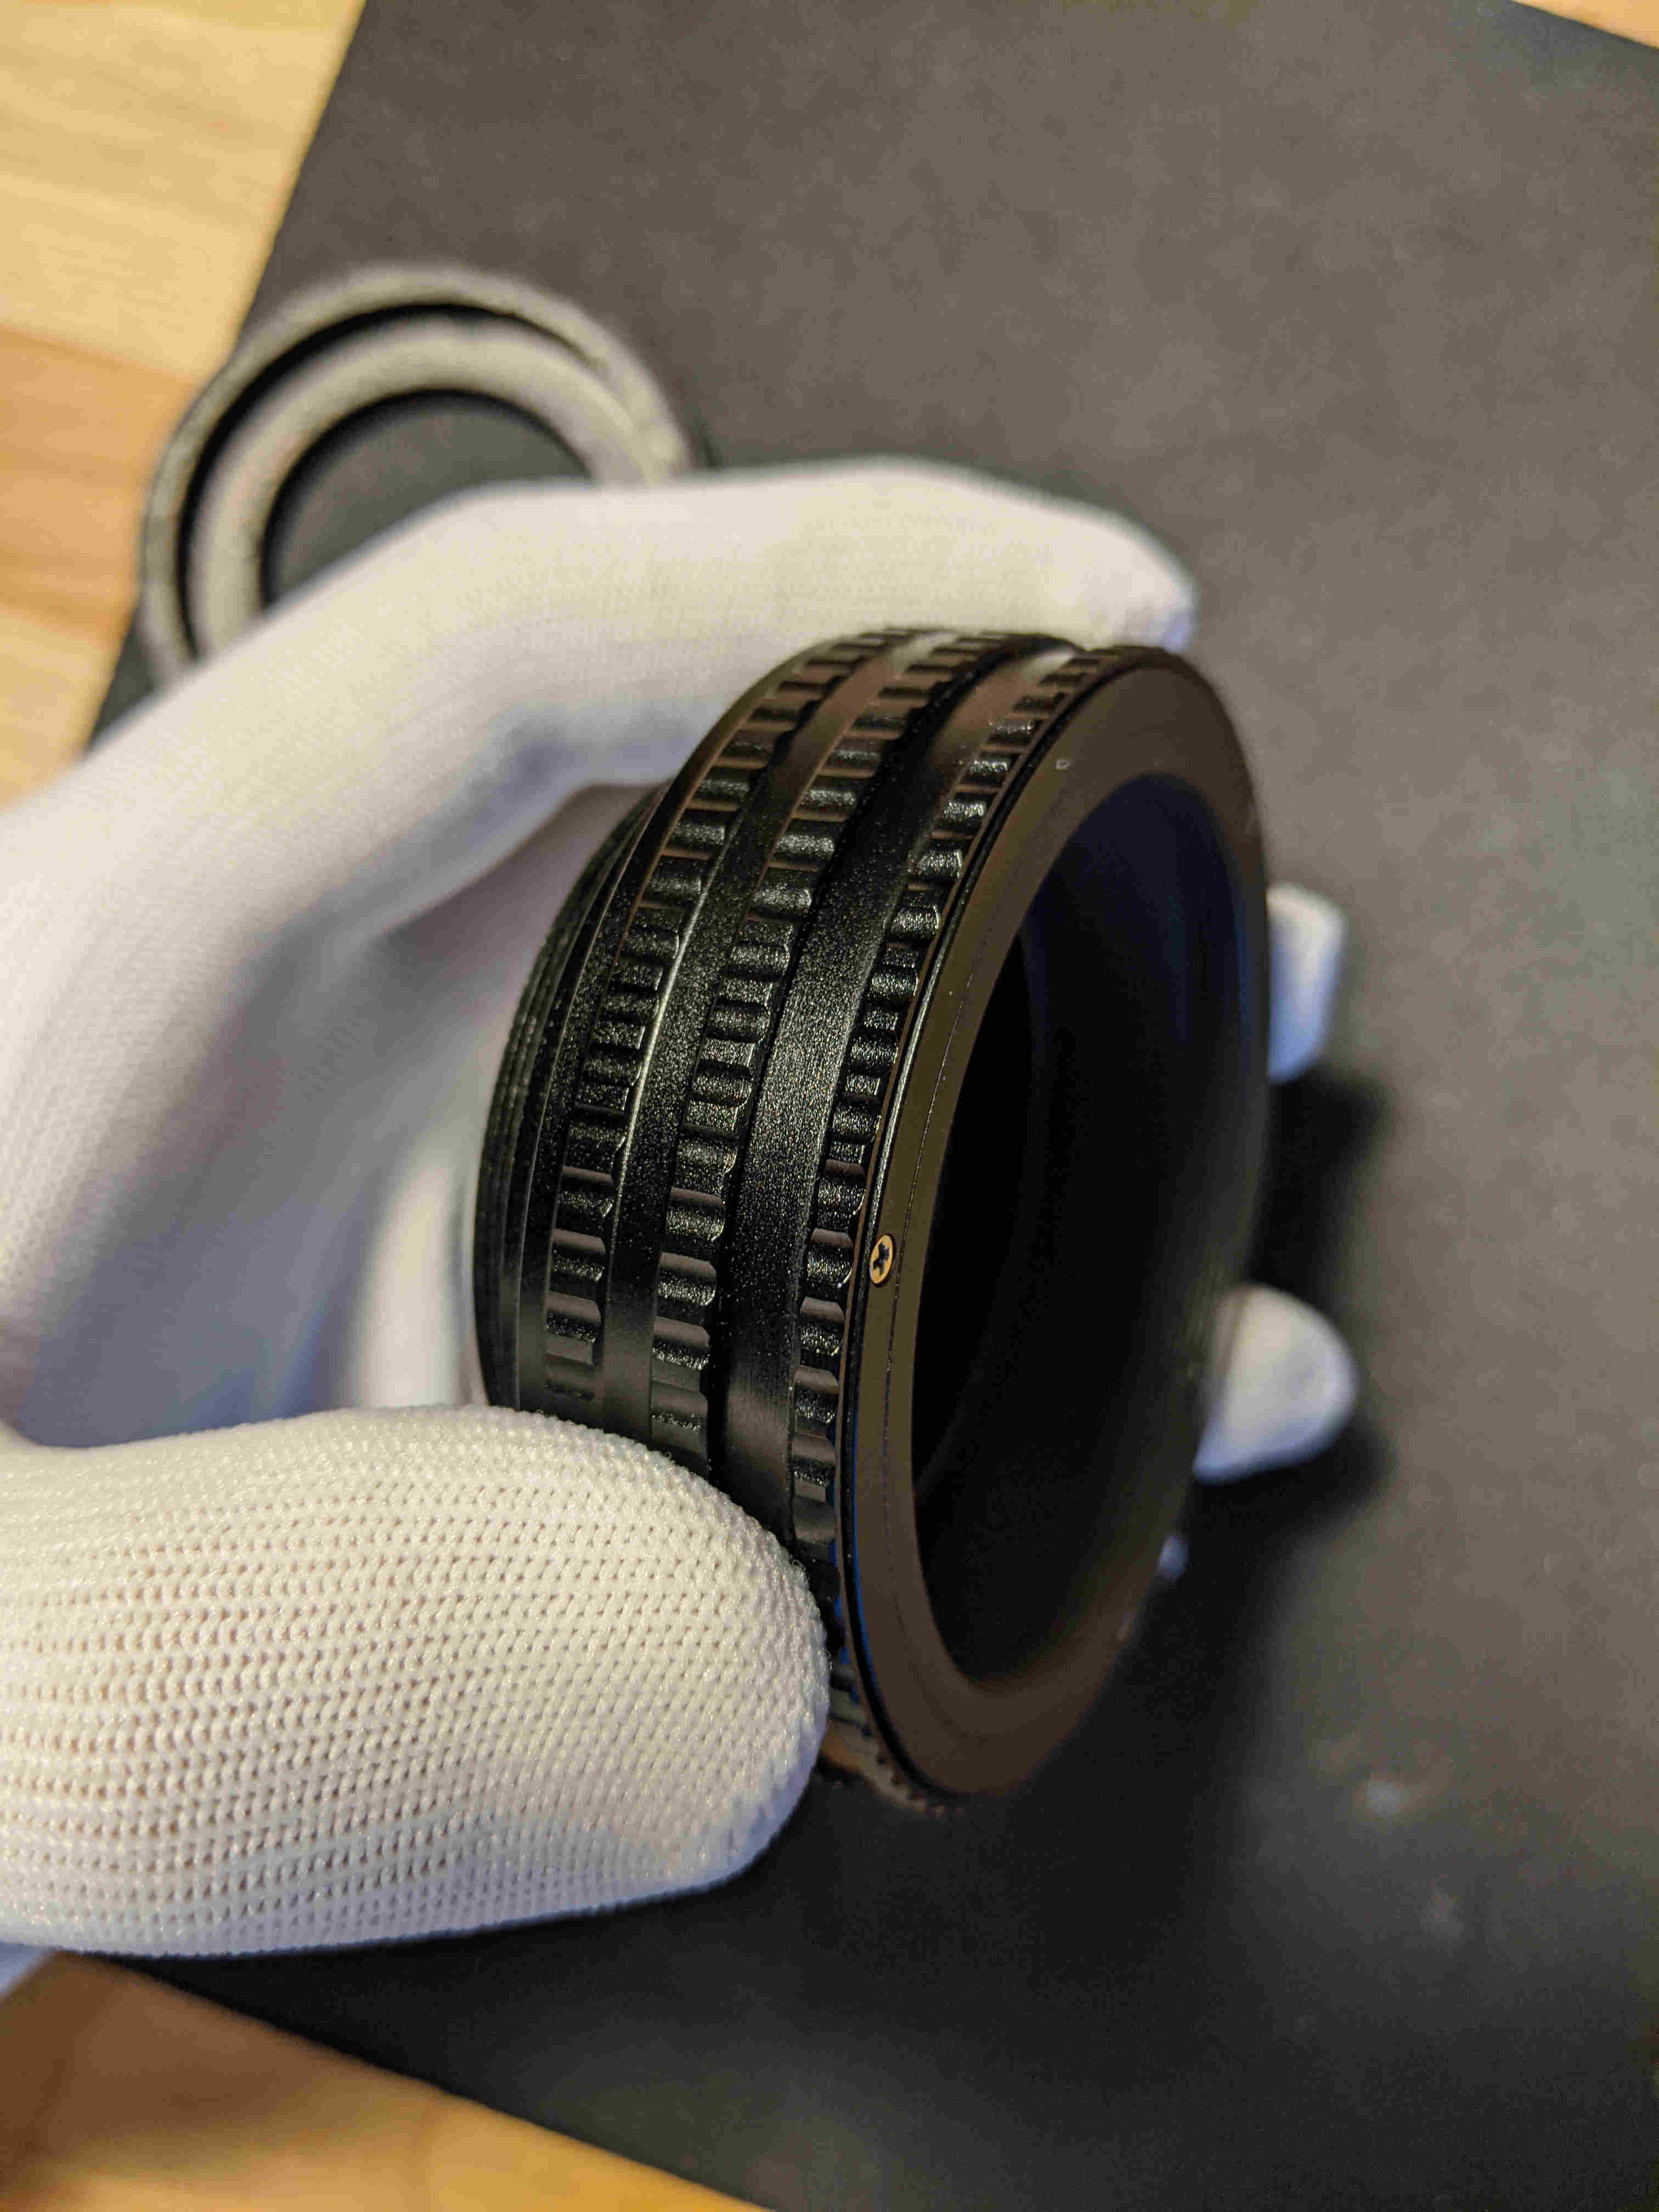
Next, we will place the diopter into the new helicoid (pictured left). The helicoid that works best with the BH16-2 is an M58 to M58 Focusing Helicoid Ring 17-31mm. This specific size perfectly fits over the anamorphoser.
Most of these new helicoids are too stiff from the factory. The best practice is to re-grease the helicoid before installing the diopter.
Next, the diopter will be inserted into the helicoid. A
rubber gasket will hold the diopter in place within the helicoid.
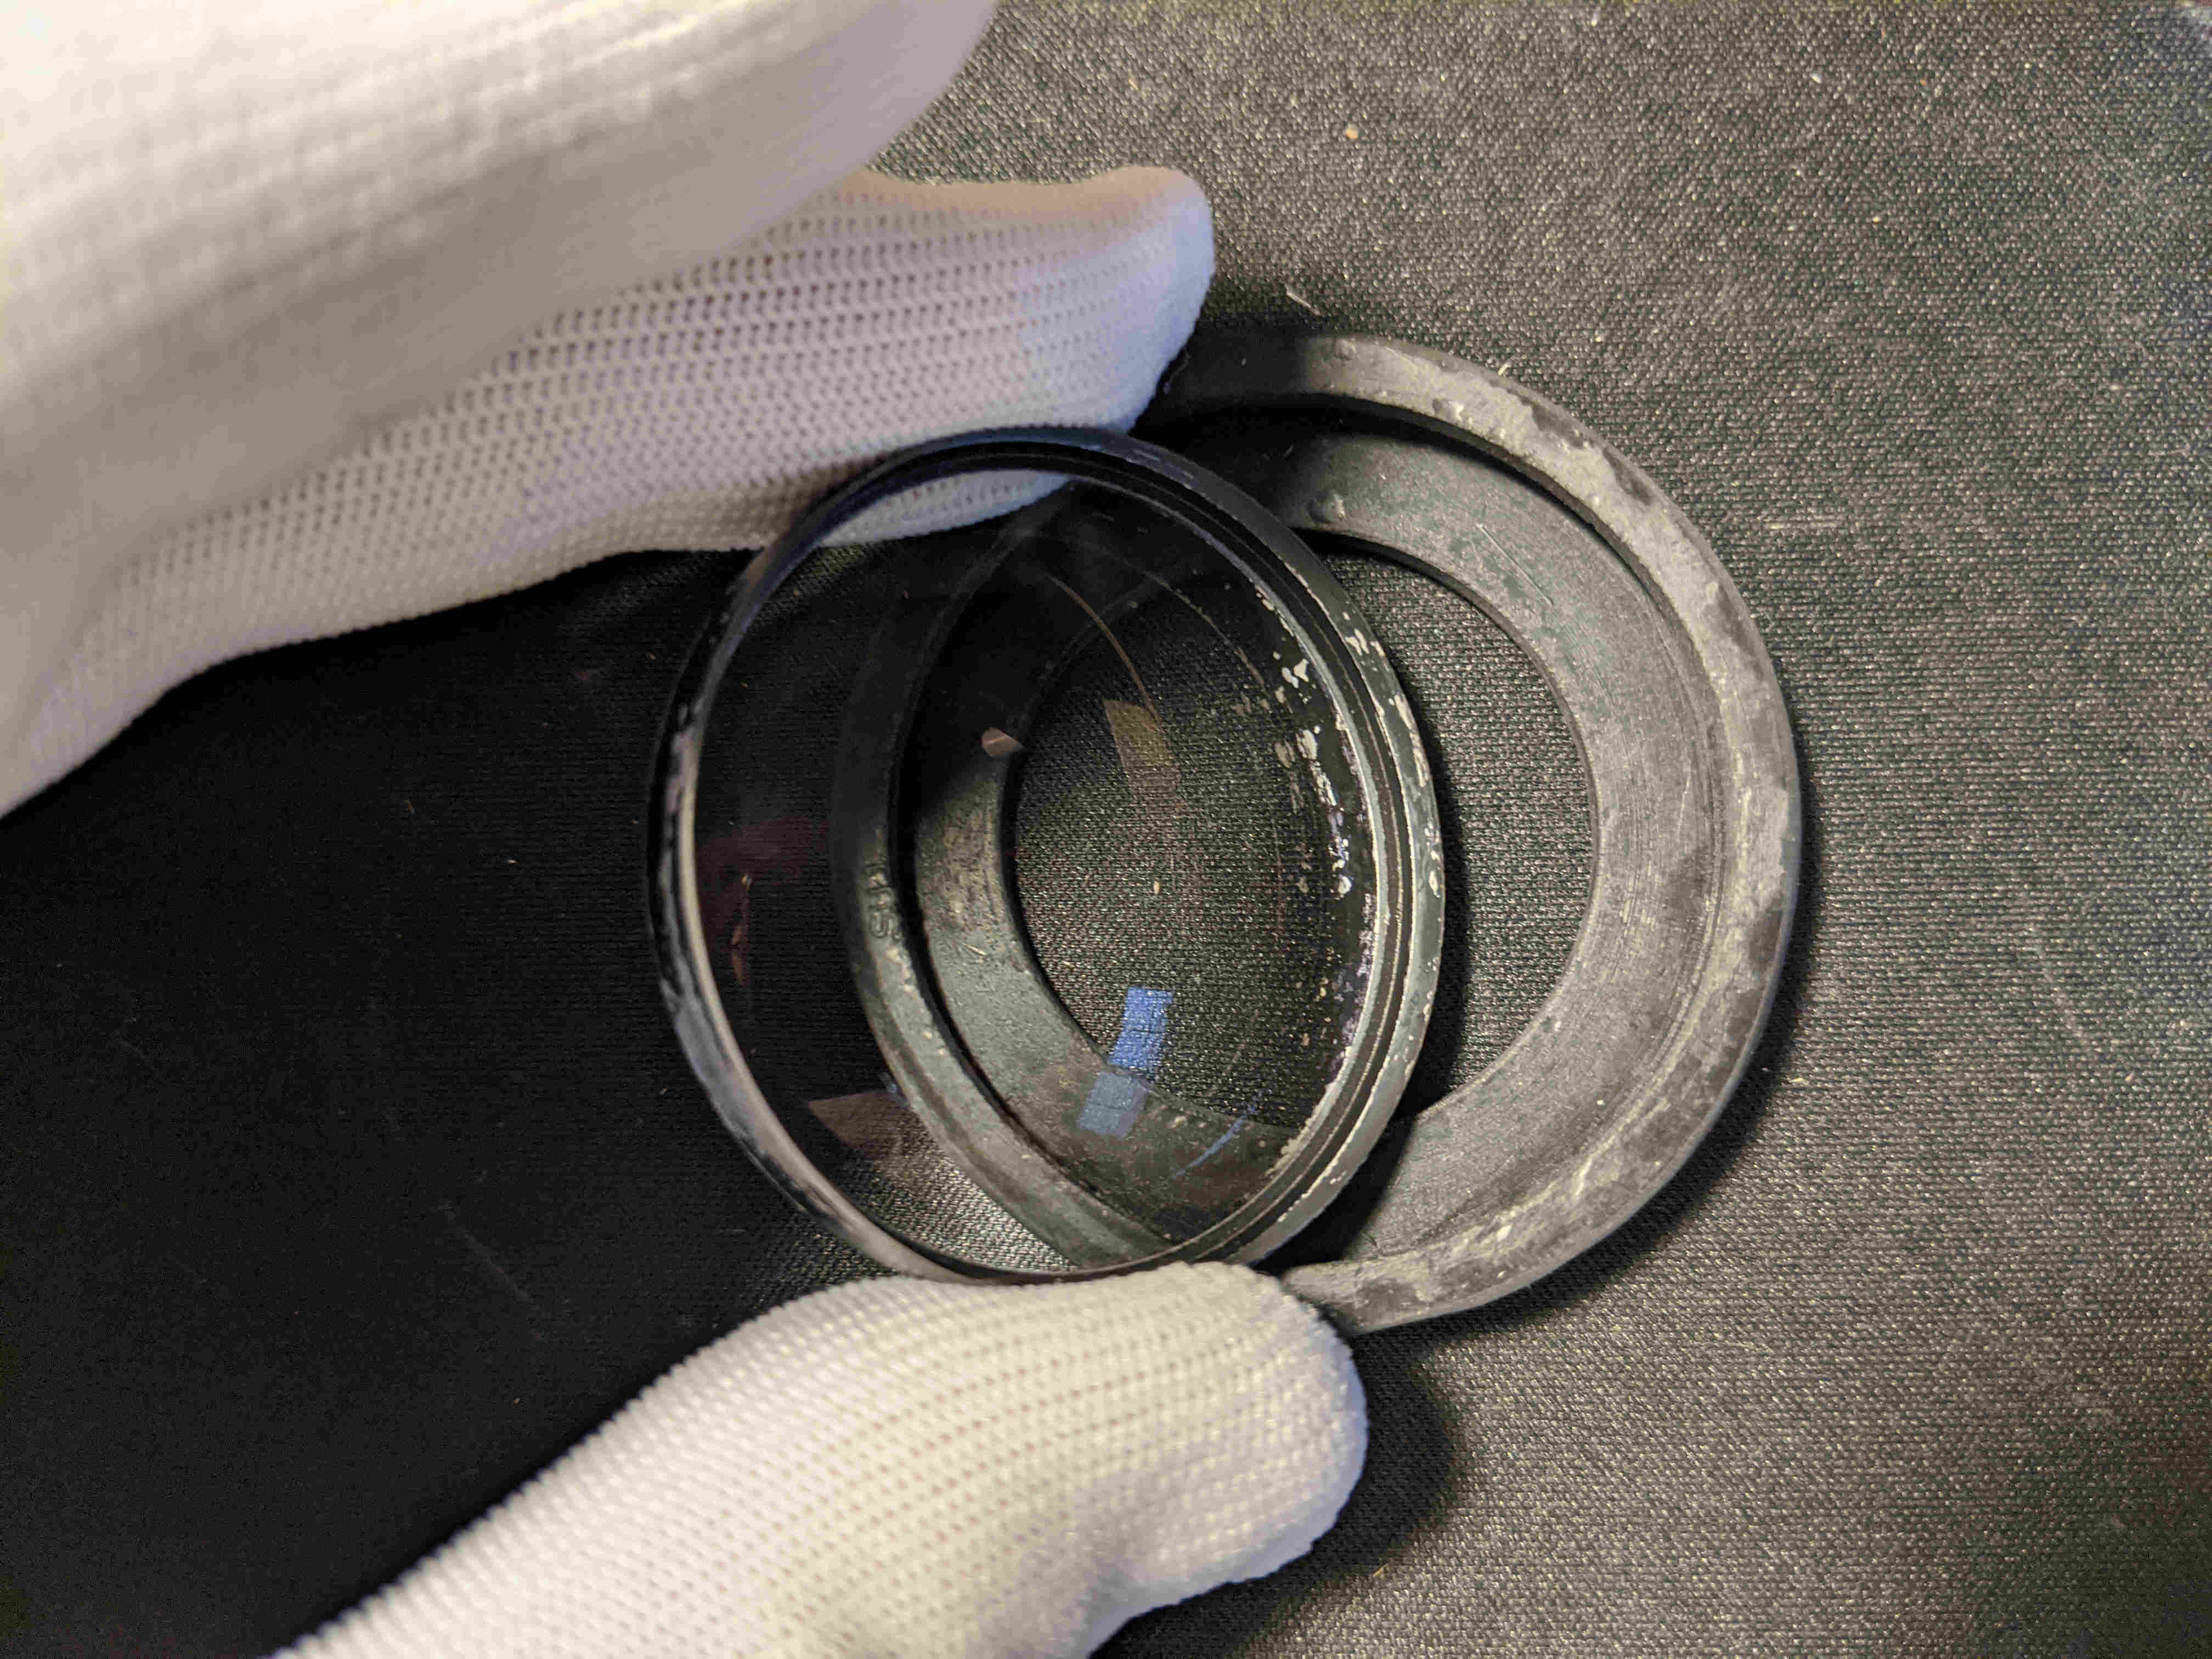
This particular rubber gasket has an interior diameter that is too small, so a
knife or Dremel tool was used to widen the diameter. The diameter should be
just smaller than the diopter itself because the rubber will stretch around it and hold the diopter snugly in place. Before installing the diopter in the gasket, install the gasket into the helicoid by pushing it in:
Once the gasket is pushed into place, push the diopter into place:
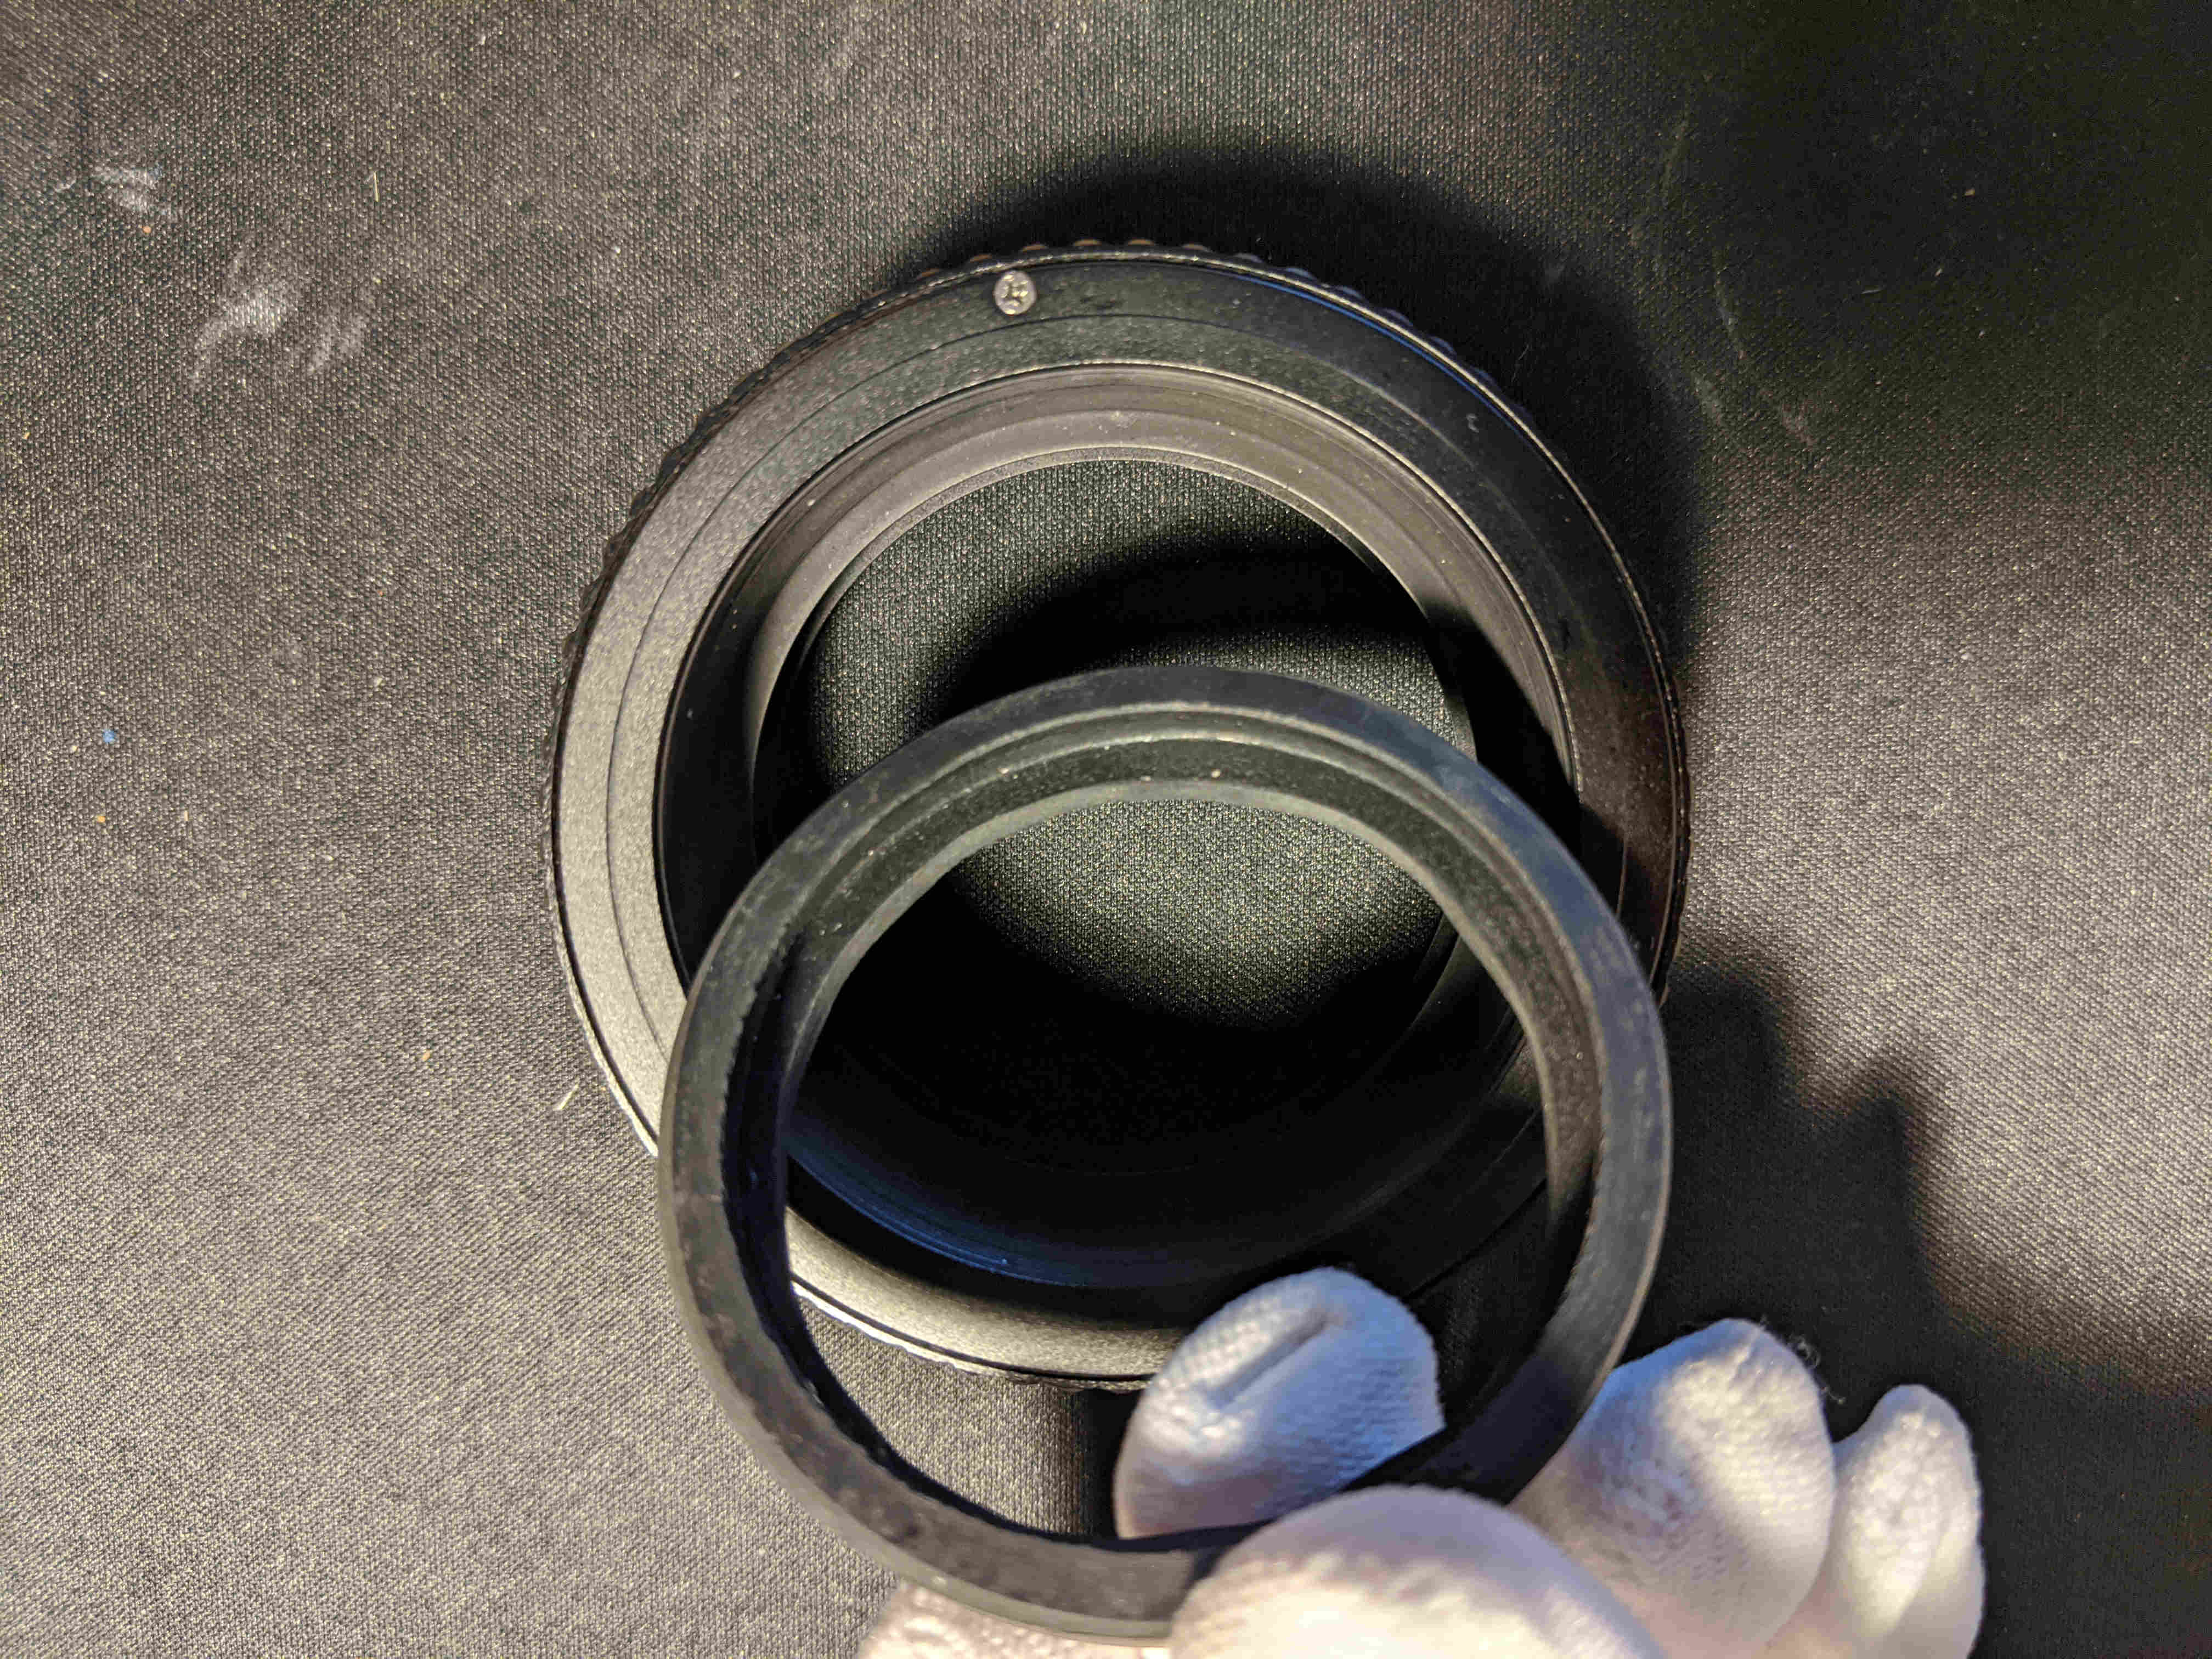
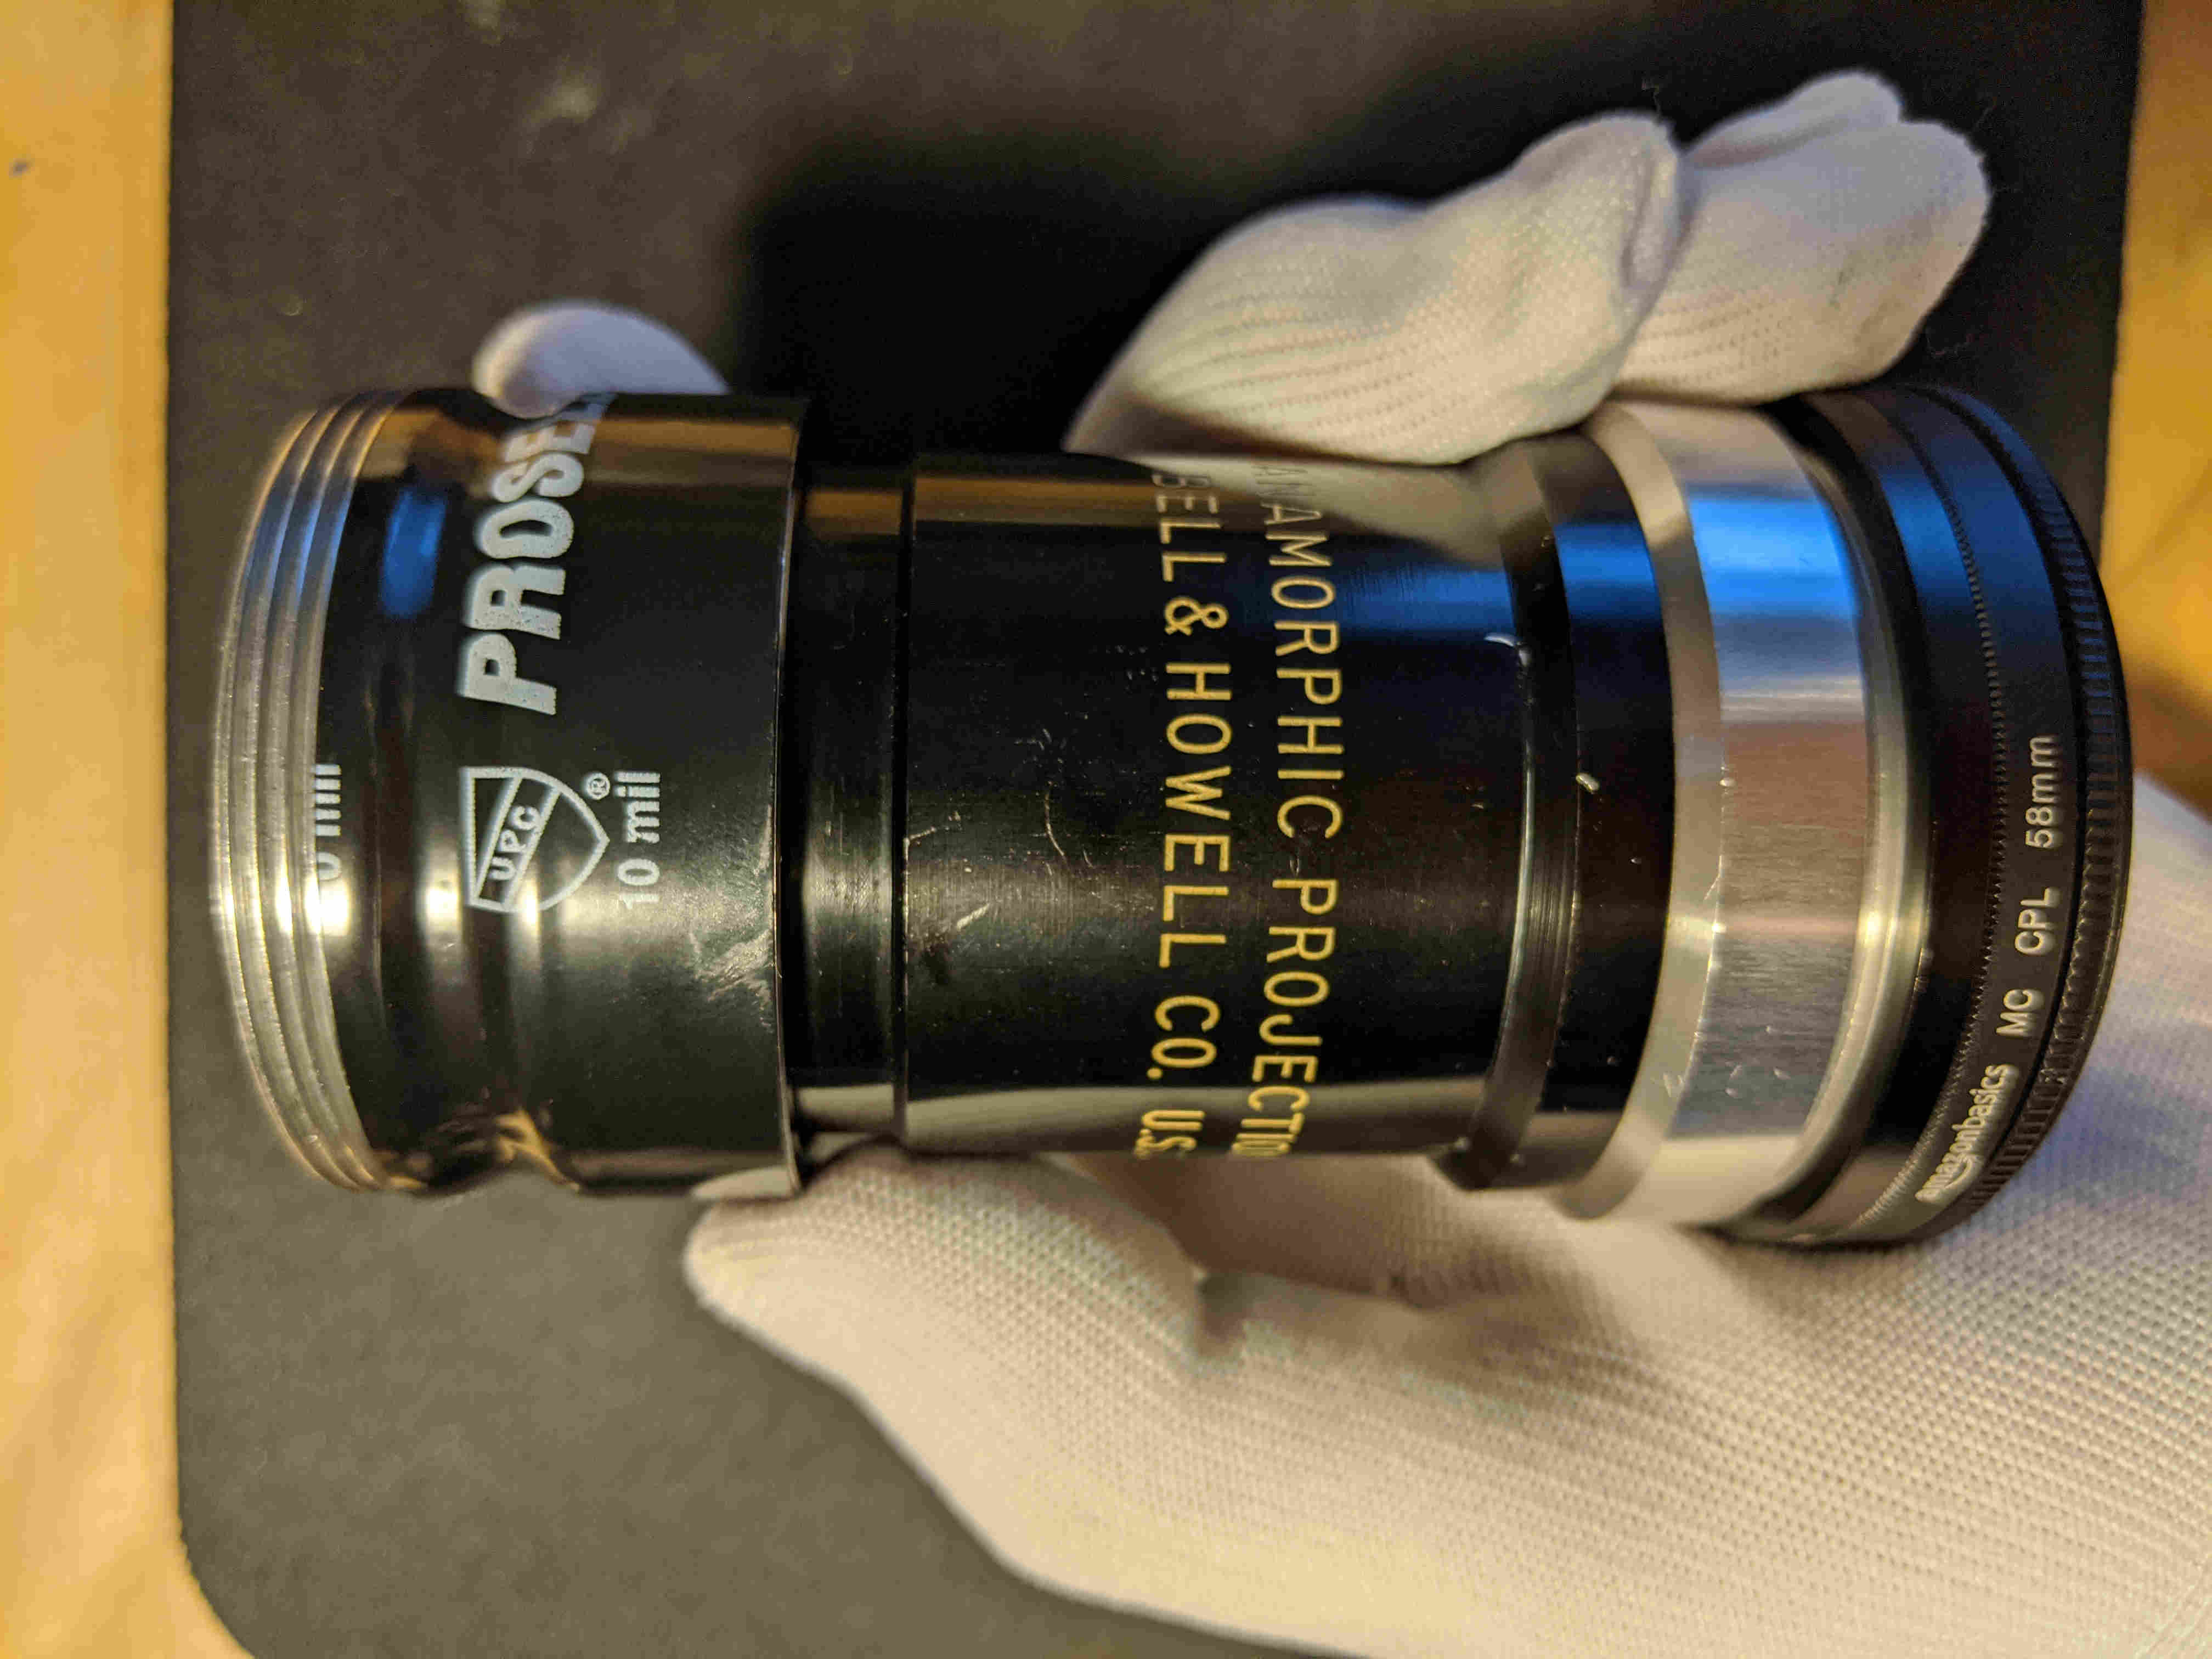
Above are the front and back of the new VDH with the diopter held by the rubber gasket. Next is installing the new VDH securely to the anamorphoser. The sturdiest solution is to use a lens clamp like ones from
RAF Camera or Vid Atlantic.
The particular clamp used in this guide has a front 82mm thread and a rear 77mm thread. Once the lens is complete, it will be too heavy for the camera mount and adapter ring. The clamp will also become the lens support point.
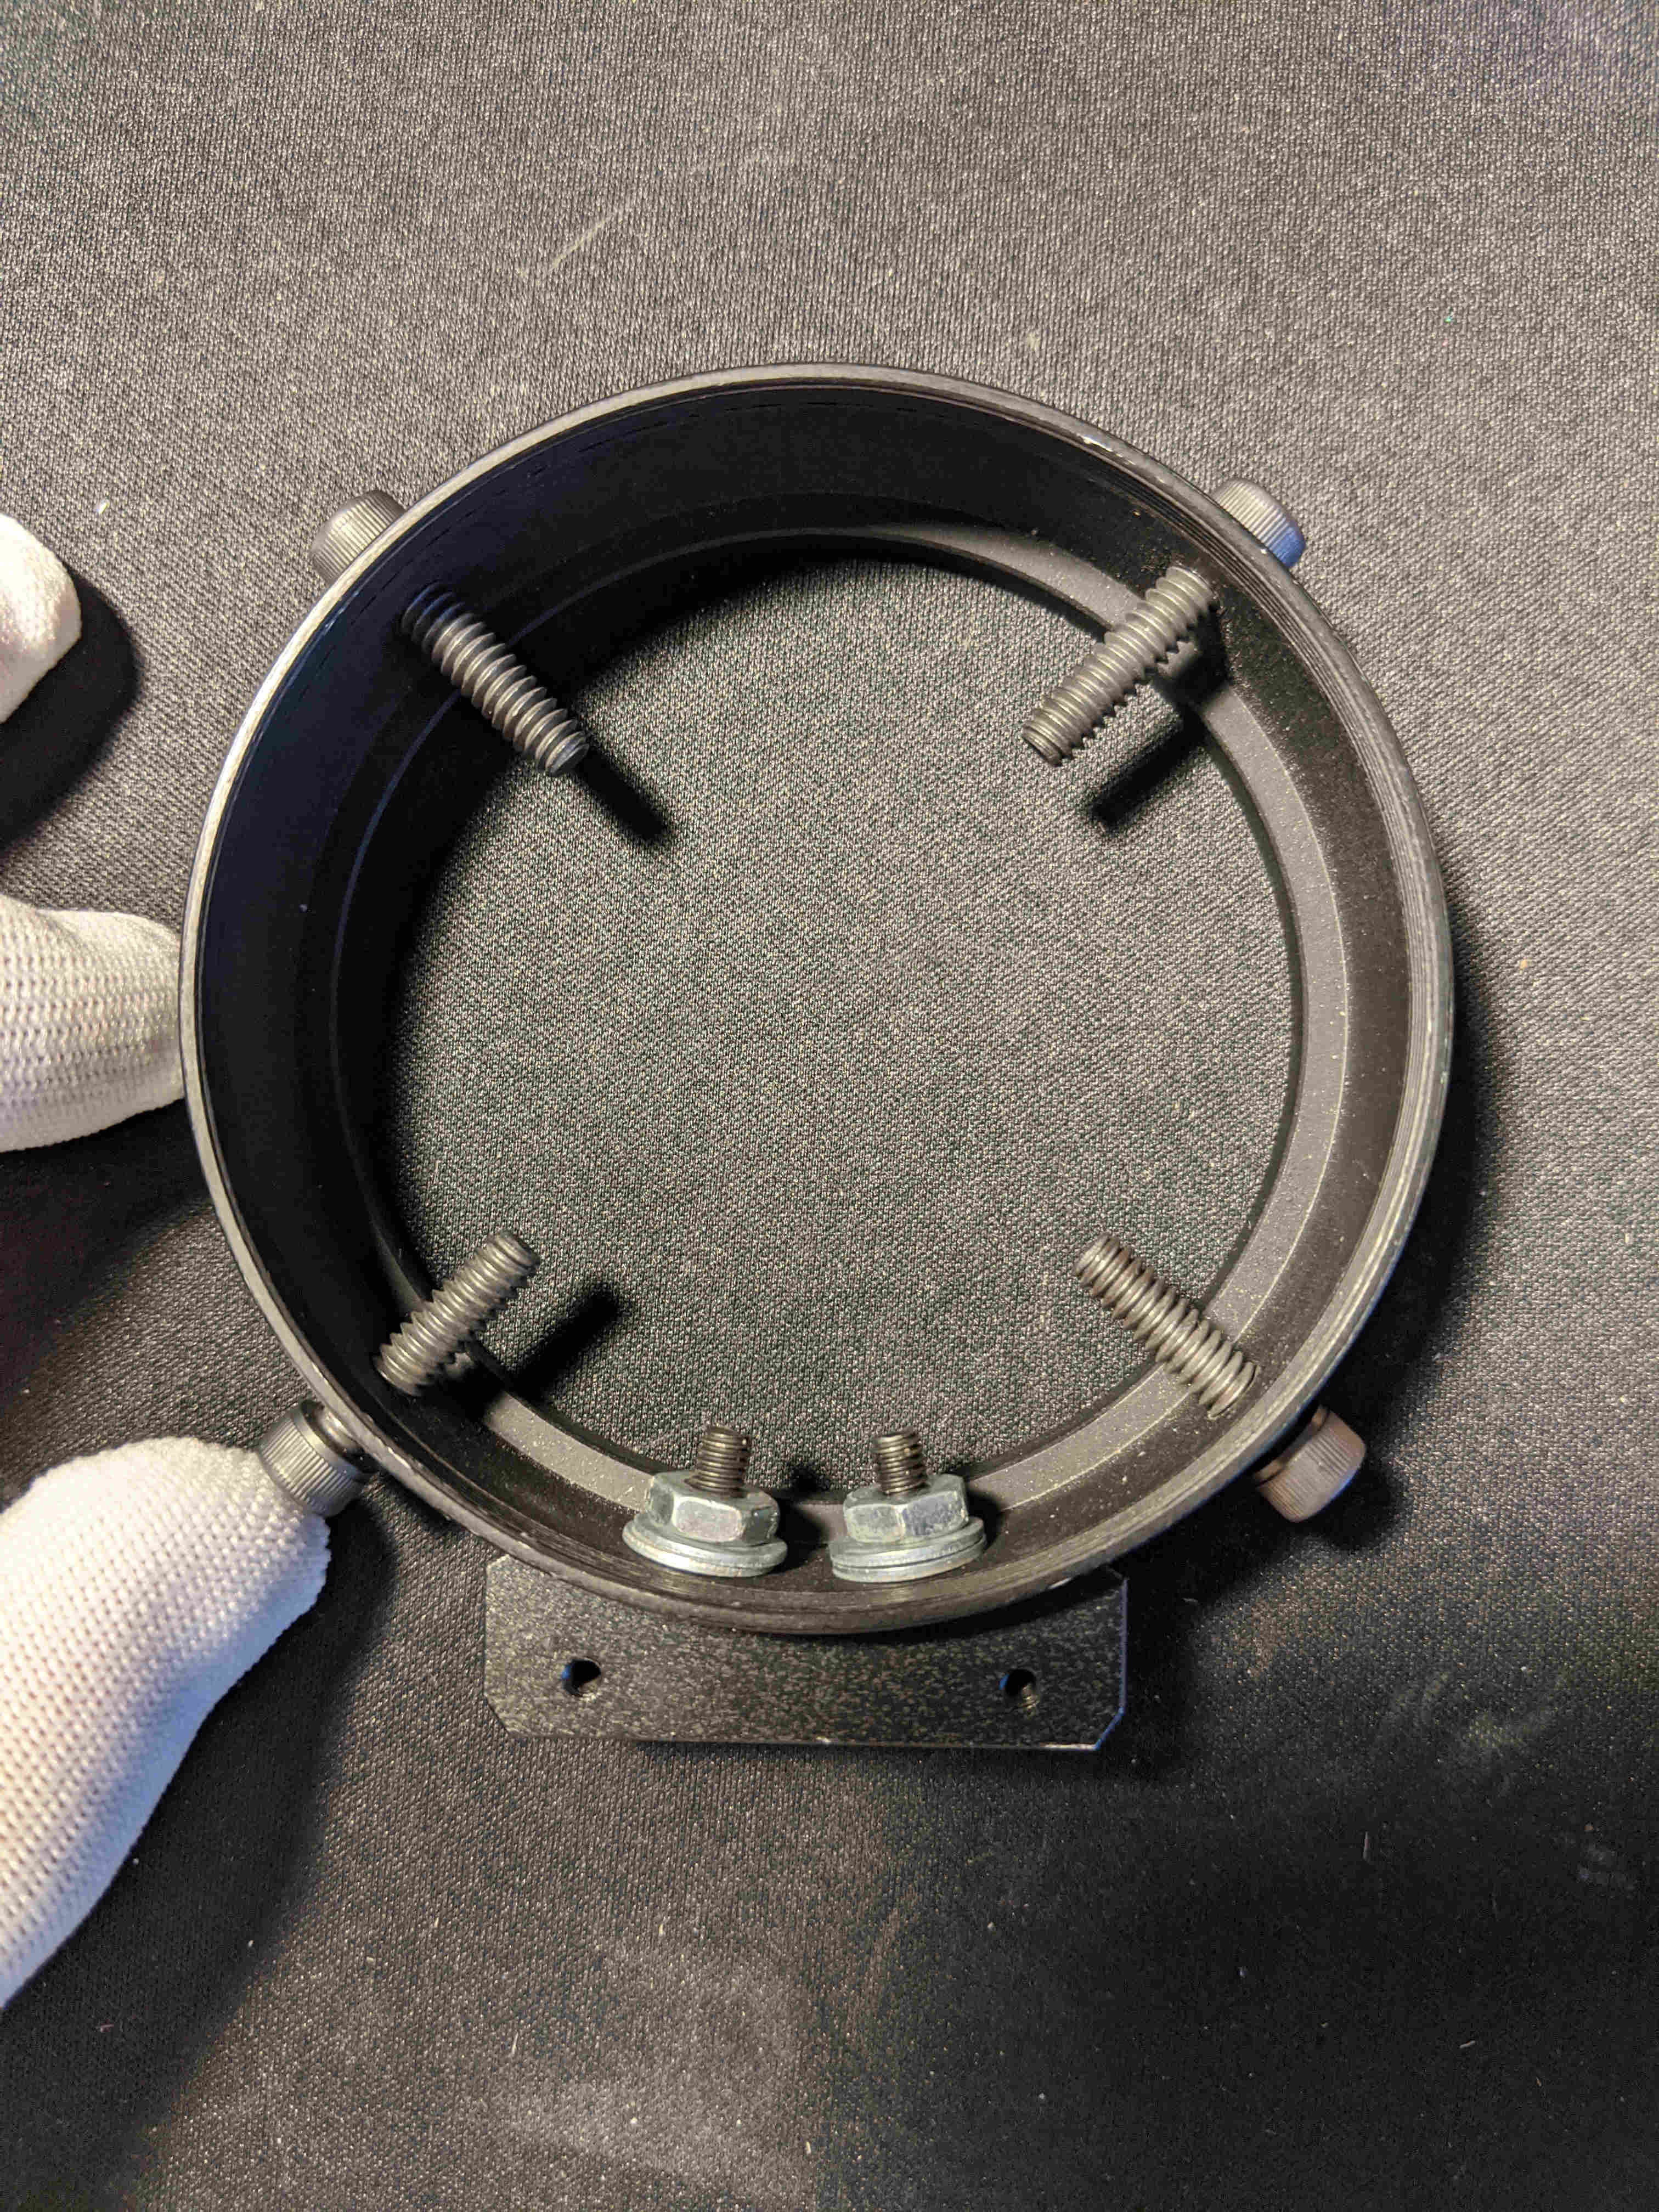
The
female 1/4 20 support point from a
Rapido FMJ was used for this clamp mod. Additionally, step up rings were attached to the front 82mm thread. Once the step up rings are attached, the new VDH is screwed into place on the lamps clamp. Finally, the new VDH will be clamped to the anamorphoser.
Before attaching the new VDH, use
PVC Tape to cover the anamorphoser. The tape only needs to cover where the bolts of the clamp will touch. Doing this protects the anamorphoser and gives extra grip for the bolts of the clamp. Once taped, attach the VDH!
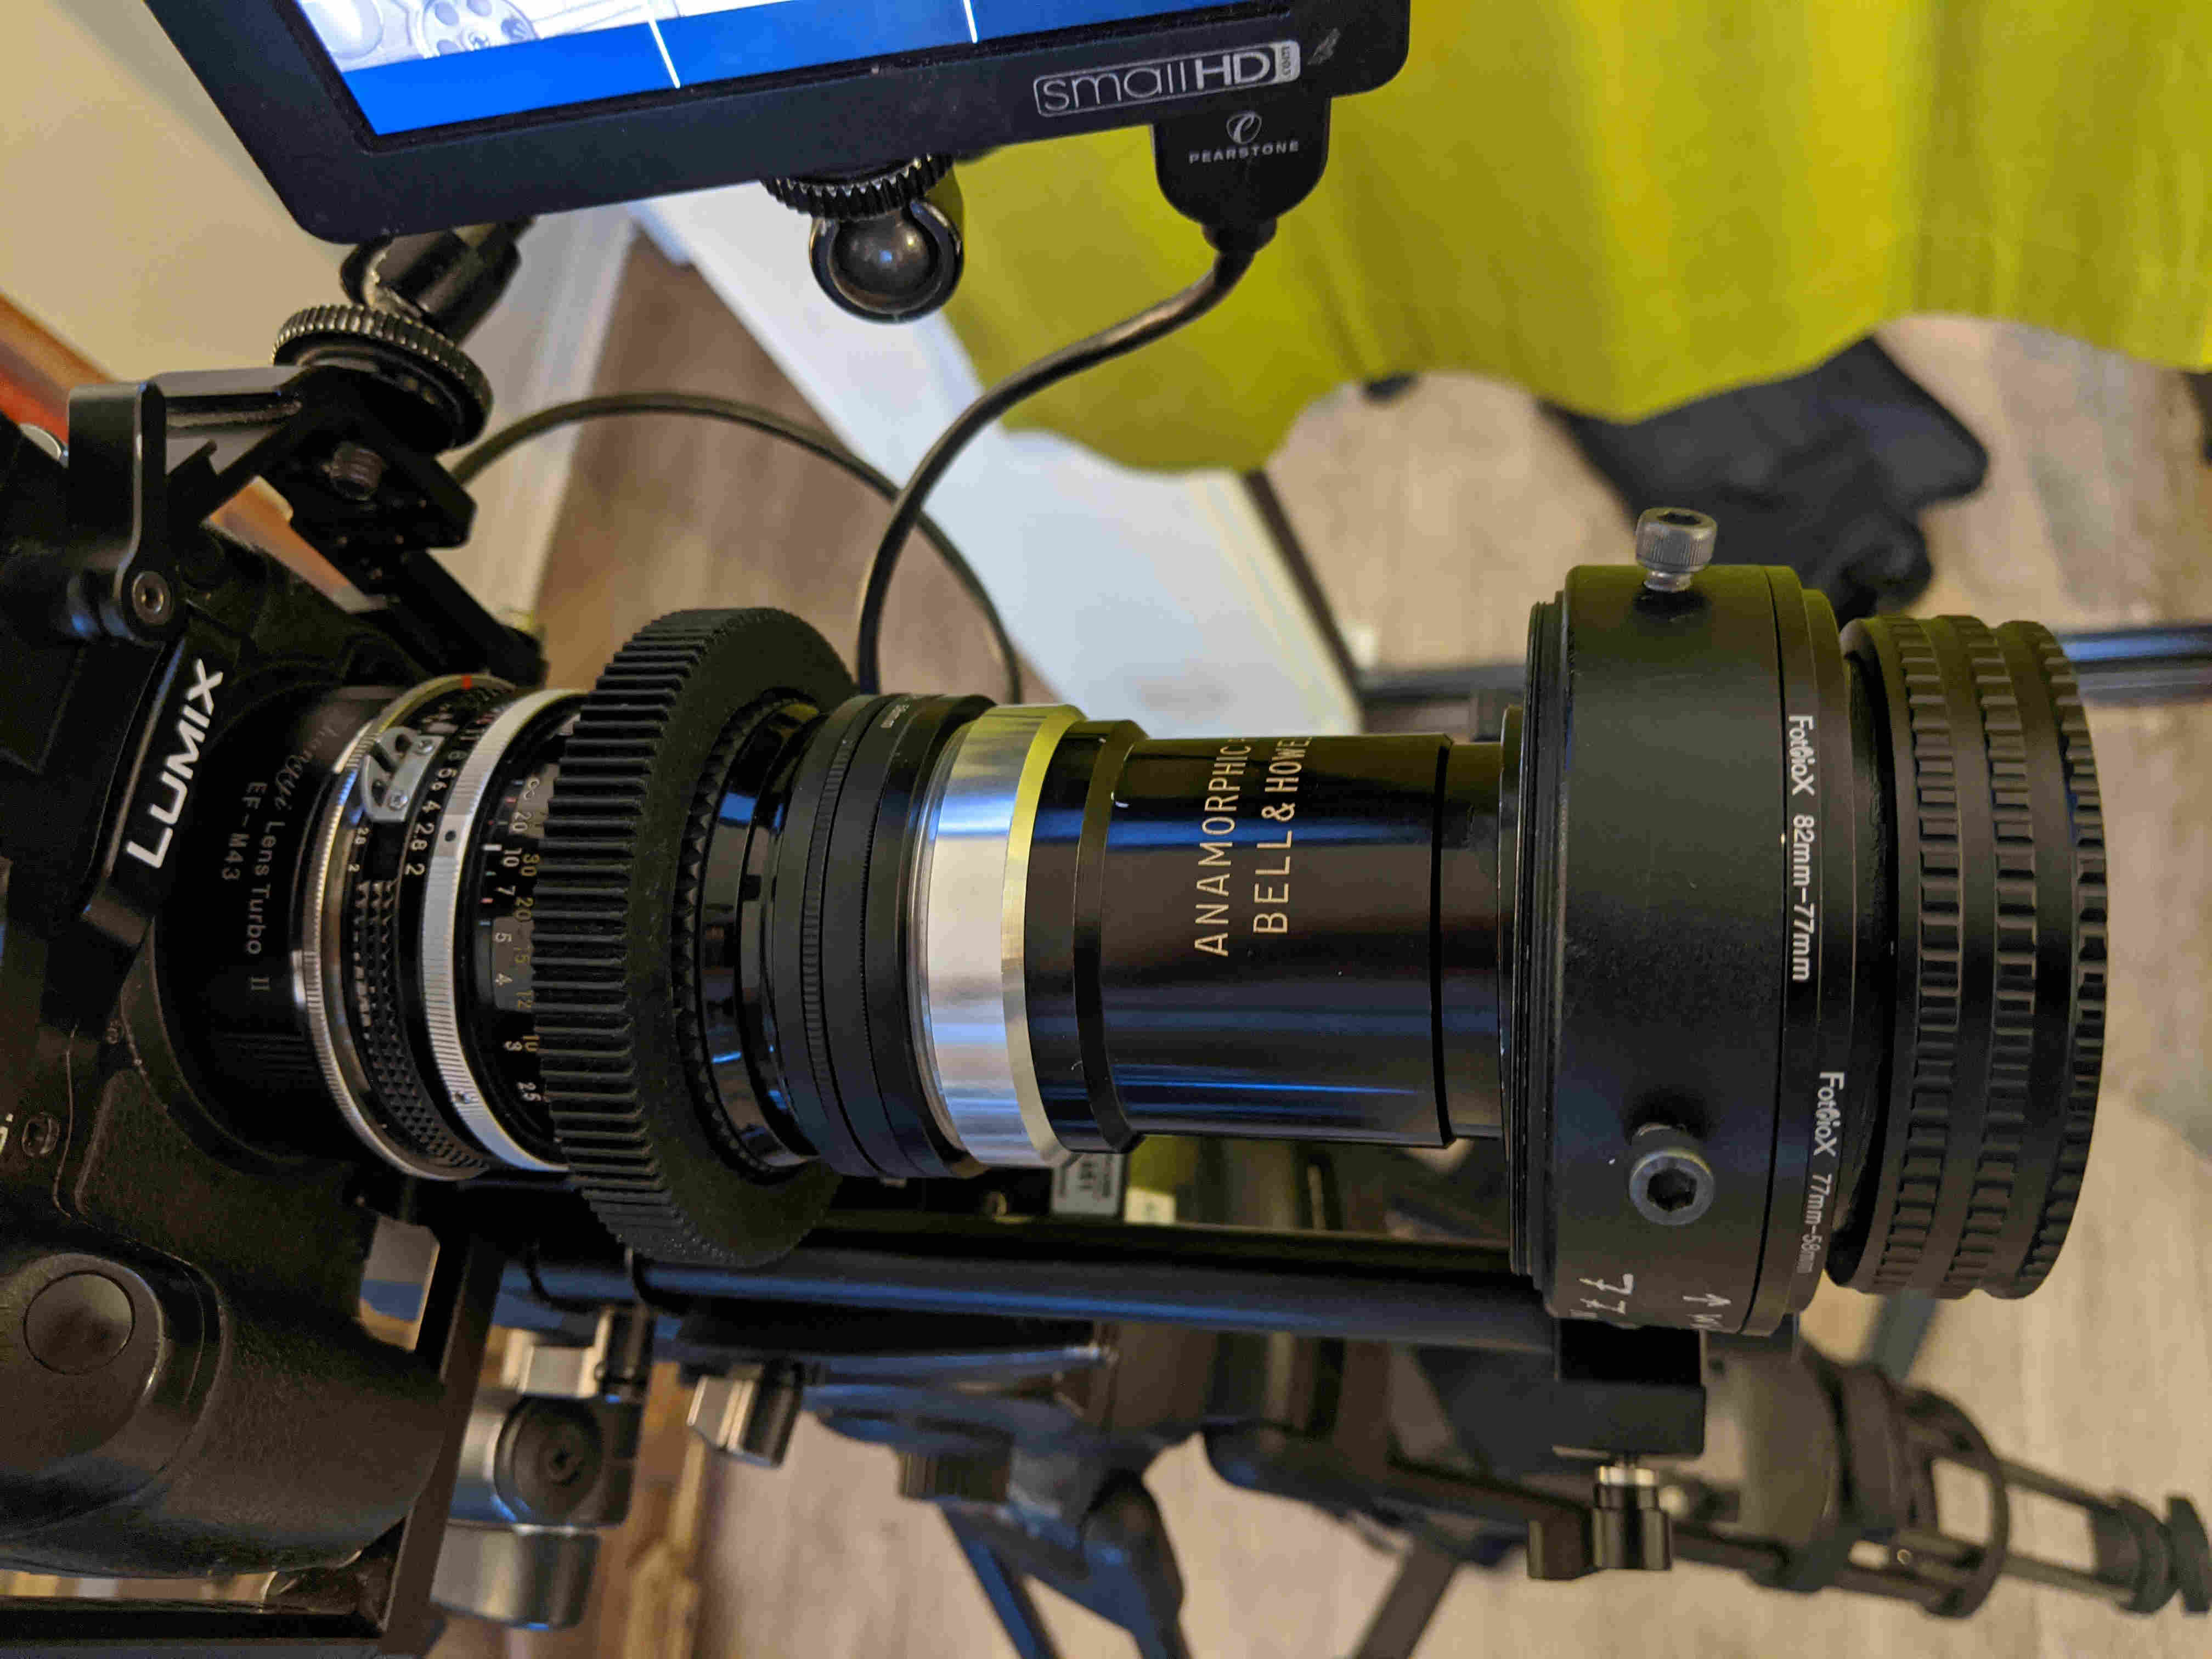
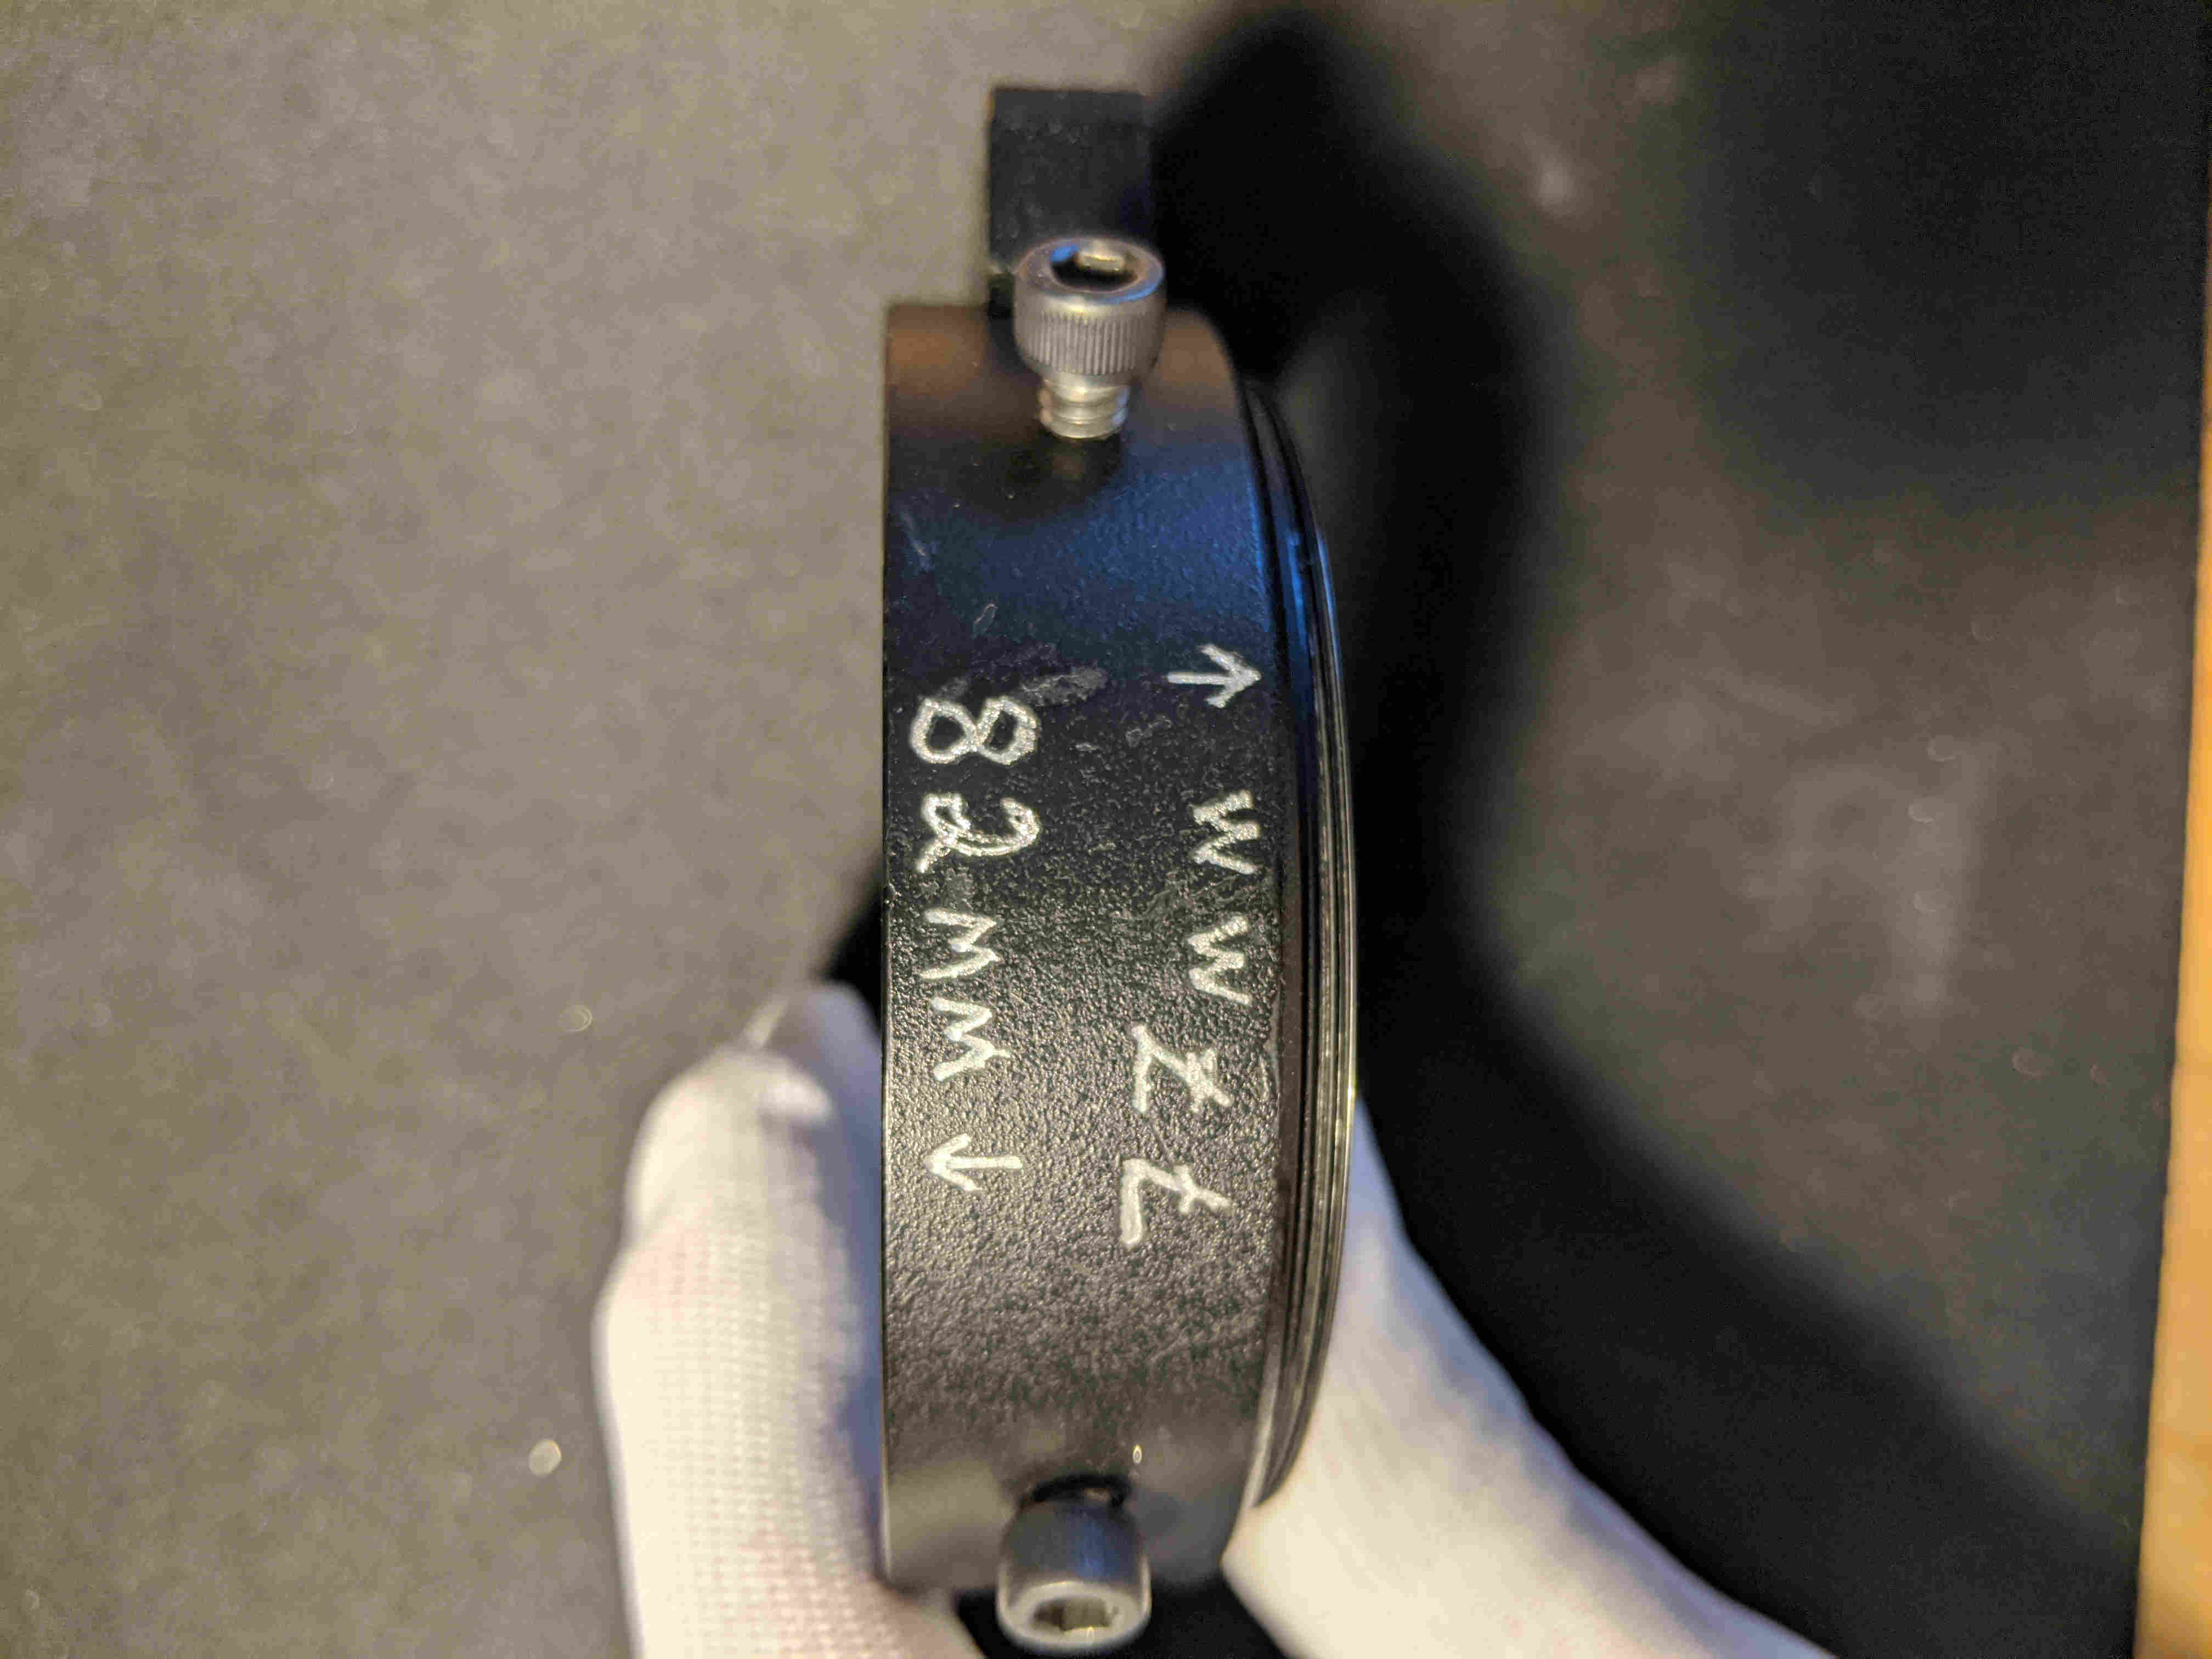
Screw the anamorphoser + new VDH to the spherical lens. The newly modified lens is nearly complete, but the anamorphoser needs to be aligned. Attach the lens to a camera, then attach the rod support, and finally align the anamorphoser by loosening the VDH clamp and rotating the anamorphoser until alignment is correct. Once it is, lock everything down.
It’s important to use rod support with the mod because the various step-up rings and the spherical lens are too weak to hold the weight of the anamorphoser and variable diopter. It also locks the alignment of the anamorphoser and spherical lens. The added stability of the lens support is a requirement for the BH16-2 to be practically used on set.
The final step is to set the spherical lens to infinity and the lens is ready to shoot!